Tools
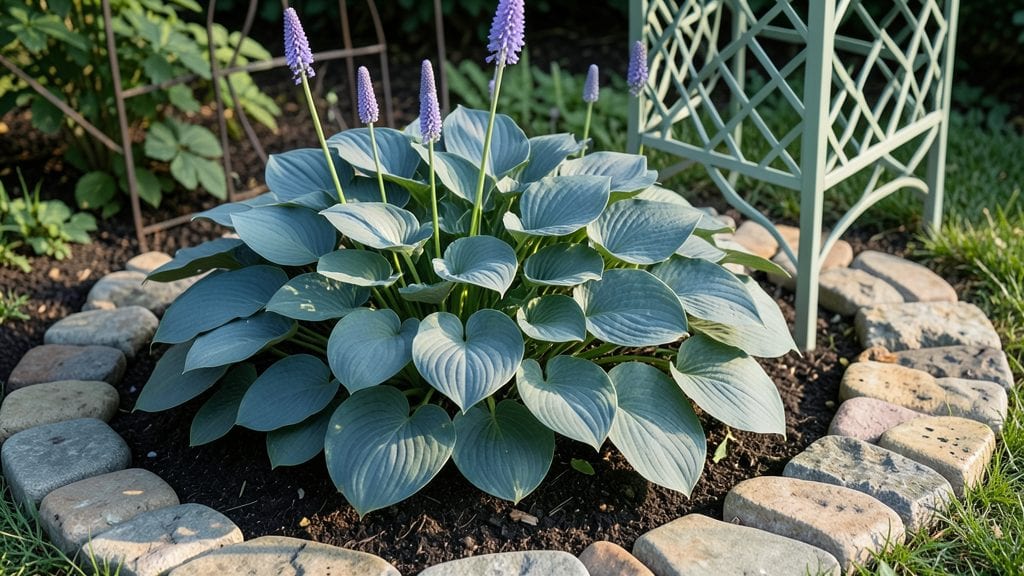
A circular garden layout transforms tight spaces into stunning, functional gardens—no matter how small your yard. I designed my first one after realizing my rectangular beds wasted precious square footage, and the difference was immediate: more plants, better flow, and a design that actually works with my morning coffee routine.
The secret lies in the geometry—curves create visual rhythm, while the center becomes a natural focal point that draws the eye year-round.
You’ll need just a few key elements: a 5-foot diameter base circle (or larger for bigger spaces), concentric rings for plant layers, and a central feature—whether it’s a small tree, bench, or even a decorative pot.
The outer ring handles tall plants like sunflowers or ornamental grasses, while the inner rings layer perennials, annuals, and ground covers for continuous color. Think of it like a living mandala where every plant has its perfect spot without crowding.
By mid-summer, your garden will feel like a lush, ever-changing painting—vibrant blooms in June, golden foliage in September, and winter interest from evergreens or berries.
The circular shape also makes maintenance easier: tools reach every plant without stepping on beds, and pathways flow naturally around the design. Plus, it’s the one layout that actually grows with you—add new plants to the outer edges as your collection expands.
Works for urban balconies (use large containers), backyard corners, or even formal gardens—just adjust the scale. The real magic? Every visit feels like discovering a new perspective. Here’s how to sketch your first design without overcomplicating it.
📚 In This Guide
- What you need
- Instructions
- Tips and common mistakes
- Wrapping up and next steps
What you need
- ● Garden bed liner or landscape fabric: 10–20 sq. ft. (depending on garden size) to suppress weeds and retain moisture.
- ● Mulch: 2–3 bags (shredded bark, straw, or pine needles) for moisture retention and weed control.
- ● Soil: 1–2 cubic yards of high-quality garden soil or compost mix (adjust based on garden depth).
- ● Plants: Perennials (e.g., lavender, coneflowers, or hostas) for structure.
- ● Annuals (e.g., marigolds, petunias, or impatiens) for color bursts.
- ● Shrubs or small trees (e.g., boxwood, dwarf lilac) for height variation.
- ● Garden edging: Flexible plastic, metal, or stone (10–20 ft. length) to define the circular shape.
- ● Basic tools: Garden trowel or spade
- ● Wheelbarrow or garden cart
- ● Measuring tape
- ● Garden gloves
- ● Pruners or shears
- ● Pathway materials: Gravel, stepping stones, or pavers to create a circular walkway around the garden.
- ● Decorative accents: Garden stakes, trellises, or solar-powered lights for ambiance.
- ● Drip irrigation system: For low-maintenance watering (especially for larger layouts).
- ● Seating or planters: A small bench, hanging baskets, or window boxes to enhance the space.
Instructions for designing a circular garden layout
This space-saving approach creates harmony between form and function, ensuring every plant thrives while maximizing visual appeal.
Determine the Centerpiece and Radius
Start by selecting a focal point—whether it's a decorative pot, a small water feature, or a mature shrub. Measure your centerpiece's diameter to establish the minimum 4-foot radius for your circle. A wider radius allows more plant diversity, while a tighter circle works better for small spaces or container gardens. I always sketch the circle first to visualize the layout before digging.
Use a 10-foot tape measure and a stake to mark the circle's perimeter. Drive the stake into the ground at the center, then extend the tape to your desired radius. Pound small flags or spray-paint dots at 1-foot intervals along the arc to guide planting placement. This ensures even spacing and prevents overcrowding as plants mature.
Divide the Circle Into Planting Zones
Break the circle into four equal quadrants using two perpendicular diameters drawn from the center. Each quadrant will host a different plant type—tall backdrops, mid-height fillers, low ground covers, and seasonal accents. For example, place sun-loving perennials in the south-facing quadrant and shade-tolerant plants in the north. This zoning prevents competition for light and water.
Label each quadrant with a small wooden stake to track plant selections. I recommend using a notebook to sketch your design, noting mature plant sizes and sunlight needs. For instance, a 6-foot tall ornamental grass belongs in the outer ring, while a 1-foot tall creeping thyme suits the inner edge. This layered approach creates depth and year-round interest.
Install Drainage and Soil Amendments
Remove the top 6 inches of soil from the circle and replace it with a 2-inch layer of compost mixed into the native soil. For clay-heavy areas, add a 1-inch layer of coarse sand to improve drainage. Work the amendments into the soil using a garden fork, breaking up compacted layers. Circular layouts benefit from raised beds if your soil drains poorly, as they prevent water pooling at the center.
Test soil moisture weekly by pressing a finger 2 inches deep—if it feels dry, water deeply at the base. Over time, the amended soil retains moisture better, reducing maintenance. I also install a soaker hose along the circle’s perimeter for efficient irrigation. This step ensures your plants thrive without the hassle of uneven water distribution.
Plant in Concentric Rings
Begin planting from the outer edge and work inward, placing the tallest plants first. Space them 18-24 inches apart, depending on their mature width. For example, a rosemary bush (which reaches 3 feet wide) needs 2 feet of clearance on all sides. Mid-height plants like lavender go in the next ring, spaced 12-16 inches apart, while low-growing sedum or ajuga fill the innermost circle.
Use mulch to suppress weeds and retain moisture. Apply a 2-inch layer of shredded bark or straw, keeping it 3 inches away from plant stems to prevent rot. Water immediately after planting to settle the soil around roots. Circular layouts excel with drip irrigation installed along the outer ring—this delivers water evenly without disturbing the center.
Add Seasonal and Structural Accents
Incorporate ornamental elements like stepping stones, benches, or trellises to enhance the circle’s function. For instance, a small arched trellis in one quadrant guides climbing roses upward, while a stone path along the perimeter invites visitors to explore. These additions break the circle’s symmetry naturally, adding visual intrigue. I often place a solar-powered garden light at the center to highlight the layout after dark.
Finally, select seasonal plants to ensure year-round color. For spring, add bulbs like daffodils in the inner ring; for summer, incorporate annuals like zinnias in the outer edge; and for fall, plant mums or ornamental kale in the mid-ring. This rotating palette keeps the garden dynamic without requiring major replanting. Adjust spacing as plants grow, thinning crowded areas to maintain airflow and prevent disease.
Tips & tricks for perfect circular garden layouts
A well-executed circular garden design transforms any space into a cohesive, functional oasis. These practical insights will help you avoid common pitfalls and elevate your garden's visual appeal.
Sketch First, Dig Later: Before marking your circle in the ground, create a scaled sketch of your design. This allows you to experiment with plant placements and visualize the mature sizes of your selections. I always use graph paper where each square represents 1 foot—this helps maintain proper spacing between plants as they grow. The 4-foot minimum radius mentioned in Step 1 becomes much clearer when you can see it on paper before committing to physical markers.
Layering Creates Depth: The concentric ring approach in Step 4 is where circular gardens truly shine. For maximum visual impact, consider adding a fifth "ring"—the vertical dimension. Install a small obelisk or trellis in the center to support climbing plants like clematis or sweet peas. This adds height without taking up ground space, creating a three-dimensional effect that draws the eye upward and outward from the centerpiece.
Soil Matters Most: Don't overlook the soil preparation in Step 3. If your native soil is particularly heavy or sandy, consider adding a third amendment layer: a ½-inch layer of perlite or vermiculite mixed into the top 6 inches. This improves aeration and moisture retention, especially important in circular layouts where water can pool at the center. For clay soils, I've found that adding a thin layer of coconut coir along with the compost helps break up compaction over time.
Seasonal Plant Rotation: The seasonal accents in Step 5 are your secret weapon for year-round interest. Create a simple chart mapping each quadrant's seasonal plants—this prevents overwhelm when shopping for new additions. For example, in the spring quadrant, you might rotate daffodils with tulips, then summer zinnias with cosmos. I keep a small notebook with each plant's bloom time and mature height to ensure smooth transitions between seasons without gaps in color.
Pro Tips for Circular Garden Layout
- A well-executed circular garden design transforms any space into a cohesive, functional oasis.
- Sketch First, Dig Later: Before marking your circle in the ground, create a scaled sketch of your design.
- Layering Creates Depth: The concentric ring approach in Step 4 is where circular gardens truly shine.
Frequently asked questions
Got questions about creating a circular garden layout? You’re not alone! Here are some of the most common queries—and their straightforward answers—to help you plan with confidence.
What’s the best size for a circular garden bed?
A circular garden typically ranges from 3 to 10 feet in diameter, depending on your space and goals. Smaller circles (3–5 ft) are ideal for herbs, salad greens, or container gardens, while larger ones (6–10 ft) work well for vegetables, flowers, or even small shrubs. Pro tip: Measure your space first—leave at least 2 feet of walking path around the bed for easy access!
How long does it take to establish a circular garden?
Establishing a circular garden takes 3–6 months, depending on your climate and plant choices. The first month focuses on soil prep and planting, while the next 2–3 months are for root establishment and early growth. Perennials and shrubs may take longer (up to a year) to fully mature, but annuals and fast-growing veggies show quicker results. Pro tip: Start with low-maintenance plants like marigolds or lettuce for faster visual impact!
Is a circular garden more expensive than a traditional rectangular one?
Not necessarily! Circular gardens can be budget-friendly if you repurpose materials like cinder blocks, logs, or even old tires for borders. However, curved edges may require more edging material than straight lines. To save costs, opt for mulch or gravel instead of pricier pavers. Pro tip: Check local recycling centers—many offer free or low-cost reclaimed materials for garden projects!
Can I grow vegetables in a circular garden layout?
Circular gardens are perfect for veggies thanks to their space-efficient design. Use the “spiral” or “sunburst” method to plant sun-loving crops (like tomatoes or peppers) on the outer edges and shade-tolerant greens (spinach, kale) toward the center. Pro tip: Add a compost bin in the center for easy nutrient access—just ensure it’s sealed to avoid pests!
What if my circular garden looks uneven after planting?
Unevenness is common! If your plants seem lopsided or sparse, try these fixes:
- Fill gaps with fast-growing fillers like radishes, arugula, or nasturtiums.
- Adjust mulch to create a uniform layer (2–3 inches) for a polished look.
- Add climbing plants (like beans or cucumbers) to soften edges and create vertical interest.
Wrapping up and next steps
A circular garden layout isn’t just a space-saving trick—it’s a year-round masterpiece that blends functionality with beauty. Whether you’re working with a tiny balcony or a sprawling backyard, this design keeps your green thumb thriving while creating a dynamic, ever-changing visual flow. 🌿
Ready to transform your outdoor space? Start small—sketch a rough circle, gather your tools, and let your creativity bloom! And if you hit a snag, revisit our FAQs for quick solutions. Happy gardening! 🌱