Landscaping
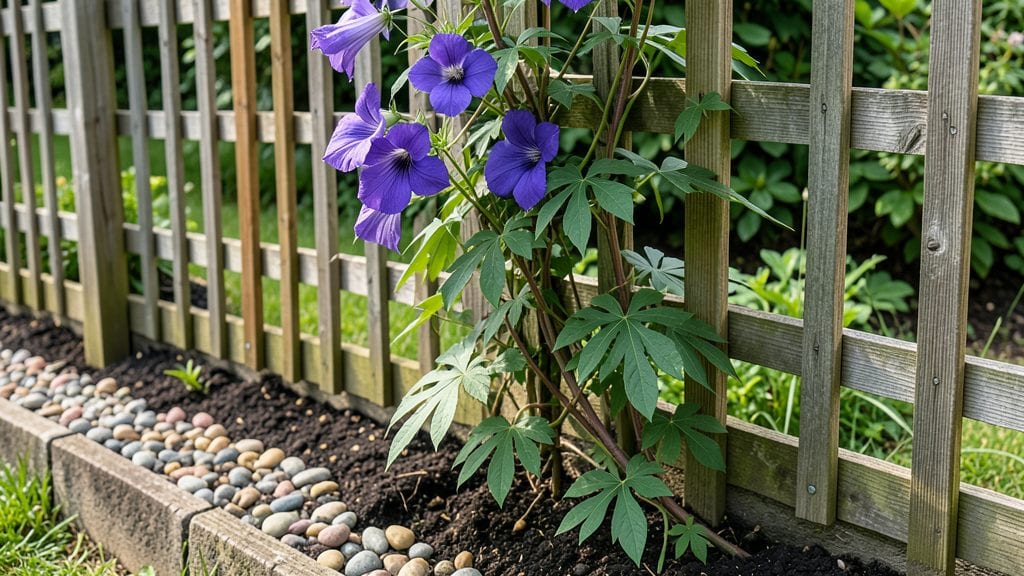
A vertical garden fence transforms bare walls into lush, living privacy screens that outperform any traditional fence. I installed mine after struggling with flimsy lattice panels that sagged under vines—this system stays sturdy while adding year-round greenery that changes with the seasons.
The best part? It turns dead space into a productive, beautiful backdrop for patios or play areas.
You don’t need fancy materials to start—simple galvanized wire mesh or wooden slats work for DIY versions, while pre-built modular panels offer cleaner lines. Fast-growing climbers like clematis, ivy, or morning glories provide quick coverage, while herbs and succulents add texture and fragrance.
My setup uses a mix of both for low-maintenance beauty that thrives even in partial shade.
Imagine waking up to fragrant jasmine framing your deck or deep green foliage that blocks nosy neighbors. Vertical gardens reduce heat absorption too, keeping your yard cooler in summer. The plants also filter air while providing habitat for pollinators—it’s like having a mini ecosystem on your fence line.
Works for modern, cottage, or even urban gardens—just adjust plant choices to your climate. Whether you’re hiding an eyesore or adding a focal point, this fence does double duty. Let’s get your design started!
📚 In This Guide
- What you need
- Instructions
- Tips and common mistakes
- Wrapping up and next steps
What you need
- ● Fence panels or trellis frame: Pre-built wooden, metal, or PVC panels (6–8 ft tall, 4–6 ft wide). Tip: Choose a material that matches your home’s aesthetic!
- ● Garden fabric or landscape cloth: 1 roll (10–12 ft wide, breathable mesh to retain moisture).
- ● Potting soil: 2–3 bags (2–3 cubic feet each) of lightweight, well-draining mix (e.g., coco coir + perlite).
- ● Plants: Creepers (fast-growing): 6–10 plants (e.g., ivy, morning glories, or nasturtiums).
- ● Succulents/sedums: 12–15 plants (for drought-resistant options).
- ● Ferns or ornamental grasses: 4–6 plants (for texture and shade).
- ● Waterproofing membrane: 1 roll (for wood panels to prevent rot).
- ● Staple gun + staples: Heavy-duty (for securing fabric).
- ● Measuring tape, level, and drill: Basic tools for setup.
- ○ Drip irrigation kit: Optional but highly recommended for low-maintenance watering! 💡
- ● LED solar lights: 4–6 (for nighttime ambiance).
- ● Decorative planters: Hanging pots or pockets (if not using fabric).
- ● Paint/stain: Exterior-grade (to refresh wood panels).
- ● Gloves + knee pads: Because comfort (and clean hands) matter! 😉
Step-by-step instructions for building a vertical garden fence
This method combines sturdy construction with lush, evergreen foliage for a privacy screen that thrives year-round.
Prepare the Fence Frame and Attach Trellis Panels
Begin by assembling your vertical fence structure using the pre-cut wooden slats or metal panels you’ve selected. I recommend using pressure-treated lumber for durability, especially if your fence will face moisture. Space the vertical supports 6 feet apart and secure them with 3-inch exterior screws into concrete footings or deep into the ground for stability.
Once the frame is upright, attach the trellis panels horizontally across the supports. These panels should be spaced 12-18 inches apart vertically to allow for proper plant growth and air circulation. Use stainless steel screws to secure the trellis panels—rust-resistant hardware ensures longevity. Double-check that each panel is level before tightening the screws completely.
Install Drip Irrigation or Soaker Hoses
Run a drip irrigation line or soaker hose along the base of each trellis panel, connecting it to your existing water supply. I prefer drip irrigation because it delivers water directly to the roots without wetting the foliage, which helps prevent fungal diseases. Space the emitters 12 inches apart along the hose to ensure even moisture distribution.
Burrow the irrigation line 2 inches deep into the soil at the base of the fence, covering it with mulch to protect it from sunlight and physical damage. Test the system by running water for 10 minutes—adjust the flow rate so the soil remains moist but not soggy. This step is critical for maintaining consistent hydration, especially during dry spells.
Plant Climbing Evergreens and Vines
Start by planting dwarf English ivy, climbing hydrangea, or star jasmine at the base of each trellis panel. These plants thrive in vertical spaces and provide year-round coverage. Dig holes twice as wide as the root ball and as deep as the container, then place each plant gently into the soil. Fill the hole with the remaining 3 cubic yards of potting mix, pressing lightly to eliminate air pockets.
Space the plants 18-24 inches apart to allow for full growth without overcrowding. Water each plant deeply immediately after planting to help settle the soil and encourage root establishment. If you’re using deciduous plants like clematis, pair them with evergreens like needlepoint holly to ensure coverage even in winter.
Train Vines and Prune for Structure
As the plants begin to grow, gently guide the vines along the trellis using soft plant ties or twistable wire. Avoid pulling the vines too tightly—this can damage the stems. Instead, loosely secure them every 6-12 inches to encourage upward growth. I like to train vines in a zigzag pattern to create a fuller, more natural look.
Prune the plants twice a year—once in early spring to shape the growth and again in late summer to remove any dead or overcrowded branches. Cut back leggy growth to maintain a compact, bushy appearance. This not only improves the fence’s aesthetic but also promotes healthier, more vigorous growth. Use bypass pruners for clean cuts, and always sterilize the blades with rubbing alcohol between cuts to prevent disease spread.
Mulch and Maintain Seasonal Care
Spread 3 cubic yards of mulch evenly across the base of the fence, keeping it 2-3 inches away from the plant stems to prevent rot. I recommend using wood chips or shredded bark for their slow-release nutrients and moisture-retention properties. Mulch helps suppress weeds and keeps the soil temperature stable, which is especially important in hot climates.
Monitor the fence throughout the year, adjusting watering as needed—typically once a week during the growing season, but more frequently in extreme heat. Fertilize in early spring with a balanced, slow-release fertilizer to support steady growth. If any plants become overgrown or lose their shape, prune them back in late winter to encourage fresh, new growth in the spring.
Tips & tricks for building a vertical garden fence
A few strategic adjustments can transform your vertical garden fence from functional to extraordinary. The details in construction and plant care make all the difference between a fence that merely survives and one that thrives season after season.
Structural Stability: When securing your vertical supports every 6 feet, consider using galvanized metal brackets instead of screws for added strength against wind. I've found that pre-drilling pilot holes through the trellis panels prevents wood splitting, especially with pressure-treated lumber. For extra stability in windy areas, add diagonal braces between supports—this creates a more rigid framework that won't sway in storms.
Irrigation Efficiency: That 10-minute test run of your drip irrigation system is your chance to catch potential issues before they become problems. I recommend installing a pressure regulator if your water supply fluctuates—this ensures consistent flow through all emitters spaced 12 inches apart. For larger installations, consider adding a timer to automate watering cycles, which prevents overwatering during your absence. The key is maintaining that perfect balance of moist but never soggy soil.
Plant Selection Strategy: While dwarf English ivy and climbing hydrangea are excellent choices, I've had great success with a mix of evergreens and semi-evergreens for year-round coverage. For example, pair star jasmine with needlepoint holly—the jasmine provides fragrant summer blooms while the holly maintains structure through winter. When planting, place taller varieties toward the back of each panel to create natural layers, which enhances both aesthetics and growth patterns over time.
Pruning Precision: The twice-yearly pruning schedule is your opportunity to shape the fence while promoting healthy growth. I've learned to prune in early spring before new growth emerges and again in late summer after flowering—this timing prevents removing next year's flower buds. Always use bypass pruners and make cuts at a 45-degree angle just above a leaf node to encourage branching. Sterilizing your tools between cuts is particularly important when working with multiple plant varieties to prevent cross-contamination of diseases.
Pro Tips for Vertical Garden Fence
- A few strategic adjustments can transform your vertical garden fence from functional to extraordinary. The details in...
- Structural Stability: When securing your vertical supports every 6 feet, consider using galvanized metal brackets ins...
- Irrigation Efficiency: That 10-minute test run of your drip irrigation system is your chance to catch potential issue...
Frequently asked questions
Got questions about transforming your space with a vertical garden fence? You’re not alone! Here are some common queries—and their practical answers—to help you green up your privacy screen with confidence.
How much sunlight does a vertical garden fence need?
A vertical garden fence thrives with at least 4–6 hours of sunlight daily, but many plants adapt to partial shade. Succulents and herbs (like thyme or rosemary) tolerate less light, while vines (e.g., ivy or clematis) need full sun. Assess your fence’s exposure before selecting plants—low-light options exist!
How often should I water a vertical garden fence?
Watering depends on your climate, but 2–3 times per week is a good starting point for most setups. Check soil moisture—if the top inch feels dry, it’s time to hydrate. Drip irrigation systems (installed behind the fence) make maintenance effortless and prevent overwatering. Pro tip: Water early in the morning to reduce evaporation.
Can I install a vertical garden fence on an existing wooden fence?
If your fence is sturdy, attach a waterproof backing panel (like plywood or metal mesh) first, then mount the vertical garden system. For renters, lightweight modular systems (e.g., fabric pockets or trellis panels) work great without permanent damage. Just ensure your fence can support the weight—consult a pro if unsure.
What’s the best way to prevent pests in a vertical garden fence?
Pests love vertical gardens too! Start with disease-resistant plants (e.g., lavender or marigolds) and use neem oil or insecticidal soap for early signs of trouble. Ensure proper drainage to deter fungus gnats, and prune regularly to improve airflow. Bonus: Ladybugs and lacewings are natural pest predators—invite them with pollinator-friendly flowers!
Will a vertical garden fence survive winter?
Most vertical gardens can handle winter, but hardy plants (like boxwood, holly, or evergreen vines) are your best bet. In freezing climates, insulate the back with bubble wrap or straw, and choose cold-tolerant varieties. Drain excess water before frost to prevent root damage—snow is a natural insulator!
Wrapping up and next steps
A vertical garden fence isn’t just a trend—it’s a game-changer for adding lush, year-round greenery while boosting privacy and curb appeal. Whether you’re a beginner or a seasoned gardener, this project is rewarding, eco-friendly, and customizable to fit your space and style.
Ready to transform your outdoor area? Start small—pick a section of your fence, gather your supplies, and let nature do the rest! Your future self (and your plants) will thank you. 🌱✨