Landscaping
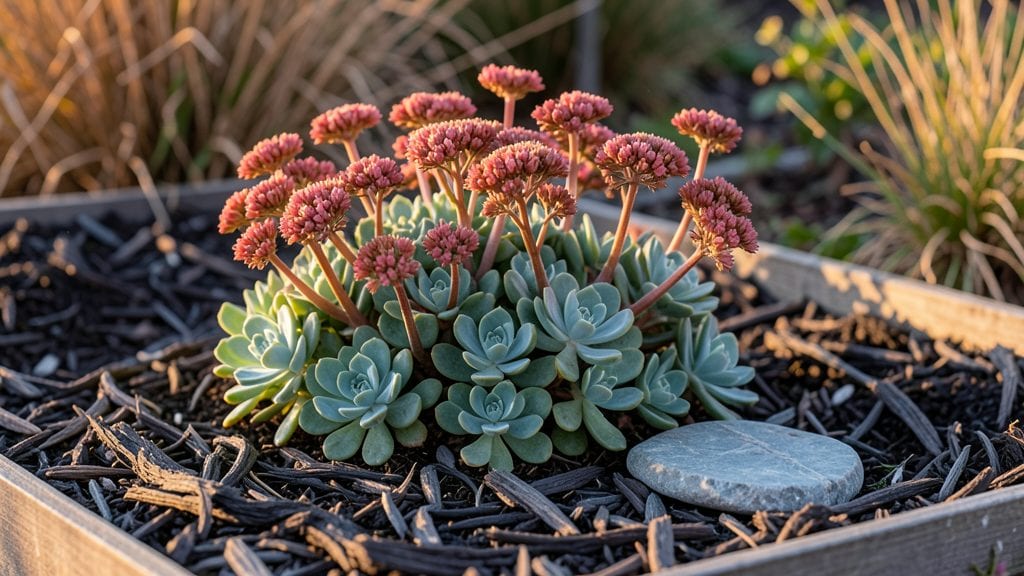
Creating a sedum garden design starts with understanding why this plant is a game-changer for low-maintenance beauty. 🌿 I fell in love with sedum after my first drought-stricken summer—it thrived while everything else wilted, and the deep purple-green foliage became the star of my front yard.
The secret lies in its layered textures and ability to handle neglect, making it perfect for busy gardeners or those in hot, dry climates.
You don’t need a sprawling yard to make it work—sedum thrives in containers, borders, or even vertical gardens. Pair it with ornamental grasses for movement or add pops of color with lavender or coreopsis. The key is grouping plants by height and color, creating visual depth without overcomplicating the layout.
For example, taller varieties like Sedum ‘Autumn Joy’ can anchor the back, while trailing types spill over edges like a living waterfall.
What you’ll end up with is a garden that stays lush even when you forget to water. The foliage turns fiery shades of red and orange in fall, and some varieties even produce tiny winter blooms.
Maintenance is minimal—just a quick trim in spring and occasional deadheading to keep it looking sharp. Plus, it’s a pollinator magnet, bringing bees and butterflies to your space all season long.
This design works for modern minimalist gardens, cottage-style charm, or even wildlife-friendly landscapes. Whether you’re working with a small balcony or a large backyard, sedum adapts effortlessly. Let’s dive into how to make it your own—starting with the perfect plant combinations for your space.
📚 In This Guide
- What you need
- Instructions
- Tips and common mistakes
- Wrapping up and next steps
What you need
- ● Sedum plants: Choose a variety like Sedum 'Autumn Joy', Sedum 'Angelina', or Sedum 'Dragon’s Blood'. Aim for 10–20 plants per square foot for full coverage.
- ● Well-draining soil: Mix 50% native soil with 50% coarse sand or gravel (e.g., builder’s sand or perlite) to prevent waterlogging.
- ● Mulch: Use 3–4 inches of gravel, decomposed granite, or bark chips (avoid organic mulch—it retains too much moisture!).
- ○ Drip irrigation system (optional but recommended): A low-volume system with emitters spaced 12–18 inches apart ensures efficient watering.
- ● Garden trowel or spade
- ● Wheelbarrow (for mixing soil)
- ● Rake (to level the ground)
- ● Measuring tape
- ● Gloves and knee pads (for comfort!)
- ● Pruners (for trimming mature plants)
- ● Test your soil: Ensure it drains well—sedums hate soggy roots! A percolation test (dig a 12-inch hole, fill with water, and time how long it drains) helps.
- ● Sunlight check: Sedums thrive in full sun (6+ hours/day). If your spot is shady, opt for Sedum ‘Murali’ or Sedum ‘Matrona’, which tolerate partial shade.
- ○ Edging (optional):** Use metal, stone, or plastic edging to define borders and keep mulch in place.
Step-by-Step instructions for designing a sedum garden
Here's how I create a low-maintenance sedum garden that thrives with minimal water and delivers striking seasonal interest.
🪴 Step 1: Select and Prepare the Planting Site
Sedums excel in full sun, so choose a location receiving at least 6 hours of direct sunlight daily. I always test the spot by observing how quickly soil dries—if it stays damp for more than 24 hours, you'll need to improve drainage by amending with 2-3 inches of coarse sand or crushed gravel mixed into the top 12 inches of soil.
Remove any existing weeds or grass, then loosen the soil to a depth of 8-10 inches using a broadfork or garden fork. Sedums hate compacted roots, so break up any hardpan layers. If your soil is heavy clay, mix in composted leaf mold to improve structure while maintaining good drainage.
☀️ Step 2: Plan for Year-Round Visual Impact
Design your sedum garden with a three-tiered height approach for maximum visual interest. Start with taller varieties (18-24 inches) like Sedum 'Autumn Joy' or Sedum 'Matrona' at the back or center. These anchor the design and provide dramatic seasonal color.
Add mid-height plants (12-18 inches) like Sedum 'Dragon's Blood' or Sedum 'Angelina' in clusters of 3-5 plants for textural contrast. Fill remaining spaces with ground-hugging varieties (6-12 inches) like Sedum 'Cape Blanco' or Sedum 'Vera Jameson' to create a lush, cascading effect at the front.
🌱 Step 3: Plant Sedums for Optimal Spacing and Growth
Dig planting holes twice as wide as the root ball but only as deep as the container's base. Gently remove sedums from their pots and tease apart any circling roots—this encourages outward growth rather than root-bound stress. Space plants according to their mature size: 12-18 inches apart for smaller varieties and 24-36 inches apart for larger ones.
Place each plant so the top of the root ball sits level with the surrounding soil—burying too deep can cause rot, while planting too high leaves roots exposed. Backfill with native soil, pressing lightly to eliminate air pockets. Water deeply immediately after planting to settle the soil and encourage root contact.
💧 Step 4: Establish Mulch and Watering Routine
Apply a 2-3 inch layer of gravel or decomposed granite around plants, keeping it 2-3 inches away from stems to prevent rot. This mulch suppresses weeds, conserves moisture, and reflects heat away from shallow roots. I avoid organic mulches like wood chips, as they can smother sedums and retain too much moisture.
Water deeply once per week during the first growing season, allowing 1-2 inches of water to penetrate the soil. After establishment (typically 2-3 years), sedums require little to no supplemental watering—their thick leaves store moisture efficiently. Check soil moisture by pushing your finger 2 inches deep; if it feels dry, that's your cue to water.
✂️ Step 5: Maintain Through Seasons for Long-Term Beauty
Deadhead spent flowers in late summer to encourage a second flush of blooms, but leave some seed heads for winter interest. In early spring, trim back any damaged foliage to 2-3 inches above the ground, which stimulates fresh growth. Sedums are incredibly resilient—even if you forget to prune, they'll bounce back with minimal care.
Fertilize lightly in early spring with a balanced organic fertilizer (10-10-10) applied at half the recommended rate. Sedums thrive in lean conditions, so avoid heavy feeding, which can lead to floppy growth and reduced drought tolerance. Once established, your garden will require virtually no maintenance beyond occasional weeding and seasonal cleanup.
Tips & tricks for perfect sedum garden design
Creating a stunning sedum garden that thrives with minimal care takes a few strategic moves—here's what I've learned after designing these drought-resistant landscapes for years.
Drainage is Everything: In Step 1, when testing your site, I can't emphasize enough how critical that 24-hour soil moisture test is. If your soil stays damp beyond this window, your sedums will inevitably rot. I've seen gardeners skip this step and lose entire plantings—don't make that mistake. For clay-heavy soils, consider adding 3-4 inches of coarse sand or gravel to the top 12 inches of soil. This isn't just about drainage; it's about creating the perfect air-soil balance sedums crave.
Plant Placement Pays Off: When arranging your three-tiered height structure in Step 2, I recommend sketching a rough layout first. Place taller varieties 18-24 inches apart at the back, then work forward with mid-height and ground-hugging plants. This creates natural depth perception while ensuring each plant gets its required sunlight. Pro tip: Face taller sedums toward the south if you're in the Northern Hemisphere—they'll get optimal light without shading smaller varieties.
Root Health Matters More Than You Think: During Step 3, when teasing apart circling roots, I've seen gardeners rush this process and end up with stressed plants. Take your time—gentle separation encourages outward root growth rather than creating root-bound stress. Also, that 2-inch deep watering after planting is non-negotiable. It's the difference between plants that establish quickly versus those that struggle for months to take root.
Mulch Like a Pro: The 2-3 inch layer of gravel in Step 4 isn't just decorative—it's a game-changer. Keep it 2-3 inches away from stems to prevent rot while still suppressing weeds. I've found that decomposed granite works even better than regular gravel because it breaks down slightly over time, adding trace minerals to the soil. And here's a secret: this mulch actually helps regulate soil temperature, protecting shallow roots during extreme heat or cold.
Pro Tips for Sedum Garden Design
- Creating a stunning sedum garden that thrives with minimal care takes a few strategic moves—here's what I've learned after designing these drought-resistant landscapes for years.
- Drainage is Everything: In Step 1, when testing your site, I can't emphasize enough how critical that 24-hour soil moisture test is.
- Plant Placement Pays Off: When arranging your three-tiered height structure in Step 2, I recommend sketching a rough layout first.
Frequently asked questions
Got questions about creating a stunning sedum garden design? You’re not alone! Here are some of the most common queries—plus straightforward answers to help you plan with confidence.
What’s the best time of year to plant sedum for a garden design?
Plant sedum in early spring or early fall when temperatures are mild (50–75°F). This gives roots time to establish before summer heat or winter frost. Avoid planting in peak summer—sedum hates soggy soil and wilts under stress. Pro tip: Start with container-grown plants for faster, easier installation!
How often should I water a sedum garden once it’s established?
Once mature (after 1–2 years), sedum is drought-tolerant and needs almost no watering—just occasional deep soaks during extreme dry spells. Newly planted sedum may need weekly watering until roots spread. Watch for: Wilting leaves = thirsty plants; crispy edges = too much sun or drought.
Are sedum gardens low-maintenance, or do they attract pests?
Sedum is low-maintenance, but pests like aphids or slugs may visit. To deter them: Plant near garlic, lavender, or marigolds (natural repellents) and remove debris. Good news: Birds and beneficial insects love sedum’s flowers, balancing the ecosystem naturally!
Can I mix sedum with other drought-resistant plants in my garden design?
Pair sedum with lavender, yarrow, Russian sage, or ornamental grasses for texture and color. For height contrast, try ‘Autumn Joy’ sedum (3–4 ft) with low-growing ‘Dragon’s Blood’ sedum (6 inches). Design tip: Group plants by water needs—sedum thrives with succulents but may compete with thirsty perennials.
Will sedum survive harsh winters, or do I need to protect it?
Most sedum varieties are hardy to USDA zones 3–9, but young plants or tender types (like ‘Angelina’) may need mulch or burlap wraps in freezing temps. Evergreen sedum (e.g., ‘Blue Spruce’) keeps color year-round, while others die back but regrow in spring. Winter prep: Trim dead foliage in late winter for a tidy look.
What’s the quickest way to fill a large sedum garden on a budget?
Buy smaller plants or cuttings (cheaper than mature sedum) and propagate them! Dig up divisions in spring, replant, and water lightly. Alternatively, seed-grown sedum (like ‘Stonecrop’) is affordable but slower to establish. Budget hack: Check local plant swaps or native plant sales for deals!
Wrapping up and next steps
A sedum garden design isn’t just a trend—it’s a smart, sustainable choice that brings year-round texture and resilience to your outdoor space. 🌿 With minimal water needs and vibrant foliage, these low-maintenance plants transform even the driest spots into lush, living art.
Whether you’re a seasoned gardener or just starting, the key is to experiment with colors, heights, and textures while keeping your local climate in mind.
Ready to dive in? Start small—pick a sunny corner, gather your favorite sedum varieties, and let your creativity grow! 🌱 Your drought-proof oasis awaits—what will you plant first?