Landscaping
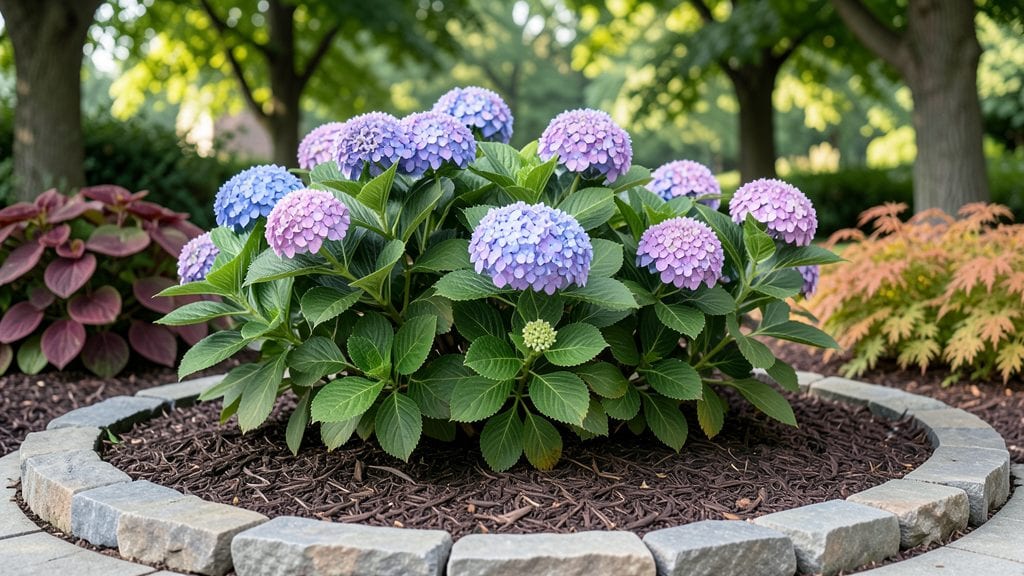
Creating a circular garden design transforms even tight spaces into lush, intentional havens where every plant has purpose. My first attempt was a 6-foot herb spiral tucked into a corner that now produces more basil than I can use.
The magic lies in how circles maximize sunlight, reduce wasteful edges, and let you layer plants like a living mandala.
The beauty of circular layouts is their adaptability—whether you're working with a 4-foot patio circle or a 12-foot backyard focal point, the principles stay the same.
You'll need durable edging (stone, brick, or even repurposed wood), a central feature (a small tree, fountain, or raised bed), and plants that thrive in concentric rings. The key is balancing sun-loving annuals with shade-tolerant perennials so the design stays vibrant year-round.
By summer's end, you'll have a garden that feels like a curated masterpiece, not just a collection of plants. The circular shape naturally draws the eye inward, creating a sense of intimacy even in large spaces.
Plus, the symmetry makes maintenance easier—weeding, pruning, and harvesting all follow the natural flow of the circle.
This design works equally well for cutting gardens, pollinator havens, or even vegetable spirals. The only real challenge is resisting the urge to make it too perfect—some intentional asymmetry keeps it feeling alive. Let's get those plans sketched out!
📚 In This Guide
- What you need
- Instructions
- Tips and common mistakes
- Wrapping up and next steps
What you need
- ● Garden bed frame or raised planter: Circular or oval shape (diameter depends on space—6–12 feet is ideal for most designs). Opt for cedar, redwood, or composite lumber for durability.
- ● Soil: High-quality garden soil mix (1–2 cubic yards, depending on bed depth). For raised beds, use a blend of topsoil, compost, and perlite (ratio: 60% soil, 30% compost, 10% perlite).
- ● Mulch: Organic mulch (pine bark, shredded leaves, or straw) to retain moisture and suppress weeds (2–3 bags, ~3 cubic feet per bag).
- ● Plants: Perennials (e.g., hostas, lavender, or daylilies) for structure.
- ● Annuals (e.g., petunias, marigolds, or pansies) for color.
- ● Shrubs or small trees (e.g., dwarf boxwood or ornamental grasses) for height variation.
- ● Watering system: Drip irrigation kit or soaker hose (with timer for convenience).
- ○ Decorative elements: Optional but fun! Think stone borders, solar lights, or a small fountain.
- ● Measuring tape and string (for marking the circle).
- ● Shovel and spade (for digging and soil prep).
- ● Wheelbarrow (to haul soil and mulch).
- ● Level (to ensure your bed is even).
- ● Pruners and gloves (for planting and maintenance).
- ● Staple gun or screws (if building a wooden frame).
- ● Sunlight analysis: Note how many hours of direct sun your space gets daily (full sun, partial shade, or full shade).
- ● Drainage check: Ensure your area isn’t prone to waterlogging (elevate beds if needed).
- ● Permits (if required): Some HOAs or municipalities need approval for raised beds or structural changes.
- ● Budget planning: Circular designs can be cost-effective, but factor in plants, materials, and tools upfront.
Instructions for crafting a stunning circular garden layout
Here’s how to transform any space into a harmonious circular garden that thrives year-round.
Define the Circle’s Centerpiece and Radius
Start by marking the circle’s center with a stake or a small flag. For a 4-foot radius (standard for small gardens), use a 10-foot diameter rope to trace the perimeter on the ground. I like to use a winding garden hose for precision—just step on the center and stretch it outward while a helper holds the hose taut. This ensures a perfect, even circle every time.
Next, choose your centerpiece—whether it’s a small fountain, a sculptural plant like a dwarf conifer, or a decorative urn. Place it exactly at the center and visualize how it will anchor the design. The centerpiece should be visible from all angles, so avoid tall plants that might obscure it later. For year-round interest, opt for evergreens or seasonal bloomers that transition smoothly.
Layer Plants in Concentric Rings for Depth
Divide your circle into three zones: the inner ring (closest to the center), the middle ring, and the outer ring. The inner ring should feature low-growing plants like creeping thyme or ajuga, while the middle ring can accommodate medium-height perennials such as hostas or daylilies. The outer ring is perfect for taller plants like ornamental grasses or shrubs.
Space plants based on their mature size—12-18 inches apart for perennials and 2-3 feet apart for shrubs. I always sketch a rough layout first to avoid overcrowding. For example, a 3-foot-tall shrub in the outer ring should sit 18 inches from the circle’s edge to allow airflow and prevent root competition. Use a measuring tape to mark planting spots before digging.
Incorporate Pathways and Hardscaping
Add a gravel or stepping-stone pathway along the outer edge of your circle to create a defined border. A 2-foot-wide path works well for small gardens, leaving enough space for plants to thrive without being trampled. For a cohesive look, use uniform stones or pavers that complement the centerpiece’s material.
If your circle includes a seating area, place two curved benches or a circular bench along the outer ring. Position them so they frame the centerpiece without blocking views. For a rustic touch, I’ve used stacked logs or stone slabs as simple, low-cost seating. Always leave at least 3 feet of clearance around seating to allow easy movement and maintenance access.
Add Seasonal and Year-Round Interest
Plant spring bulbs like daffodils or tulips in the inner ring for early color, then layer in summer-blooming perennials like coneflowers or black-eyed Susans in the middle. For fall, add mums or ornamental kale in the outer ring. Evergreens like boxwood or holly fill gaps in winter, ensuring your circle stays visually dynamic year-round.
Incorporate vertical elements like trellises or small obelisks near the outer edge to draw the eye upward. Climbing roses or clematis can spill over the trellis, adding softness and movement. For texture contrast, mix glossy leaves (like hostas) with fuzzy foliage (like lamb’s ear). This layering keeps the garden engaging at every season.
Maintain Balance and Adjust Over Time
After planting, step back and assess the circle from all angles. Fill any empty spots with filler plants like sweet potato vine or ornamental grasses. Prune overgrown plants in the outer ring to maintain the circle’s shape, and trim back leggy growth in the inner ring to keep it neat. I like to rotate plants annually—moving a few perennials to new spots prevents soil depletion and keeps the design fresh.
Water deeply once a week (or more in drought) to encourage deep root growth. Mulch with 2-3 inches of shredded bark to retain moisture and suppress weeds. Check the centerpiece’s visibility every few months—if it’s obscured, prune or replace plants blocking it. A well-maintained circular garden should feel intentional and effortless from every viewpoint.
Tips & tricks for perfect circular garden design
A few strategic approaches will help you avoid common pitfalls and create a garden that feels intentional from every angle.
Precision in Step 1: When tracing your 10-foot diameter circle, use a level to ensure the rope stays perfectly horizontal. Uneven circles create visual imbalance that's hard to correct later. I've found that marking the center with a small flag and using a helper to hold the rope taut eliminates wobble. For larger circles, consider using a garden laser level for absolute precision—it's worth the investment for professional results.
Plant Placement Strategy: In Step 2, when spacing your 3-foot-tall shrubs 18 inches from the circle's edge, remember that mature plant sizes often exceed nursery tags. Always check the plant's label for "mature height and spread" measurements, not just the current size. For example, that 3-foot boxwood might grow to 5 feet wide—account for this when planning your concentric rings to prevent future overcrowding.
Pathway Design Tip: The 2-foot-wide pathway in Step 3 should follow the circle's edge with a slight curve—never straight lines. This creates a natural flow that guides the eye around the garden. For a cohesive look, select pavers or stones that complement your centerpiece's material. If using gravel, consider edging it with bricks or metal strips to prevent it from spreading into your planting areas.
Seasonal Layering Secret: In Step 4, when adding vertical elements like trellises, place them near the outer ring where they won't compete with your centerpiece. I recommend positioning trellises at 45-degree angles to create dynamic lines that draw the eye upward. For year-round interest, choose climbing plants that bloom at different times—like early spring clematis followed by summer roses—to maintain visual appeal throughout the seasons.
Pro Tips for Circular Garden Design
- A few strategic approaches will help you avoid common pitfalls and create a garden that feels intentional from every angle.
- Precision in Step 1: When tracing your 10-foot diameter circle, use a level to ensure the rope stays perfectly horizontal.
- Plant Placement Strategy: In Step 2, when spacing your 3-foot-tall shrubs 18 inches from the circle's edge, remember that mature plant sizes often exceed nursery tags.
Frequently asked questions
Got questions about transforming your space with a circular garden design? You’re not alone! Here are answers to the most common queries to help you plan with confidence.
What’s the best size for a circular garden?
A circular garden can fit any space—start small (3–5 feet in diameter) for patios or balconies, or go bold (10+ feet) for statement pieces. Pro tip: Measure your area first! For walkways, leave at least 2 feet of clearance around the edge for easy access.
When is the ideal time to plant in a circular garden?
Timing depends on your climate! In most regions, spring (after last frost) or early fall are ideal for planting perennials and shrubs. Annuals thrive with late spring planting. Troubleshoot: Use mulch to protect roots if planting in cooler months.
Can I use a circular garden in shady areas?
Opt for hostas, ferns, or shade-tolerant impatiens for lush greenery. Add reflective surfaces (like mirrors or metallic planters) to brighten the space. Alternative: Dwarf evergreens or variegated foliage add texture without sunlight.
How do I fix uneven edges in my circular garden?
Uneven edges? No problem! Use a string line and spade to trim soil cleanly, or install a flexible edging material (like steel or plastic) for a polished look. For organic vibes, try stones or bricks as natural borders. Quick fix: Top-dress with mulch to disguise minor imperfections.
Are circular gardens low-maintenance?
Yes—if designed right! Choose drought-resistant plants and self-watering systems (like drip irrigation). Time-saver: Group plants with similar water needs together. Mulch generously to reduce weeds and retain moisture.
Wrapping up and next steps
A circular garden design isn’t just about saving space—it’s about creating a timeless, functional, and visually stunning outdoor retreat. Whether you’re maximizing a tiny patio or adding charm to a sprawling yard, this approach blends practicality with beauty, ensuring your garden thrives year-round. 🌿✨
Ready to transform your outdoor space? Start small—sketch a rough layout, gather your materials, and let your creativity bloom! Your perfect circular garden awaits!