Tools
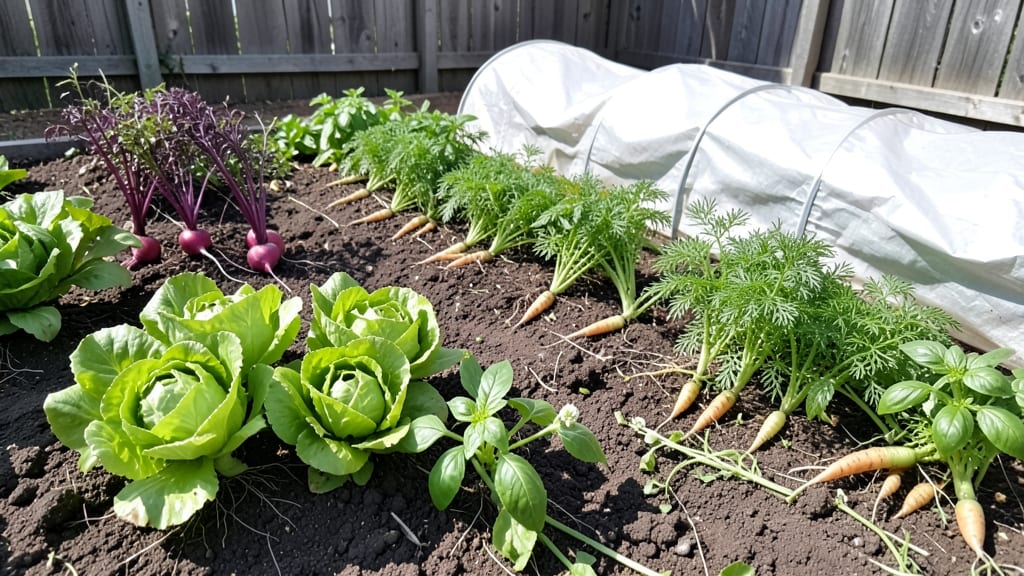
A weed-free garden isn’t just about pulling weeds—it’s about creating a fortress where they can’t take root in the first place. I’ve spent years perfecting natural barriers that smother weeds before they start, using what’s already in my yard.
The key? Layering thick mulch, strategic plants, and simple physical blocks that outcompete weeds for sunlight and space.
Most people reach for chemicals or spend hours hand-pulling, but the real game-changer is prevention. You’ll need 3-5 inches of mulch, a few tough ground covers like clover or creeping thyme, and maybe a sheet of landscape fabric in high-traffic spots.
It’s not about eliminating weeds forever—it’s about making your garden so inhospitable that they give up and move on.
By summer’s end, you’ll have a garden where weeds barely show their faces, and the plants you want thrive without competition. The best part? No more backbreaking weeding sessions or chemical sprays. It’s a system that works whether you’re dealing with crabgrass, dandelions, or those stubborn creeping Charlie vines.
Here’s the thing—this method gets easier with time. The first year requires a little extra effort, but after that, maintenance is minimal. You’ll spend less time fighting weeds and more time enjoying your garden. Let’s get started with the barriers that actually work.
📚 In This Guide
- What you need
- Instructions
- Tips and common mistakes
- Wrapping up and next steps
What you need
- ● Landscape Fabric: 1 roll (3-4 ft wide, 50-100 ft long) – permeable, UV-stabilized (e.g., Eco-Friendly Weed Barrier)
- ● Mulch: 2-3 bags (1-2 cubic feet each) – organic (straw, wood chips) or inorganic (gravel, rubber mulch)
- ● Edging Material: Metal or Plastic Edging: 10-20 ft (depending on garden size)
- ● Natural Options: Stones, bricks, or logs (1-2 ft per garden side)
- ● Garden Gloves: 1 pair – durable, waterproof
- ● Utility Knife or Scissors: 1 – for cutting fabric
- ● Staple Gun & Staples: 1 – to secure fabric edges
- ● Rake or Hand Cultivator: 1 – for clearing existing weeds and soil prep
- ● Corn Glue or Landscape Staples: For extra-secure fabric anchoring
- ● Living Mulch (e.g., Clover or Creeper Plants): To smother weeds naturally
- ● Vinegar Spray (10% Acetic Acid): For spot-treating stubborn weeds (use sparingly!)
- ● Garden Twine or String: To mark fabric edges before mulching
Step-by-Step instructions for creating natural weed barriers
Here's how to build effective, chemical-free barriers that keep weeds at bay for seasons.
Choose and Prepare Your Barrier Location
Start by selecting the areas where weeds are most persistent—typically garden beds, pathways, or along fences. Clear existing weeds and debris from a 6-inch wide strip around the perimeter of your planting area. I like to use a garden hoe to cut weeds at the soil line before they go to seed, which prevents future generations from sprouting.
Mark the boundary with stakes or a string line if needed. This ensures your barrier will be straight and uniform. For raised beds, focus on the outer edges where weeds often creep in from surrounding soil. The key is to create a clean, defined space where your natural barrier will work most effectively.
Install a Physical Barrier Layer
Lay down a 2-3 inch thick layer of cardboard or newspaper over the cleared area. This blocks light, which weeds need to germinate, while allowing moisture and roots to penetrate. Overlap edges by 2-3 inches to prevent gaps where weeds can sneak through. Avoid glossy paper—it doesn’t break down easily and can suffocate soil.
For pathways or high-traffic areas, use landscape fabric instead. Secure it tightly with landscape staples or rocks to prevent shifting. The fabric should cover the entire area without stretching, as even small tears can become weed entry points. This layer acts as the foundation for everything else you’ll add on top.
Add a Mulch Layer for Long-Term Suppression
Spread a 3-4 inch thick layer of organic mulch—such as wood chips, straw, or shredded leaves—over the barrier. This smothers any remaining weed seeds and prevents new ones from reaching the soil. I prefer wood chips for their durability and ability to break down slowly, but straw works well in vegetable gardens because it decomposes faster, enriching the soil.
Keep the mulch evenly distributed, avoiding piles that could trap moisture and encourage rot. For pathways, use gravel or crushed stone instead, as it doesn’t decompose and stays weed-free longer. Water lightly after applying mulch to help it settle and make contact with the barrier underneath.
Maintain and Refresh the Barrier
Check your barrier every 2-3 weeks during the growing season. Remove any weeds that sprout along the edges or poke through the mulch. Over time, organic mulch will break down, so replenish it annually in the spring. For landscape fabric, top it with fresh mulch every 1-2 years to maintain its effectiveness.
In high-weed areas, consider adding a layer of pea gravel or fine bark on top of the mulch. This creates an extra barrier that deters weeds while keeping the soil underneath moist. The goal is to keep the surface covered and light-blocked at all times—this is the secret to long-term weed control without chemicals.
Tips & tricks for effective natural weed barriers
Creating a weed-free garden starts with smart planning and the right techniques. These tips will help you maximize your barrier's effectiveness and keep weeds from creeping back in.
Location Selection: When preparing your 6-inch wide strip in Step 1, focus on areas where weeds are most aggressive—like the edges of garden beds or along pathways. I've found that cutting weeds at the soil line with a garden hoe before they go to seed makes a huge difference in preventing future growth. This step might take a little extra time, but it's worth it for long-term results.
Layering Matters: In Step 2, the overlap of your cardboard or newspaper by 2-3 inches is crucial for preventing weed growth. I recommend using unglossy paper or cardboard that will break down naturally over time. For pathways, landscape fabric is a game-changer—just make sure it's securely fastened to avoid any gaps where weeds could sneak through.
Mulch Depth and Distribution: The 3-4 inch thickness of mulch in Step 3 is essential for smothering weeds effectively. I prefer wood chips for their durability, but straw works well in vegetable gardens because it decomposes faster and adds nutrients to the soil. Make sure to distribute the mulch evenly—piles can trap moisture and lead to rot, which defeats the purpose of your barrier.
Maintenance Strategy: Don't wait until weeds become a problem—check your barriers every 2-3 weeks during the growing season, as mentioned in Step 4. This regular maintenance prevents small weeds from becoming established. For landscape fabric, topping it with fresh mulch every 1-2 years keeps it effective for years to come.
Pro Tips for Weed Free Garden
- Creating a weed-free garden starts with smart planning and the right techniques.
- Location Selection: When preparing your 6-inch wide strip in Step 1, focus on areas where weeds are most aggressive—like the edges of garden beds or along pathways.
- Layering Matters: In Step 2, the overlap of your cardboard or newspaper by 2-3 inches is crucial for preventing weed growth.
Frequently asked questions
Got questions about keeping your garden weed-free naturally?
Here are some of the most common concerns—and straightforward answers to help you maintain a thriving, weed-free space without harsh chemicals.
What are the best natural barriers to prevent weeds from growing in the first place?
Layering cardboard, landscape fabric, or gravel under mulch creates a physical block that weeds can’t penetrate. For a low-maintenance approach, try living mulches like clover or creeping thyme—they shade the soil while suppressing weeds naturally. Just ensure barriers are at least 3–4 inches deep for long-term results.
How long does it take for natural barriers to work effectively?
Most barriers start working within 2–4 weeks, but full weed suppression can take 3–6 months depending on the method. For example, landscape fabric works immediately, while organic mulch (like straw or wood chips) needs time to break down and smother weeds. Patience pays off—consistent coverage is key!
Can I reuse materials like cardboard or newspaper as weed barriers?
Cardboard and black-and-white newspaper (no glossy inserts) break down into nutrient-rich compost while blocking light. Just wet them down before laying over soil to prevent blowing away. Avoid colored paper or plastic—these can harm plants or attract pests over time.
What do I do if weeds keep popping up through my barrier?
If weeds persist, check for gaps or tears in your barrier and patch them with more mulch or fabric. For stubborn sprouts, hand-pull them before they seed (wear gloves!). If using organic mulch, top it up annually to maintain a thick, weed-blocking layer. A vinegar spray (1:1 ratio with water) can also help dissolve young weeds.
Are there any plants that naturally repel weeds better than mulch?
Yes! Ground covers like creeping jenny, ajuga, or clover outcompete weeds by crowding them out. For veggie gardens, try living mulches such as buckwheat or phacelia, which grow quickly and suppress weeds while attracting pollinators. Just ensure they’re edible-safe if growing food!
Wrapping up and next steps
A weed-free garden isn’t just about aesthetics—it’s about reclaiming your space with confidence and ease! 🌱 By using natural barriers like mulch, landscape fabric, or edging, you’ve taken a proactive, eco-friendly step toward a thriving garden without harsh chemicals.
Your hard work will pay off with lush plants and fewer headaches.
Now that you’re armed with the right tools and knowledge, start small—pick one barrier method to test this season. Watch your garden transform, and soon, you’ll be sharing your weed-free success with fellow green thumbs! 🌟