Tools
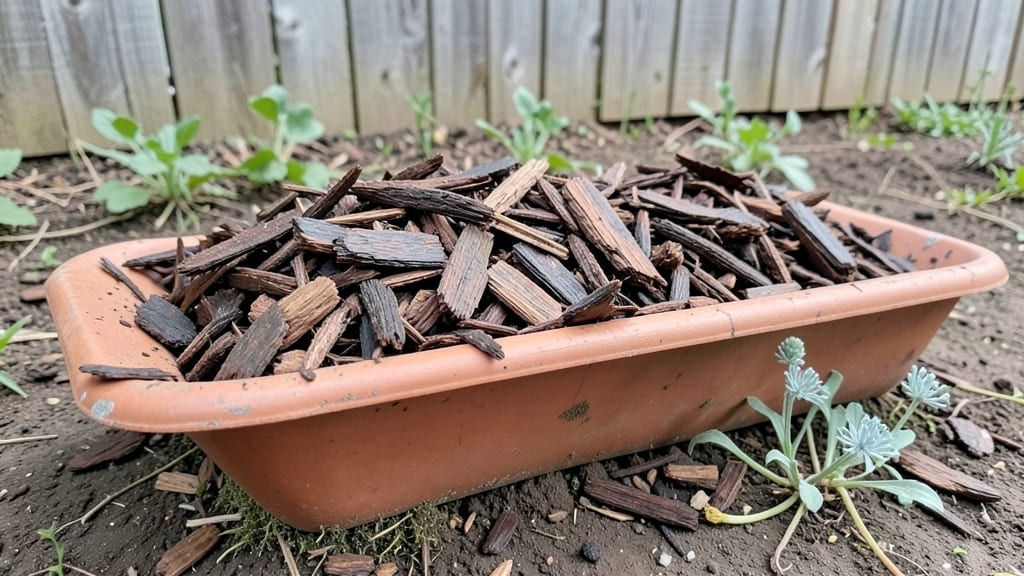
My first trough garden bed transformed a neglected corner into a fragrant herb haven—all in a space smaller than my kitchen counter. 🌿 These rustic elevated planters solve the classic gardener’s dilemma: how to grow more when space is tight, without sacrificing style or drainage.
The shallow design makes them perfect for herbs, succulents, and drought-tolerant flowers that thrive in limited soil but demand excellent airflow.
What makes them special isn’t just the space-saving—it’s the versatility. Build yours from reclaimed cedar planks, galvanized metal troughs, or even repurposed rain gutters. The key is ensuring the bottom has drainage holes (or a false bottom with rocks) to prevent soggy roots.
I’ve seen them dressed up with copper flashing or left raw for a farmhouse look—your choice determines the vibe, not the function.
You’ll end up with a vertical garden that stays weed-free, drains like a dream, and produces more in less space. Imagine snipping fresh basil for cocktails or arranging homegrown lavender bouquets—all from a planter that doubles as decor.
The shallow soil warms faster in spring, giving you a jumpstart on the growing season, and the elevated height keeps pests like slugs at bay.
Perfect for balconies, patios, or even mounted on walls—these beds work anywhere sunlight touches. Start with drought-lovers like rosemary, thyme, or sedum, then expand to annuals once you’ve mastered the basics.
The best part? You can move them to follow the sun or protect them from sudden rains. Let’s get building!
📚 In This Guide
- What you need
- Instructions
- Tips and common mistakes
- Wrapping up and next steps
What you need
- ● Wooden trough: 1 pre-cut wooden trough (cedar, redwood, or pine recommended for durability; dimensions: 4–6 ft long × 8–12 in wide × 6–8 in deep).
- ● Alternative: Reclaimed wood (e.g., old whiskey barrels, wine casks, or pallet wood).
- ● Fasteners: 1 lb galvanized or stainless steel screws (2–2.5 in long).
- ● 1–2 exterior wood glue bottles (for extra reinforcement).
- ● Landscape fabric: 1 roll (4 ft wide × 25 ft long) to prevent weeds and retain moisture.
- ● Potting soil: 2–3 bags (1–2 cu ft each) of high-quality garden soil or potting mix (add perlite for drainage if needed).
- ● Tools: Drill + drill bits (for screws).
- ● Saw (if cutting custom wood).
- ● Sandpaper (80–120 grit) or electric sander.
- ● Measuring tape + pencil.
- ○ Paintbrush (for sealing, optional).
- ● Wood stain or outdoor paint (for weatherproofing).
- ● Waterproof sealant (e.g., spar urethane).
- ● Drainage holes plug (if your trough lacks them).
- ● Decorative elements (e.g., rope, metal brackets, or carved handles).
- ● Self-watering kit (for low-maintenance growing).
Step-by-Step instructions for building a trough garden bed
Transforming a simple wooden trough into a thriving garden is easier than you think—here’s how to get started!
🪴 Step 1: Gather and Prepare Your Materials
Start by collecting a wooden trough (like a whiskey barrel or cedar planter) that’s at least 12 inches wide and 18 inches long—this gives roots enough room to spread. I like to use untreated cedar because it naturally resists rot and pests. If your trough has a bottom, drill ¼-inch drainage holes along the sides near the base to prevent waterlogging. No holes? No problem—just place the trough on brick spacers to allow airflow underneath.
Line the bottom with landscape fabric to block weeds and keep soil from washing out through the holes. Secure it with a few staples or by tucking the edges under the sides. This step is non-negotiable—without it, weeds will invade faster than you can say "garden maintenance."
🌱 Step 2: Fill with the Right Soil Mix
Use a high-quality potting mix blended with 20% perlite or coarse sand to improve drainage. Fill the trough to 1 inch below the rim, leaving space for mulch and watering. I tap the sides gently to settle the soil without compacting it—think fluffy, not packed-down. Avoid garden soil; it’s too dense and will suffocate roots in a confined space.
For a 4-trough garden, you’ll need about 3 gallons of mix per trough. Moisten the soil with warm water until it’s damp like a wrung-out sponge—no puddles, just even moisture. This ensures roots can access water without drowning. If you’re planting herbs, mix in a slow-release fertilizer (like 1 tablespoon per trough) to give them a nutrient boost right away.
☀️ Step 3: Plant Your Herbs and Flowers
Herbs like basil, thyme, and parsley thrive in troughs, while flowers such as pansies or marigolds add color without stealing space. Space plants 6-8 inches apart—crowding leads to competition for water and nutrients. Dig a hole twice as wide as the root ball but no deeper, then place the plant in and fill the gap with soil. Press gently around the base to remove air pockets.
Here’s the thing—water deeply after planting. The soil will settle, so add a little more mix around the stems to keep them upright. If you’re using seeds, sprinkle them on the surface (no covering needed for most herbs) and keep the soil lightly moist until they sprout. Watch for first true leaves in 7-14 days—that’s your cue everything’s on track!
💧 Step 4: Water and Mulch for Success
Water troughs every 2-3 days until the top inch of soil feels dry. Since troughs dry out faster than ground beds, I set a timer to check moisture levels—overwatering is a quick way to kill plants in confined spaces. Water at the base, not from above, to avoid washing away soil and disturbing roots.
Top off with 1 inch of mulch (like shredded bark or straw) to lock in moisture and suppress weeds. Mulch also keeps soil temps stable—critical for heat-sensitive herbs like basil. Replenish mulch every few weeks as it breaks down. You’ll notice fewer weeds and less watering once this layer is in place!
✂️ Step 5: Maintain and Enjoy Your Garden
Prune herbs regularly to encourage bushier growth—pinch back the tips of basil and thyme when they reach 3-4 inches tall. Deadhead spent flowers to keep blooms coming. I also rotate troughs a quarter turn weekly to ensure even sun exposure, preventing plants from leaning toward the light.
Fertilize every 4-6 weeks with a balanced liquid fertilizer (like 10-10-10) during the growing season. Stop fertilizing in late summer to let plants toughen up for cooler weather. With this setup, your trough garden will stay lush and productive for years—just refresh the soil every spring if it starts to compact.
Tips & tricks for perfect trough garden beds
Here's what I wish I'd known before starting my first trough garden—these little tricks make all the difference between a struggling planter and a thriving herb oasis!
Drainage is Everything: In Step 1, if your trough doesn't have drainage holes, those brick spacers are your best friend! I learned this the hard way when my first trough turned into a swampy mess. The key is to elevate it just enough to allow airflow underneath—about 1-2 inches off the ground. For extra insurance, consider adding a layer of pebbles at the bottom before the landscape fabric to create a secondary drainage layer.
Soil Science Matters: When mixing your soil in Step 2, don't just eyeball that 20% perlite—measure it! I use a simple ratio of 4 parts potting mix to 1 part perlite by volume. This creates perfect drainage while still holding moisture. Pro tip: If you're using coconut coir in your potting mix, add an extra 10% perlite since coir can hold too much water on its own. The goal is that "wrung-out sponge" texture—you should be able to squeeze a handful and see just a few drops come out, not a gush!
Plant Placement Strategy: In Step 3, think vertically! Herbs like basil and parsley grow taller, while thyme stays low—place taller plants toward the back (farthest from the trough's edge) and shorter ones toward the front. This creates a natural tiered effect and makes harvesting easier. For seeds, I like to use small pebbles to weigh them down lightly while they germinate—this prevents them from washing away during watering.
Watering Wisdom: The 2-3 day watering schedule in Step 4 can be tricky—it depends on your climate! In hot summers, I water mine every morning, while in cooler months, every other day works. Here's my secret: Stick your finger about an inch into the soil. If it feels dry, water thoroughly until it runs out the drainage holes. This method prevents both underwatering and the root rot that comes from overwatering in confined spaces.
Pro Tips for Trough Garden Bed
- Here's what I wish I'd known before starting my first trough garden—these little tricks make all the difference between a struggling planter and a thriving herb oasis!
- Drainage is Everything: In Step 1, if your trough doesn't have drainage holes, those brick spacers are your best friend!
- Soil Science Matters: When mixing your soil in Step 2, don't just eyeball that 20% perlite—measure it!
Frequently asked questions
Got questions about trough garden beds?
Here are some of the most common ones—plus quick, practical answers to help you get started!
What’s the best time of year to plant in a trough garden bed?
Spring and early fall are ideal for planting in trough garden beds. These seasons offer mild temperatures and balanced moisture, giving plants the best chance to establish roots before extreme heat or cold sets in. For herbs, start in spring; for flowers, fall planting can yield vibrant blooms next year.
How often should I water a trough garden bed?
Watering frequency depends on your climate, but generally, troughs dry out faster than ground beds. Aim to water every 2–3 days in hot weather and reduce to every 5–7 days in cooler months. Check soil moisture by sticking your finger 1–2 inches deep—if it’s dry, it’s time to water. Drip irrigation or self-watering troughs can simplify maintenance!
Can I use a trough garden bed for vegetables instead of herbs or flowers?
Troughs work great for shallow-rooted veggies like lettuce, spinach, radishes, and green onions. Just ensure the trough is at least 6–8 inches deep and use a high-quality potting mix. Avoid heavy feeders like tomatoes or squash—they need deeper roots and more space. For best results, opt for compact varieties!
How do I keep pests out of my trough garden bed?
Pests love troughs because they’re elevated and easy to access. Prevent issues by:
- Using row covers or fine mesh to block flying insects.
- Planting pest-repelling herbs like basil or marigolds alongside your flowers.
- Inspecting plants regularly for aphids, slugs, or spider mites and treating early with neem oil or insecticidal soap.
- Avoiding overwatering, which attracts slugs and fungus gnats.
What’s the easiest way to build a DIY trough garden bed on a budget?
Start with a wooden trough (cedar or redwood resists rot) or repurpose materials like:
- Old wooden wine barrels or feed troughs (sand and seal first!).
- Plastic kiddie pools or half-barrels (drill drainage holes!).
- Stacked cinder blocks or bricks lined with landscape fabric.
Wrapping up and next steps
Creating a trough garden bed is a rewarding way to bring rustic charm and lush greenery to your space—whether you're growing fragrant herbs or vibrant flowers! 🌿 With the right materials, a little creativity, and some elbow grease, you’ll have a functional, elevated planter that adds both beauty and utility to your garden.
The best part? It’s a project that adapts to any skill level, so don’t hesitate to roll up your sleeves and get started.
Ready to transform your outdoor area? Start small—pick a simple design or experiment with materials you already have. Once your trough is ready, share your progress or tag us in your garden photos—we’d love to see your green thumb in action! 🌸