Tools
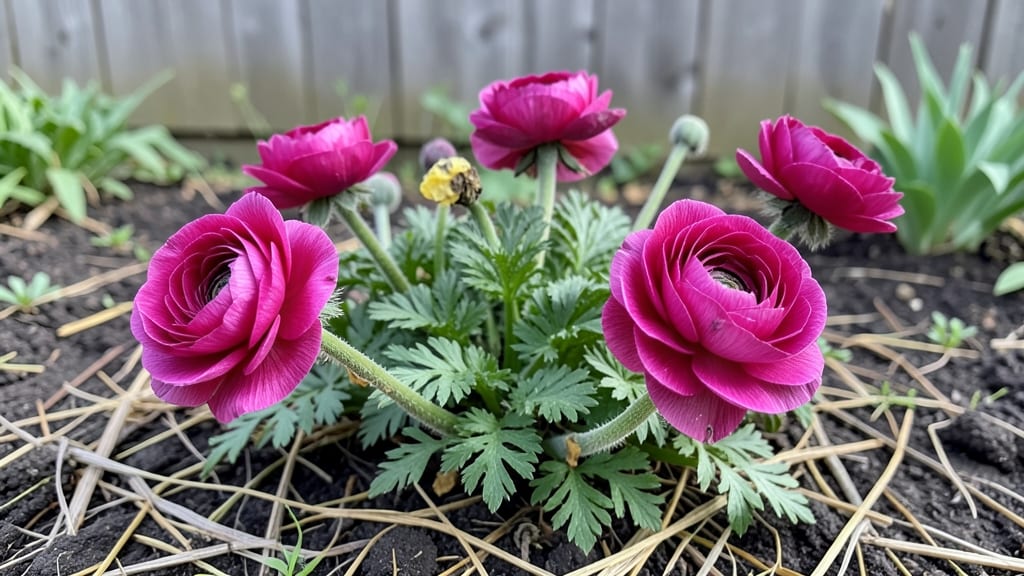
Ranunculus blooms in your garden will look like they came straight from a florist shop—layered petals in every color imaginable. 🌸 I’ve designed borders and containers where these velvety flowers steal the show, and once you see how they transform a space, you’ll never plant them just as cut flowers again.
The secret lies in their placement: full sun for maximum bloom, paired with low-growing companions like sweet alyssum or dusty miller to highlight their ruffled texture. In formal gardens, they create dramatic swaths of color; in cottage styles, they soften paths with their delicate layers.
Even in containers, they cascade like living bouquets—no arranging required.
You’ll end up with gardens that smell like spring (even in summer) and look like they belong in high-end photos. The key is timing: plant bulbs in fall for spring blooms, or choose summer varieties for continuous color.
These flowers don’t just fill space—they make every corner of your garden feel like a curated masterpiece.
Works for small urban plots, large cottage gardens, or even as a single statement container. Once you try them, you’ll wonder why you didn’t start sooner—your garden (and your neighbors) will thank you.
📚 In This Guide
- What you need
- Instructions
- Tips and common mistakes
- Wrapping up and next steps
What you need
- ● Ranunculus bulbs or seeds: Choose high-quality Ranunculus asiaticus or Ranunculus tricolor bulbs (or seeds if starting early). Aim for 50–100 bulbs for a full garden bed (adjust based on spacing).
- ● Well-draining potting mix: A blend of 50% garden soil, 30% perlite or sand, and 20% compost (ranunculus hates soggy roots!).
- ● Containers or garden bed: For containers: Pots 6–8 inches deep with drainage holes (use 3–5 bulbs per 6-inch pot).
- ● For in-ground planting: A sunny spot with 6+ hours of light and loose, fertile soil.
- ● Slow-release fertilizer: A balanced 10-10-10 or phosphorus-rich (5-10-10) formula to encourage blooming.
- ● Mulch: 2–3 inches of straw or shredded bark to retain moisture and regulate temperature.
- ● Garden trowel or bulb planter (for precise planting).
- ● Watering can with a fine rose nozzle (avoid overhead spraying to prevent fungal issues).
- ● Pruners or sharp scissors (for trimming spent blooms and shaping plants).
- ○ Gloves (optional but helpful for handling soil and bulbs).
- ○ pH testing kit (optional but recommended—ranunculus thrives in 6.0–7.0 pH).
- ● Planting time: Bulbs: Fall (8–10 weeks before last frost) or early spring (avoid extreme heat).
- ● Seeds: Start indoors 10–12 weeks before last frost (they need cold stratification to germinate).
- ● Patience: Ranunculus blooms take 8–12 weeks from planting to show off their papery petals!
- ● Deadheading: Snip spent blooms to encourage nonstop reblooming all season.
How to design a showstopping ranunculus garden
Here's how to create a lush display that brings florist-quality blooms to your yard—no green thumb required.
🌱 Step 1: Choose the Perfect Planting Location
Ranunculus crave full sun—at least 6 hours daily—but they also appreciate afternoon shade in hot climates. I always scout my yard first: the spot with the most sun but some afternoon relief from intense heat wins. Avoid low-lying areas where cold air settles in spring, as ranunculus are frost-sensitive.
Test your site for drainage by digging a 12-inch hole and filling it with water. If it drains within an hour, you're good; if not, amend the soil with 2-3 inches of compost to improve drainage. Ranunculus roots rot quickly in soggy soil, so this step prevents future heartache.
🪴 Step 2: Prepare the Soil for Optimal Growth
Loosen the soil to a depth of 12 inches with a garden fork, breaking up any compacted layers. Work in 2-3 inches of well-aged compost or a balanced 10-10-10 fertilizer to give your ranunculus a nutrient boost. I like to mix in a handful of bone meal for extra phosphorus, which encourages strong root development.
Ranunculus prefer slightly acidic to neutral soil (pH 6.0-7.0). Test your soil with a simple pH kit—if it's too alkaline, add sulfur to lower the pH gradually. Avoid fresh manure, as it can burn tender roots. Once amended, rake the surface smooth for a clean planting bed.
☀️ Step 3: Plant Bulbs at the Right Depth and Spacing
Ranunculus bulbs should go in 2-3 inches deep, with the pointed end facing up. Space them 3-4 inches apart in rows 6 inches apart for a full, layered look. I plant in clusters of 5-7 bulbs to create natural drifts that look like professional garden designs.
Water immediately after planting to settle the soil and remove air pockets around the bulbs. Mulch lightly with 1 inch of straw or shredded bark to retain moisture and suppress weeds. Avoid heavy mulch, which can smother emerging shoots. Keep the soil consistently moist until shoots appear—usually in 4-6 weeks.
💧 Step 4: Water and Fertilize for Vibrant Blooms
Once shoots emerge, water deeply once a week, aiming for 1 inch of water per week. Ranunculus wilt easily, so always water at the base rather than overhead to prevent fungal diseases. I set a timer to remind me—consistency is key.
When foliage reaches 3-4 inches tall, side-dress with a 5-10-10 fertilizer to encourage blooming. Repeat every 4-6 weeks during the growing season. Deadhead spent blooms regularly to prolong flowering and keep the garden looking tidy. Just pinch off the faded flowers with your fingers—no need for pruners.
✂️ Step 5: Maintain and Extend the Blooming Season
After the first flush of blooms, reduce watering slightly to let the foliage mature. This stores energy for next year’s flowers. When growth slows in late summer, cut back the foliage by half to tidy the garden. Ranunculus go dormant in fall, so stop fertilizing by mid-September.
In mild climates, ranunculus may rebloom in spring if left undisturbed. In colder areas, mulch heavily with 3-4 inches of straw to protect bulbs over winter. With proper care, your garden will reward you with 10-12 weeks of stunning blooms—far longer than cut flowers last in a vase!
Tips & tricks for perfect ranunculus garden design
A few simple strategies will help you transform your yard into a showstopping ranunculus display that rivals any florist arrangement.
Sunlight Strategy: Those 6 hours of daily sun are non-negotiable, but here's the thing: in hot climates, afternoon shade is just as important. I've seen ranunculus wilt dramatically when exposed to intense afternoon heat. Try planting near taller shrubs or trees that provide shade after 2 PM—this can extend your blooming season by weeks.
Soil Prep Secret: When amending with compost, don't just dump it in—mix it thoroughly with the existing soil down to that 12-inch depth. I use a garden fork to create "tunnels" in the soil, then add compost between them. This ensures even distribution of nutrients where the roots need them most. For clay-heavy soil, work in additional perlite or coarse sand to improve drainage.
Planting Layout Tip: Those clusters of 5-7 bulbs create natural drifts that look effortless. For a more dramatic effect, try planting in concentric circles with each ring slightly closer together. Start with a large circle of 12 bulbs, then add a smaller circle of 8 bulbs in the center. The layered effect creates depth that catches the eye immediately.
Watering Wisdom: The once-weekly watering guideline works best with consistent timing. I set my timer for 7 AM every Monday—this gives roots time to absorb moisture before the heat of the day. For container-grown ranunculus, water more frequently (every 3-4 days) since they dry out faster. Always check the top inch of soil before watering—if it's dry, it's time.
Pro Tips for Ranunculus In Garden
- A few simple strategies will help you transform your yard into a showstopping ranunculus display that rivals any florist arrangement.
- Sunlight Strategy: Those 6 hours of daily sun are non-negotiable, but here's the thing: in hot climates, afternoon shade is just as important.
- Soil Prep Secret: When amending with compost, don't just dump it in—mix it thoroughly with the existing soil down to that 12-inch depth.
Frequently asked questions
Got questions about growing and styling ranunculus in your garden? You're not alone! Here are answers to the most common inquiries—from planting tips to troubleshooting—to help you create a showstopping display.
When is the best time to plant ranunculus?
Plant ranunculus bulbs in early fall (8-10 weeks before your first frost) for spring blooms. If you miss that window, try planting in late winter (just as the ground thaws) for a slightly delayed but still stunning display. Avoid planting in hot summer months—they need cool soil to establish roots!
How often should I water ranunculus?
Keep the soil consistently moist but not soggy during the growing season. Water deeply 1-2 times per week, adjusting for rainfall. Once blooms appear, reduce watering slightly to prolong their life. Pro tip: Mulch around the base to retain moisture and prevent weeds!
Why aren’t my ranunculus blooming?
Blooms may skip if bulbs aren’t planted deep enough (3-4 inches), lack sunlight (full sun is ideal), or receive inconsistent water. Check for pests like slugs or aphids, which can stress plants. If your bulbs are old, they may need replacing—ranunculus often thrive best with fresh stock!
Can I grow ranunculus in containers?
Ranunculus thrives in well-draining containers (10+ inches deep) with a mix of potting soil and perlite. Choose pots with drainage holes and place them in a sunny spot. Just ensure they’re large enough to accommodate the bulb’s spread—crowding can stunt growth. Bonus: Container-grown ranunculus makes stunning cut flowers!
What’s the best way to deadhead ranunculus?
Snip spent blooms just above the first set of leaves with clean shears to encourage more flowers. Avoid pulling stems by hand—it can damage the plant. Deadheading also keeps your garden looking tidy and extends the blooming season. Pro tip: Use the cut blooms in vases for a fresh, long-lasting bouquet!
Wrapping up and next steps
Transforming your garden into a ranunculus paradise is easier—and more rewarding—than you think! These delicate blooms bring florist-worthy elegance to any outdoor space, whether you’re a seasoned gardener or just starting out.
With the right soil, sunlight, and a little TLC, you’ll soon be enjoying vibrant, long-lasting flowers that rival any bouquet.
Ready to take the next step? Start small—plant a few ranunculus bulbs in a sunny spot and watch your garden bloom with confidence. Before you know it, you’ll be the neighbor everyone admires for their stunning, show-stopping displays! 🌸✨