Landscaping
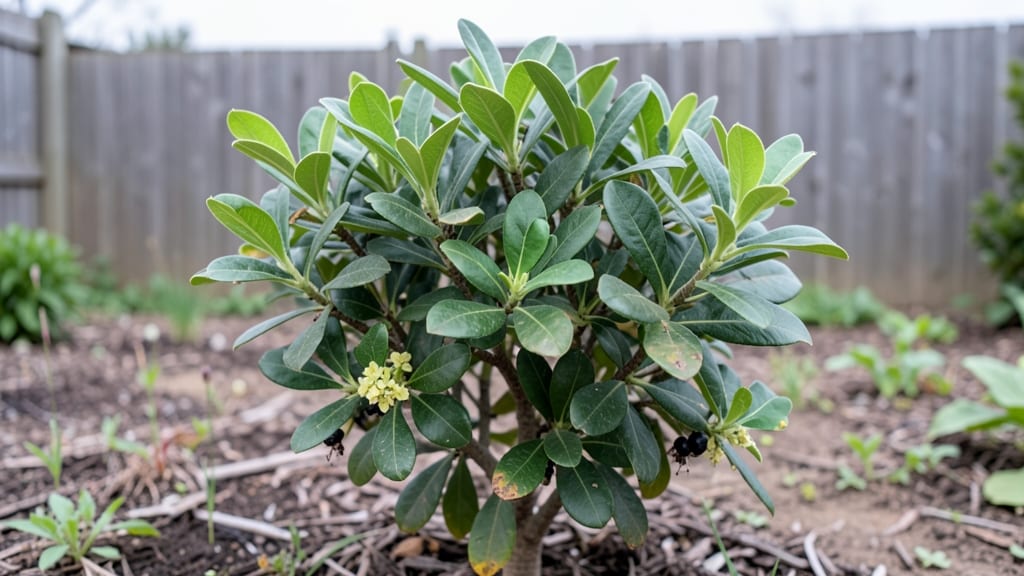
Laurel’s garden design transforms any space into a fragrant, ever-changing sanctuary that feels like a hug from nature. 🌿 I stumbled upon this approach after struggling with gardens that looked great for two weeks—then faded into boring green.
The secret? Layering perennials that bloom at different times, all with intoxicating scents and minimal fuss.
Start with laurel as your backbone—its glossy leaves and sturdy structure create instant drama. Pair it with lavender for purple spikes in summer, Russian sage for blue haze in fall, and hellebores for early spring blooms.
The fragrance alone makes it worth it: crushed lavender, woody laurel, and sweet hellebore all mingling in the breeze. This combo works in sun or shade, and once established, it thrives with almost no maintenance.
You’ll end up with a garden that looks lush in every season, even when nothing else is blooming. The colors shift naturally—pinks in spring, purples in summer, golds in fall—while the scent keeps visitors lingering. Best of all, you’ll spend less time weeding and more time enjoying the view.
Perfect for small yards, large backyards, or even container gardens on patios. The design adapts to any space while keeping that effortless, fragrant charm. Let’s bring Laurel’s magic to your garden!
📚 In This Guide
- What you need
- Instructions
- Tips and common mistakes
- Wrapping up and next steps
What you need
- ● Perennials (pre-planted or seeds): 10–20 Lavender plants (dwarf varieties like 'Hidcote' or 'Munstead')
- ● 8–12 Russian Sage ('Blue Mist' or 'May Night')
- ● 6–10 Coneflower ('Magnus' or 'White Swan')
- ● 5–8 Salvia ('May Night' or 'Indigo Spires')
- ● 4–6 Catmint ('Walker’s Low' or 'Blue Horizon')
- ● 3–5 Ornamental Grasses ('Karl Foerster' or 'Little Bluestem')
- ● Soil Amendments: 50 lbs. Compost (for enriching soil)
- ● 20 lbs. Perlite or sand (for drainage, if soil is heavy clay)
- ● Mulch: 2–3 bags Organic mulch (cedar or pine, 3–4 inches thick)
- ● Basic Tools: 1 Garden trowel (for planting)
- ● 1 Pruning shears (sharp, for shaping)
- ● 1 Garden fork (for aerating soil)
- ● 1 Wheelbarrow (for hauling materials)
- ● 1 Measuring tape (for layout)
- ○ Optional (But Helpful): 1 Garden hose with spray nozzle (for watering)
- ● 1 Soil pH tester (to ensure optimal conditions)
- ● 1 Knee pad (for comfort during planting)
- ● 1 Garden gloves (to protect your hands)
- ● ✅ Sunlight: A spot with full sun (6+ hours/day) or partial shade (4–6 hours).
- ● ✅ Drainage: Ensure your soil drains well—avoid waterlogged areas!
- ● ✅ Space: Plan for 3–5 feet between plants (adjust based on mature size).
- ● ✅ Water Access: A nearby spigot or hose makes maintenance a breeze.
- ● 💡 Pro Tip: Test your soil’s pH (aim for 6.0–7.0)—many of these perennials thrive in slightly alkaline conditions!
How to create a fragrant, low-maintenance perennial garden like Laurel’s
This design delivers year-round beauty with minimal effort—perfect for busy gardeners.
🌿 Step 1: Plan Your Seasonal Color Layers
Start by sketching a simple layout with four distinct layers: tall backdrops, mid-height perennials, ground covers, and fragrant accents. I always begin with the tallest plants—like lavender or Russian sage—along the back or edges to frame the space. These create structure and draw the eye upward while providing height for seasonal interest.
Next, add mid-height perennials like catmint or salvia that bloom from early summer through fall. Their airy foliage and vibrant colors fill gaps left by early bloomers. For ground cover, I choose creeping thyme or ajuga—both spread easily and suppress weeds while adding texture. Finally, tuck in fragrant plants like peony or dianthus near seating areas or pathways so their scents are noticeable when brushed against.
☀️ Step 2: Select Plants for Sun Exposure and Soil Conditions
Laurel’s design thrives in full sun to partial shade, so group plants by their light needs. For sunny spots, lavender, rosemary, and black-eyed Susan flourish with 6+ hours of direct sunlight. In partial shade, heuchera and astilbe add lush foliage and delicate blooms without demanding constant care. Always check your site’s sunlight patterns before planting—morning sun behaves differently than afternoon intensity.
Soil prep is key. Amend heavy clay with 2-3 inches of compost to improve drainage, and mix in sand if your soil stays soggy. I avoid fertilizers here—most perennials prefer lean soil. Instead, I top-dress with 1 inch of mulch after planting to retain moisture and regulate temperature. This one step cuts watering by half in the first year.
🪴 Step 3: Plant in Clusters for Maximum Impact
Group 3-5 plants of the same variety together to create bold drifts of color. For example, plant five lavender bushes in a 2-foot square instead of spacing them evenly. This mimics nature’s clusters and makes each plant’s fragrance stronger when brushed against. Space taller perennials 18-24 inches apart and shorter ones 12-18 inches apart—crowding too much leads to competition, while spacing too far wastes space.
Dig holes twice as wide as the root ball but no deeper. Place each plant so the top of the root ball sits level with the soil surface—burying too deep suffocates stems, while planting too high leaves roots exposed. Water deeply after planting to settle the soil and remove air pockets. I always add a slow-release fertilizer at this stage to give roots a nutrient boost without encouraging leafy growth over blooms.
⏰ Step 4: Maintain with Seasonal Pruning and Mulching
Deadhead spent blooms weekly during the growing season to encourage continuous flowering. For perennials like peony or shasta daisy, cut back foliage to the ground in late fall after it turns brown—this prevents disease and keeps plants tidy. In early spring, remove any dead stems but leave last year’s foliage until new growth appears; it insulates roots and attracts beneficial insects.
Replenish 1-2 inches of mulch annually in early spring to suppress weeds and retain moisture. I use wood chips because they break down slowly and improve soil structure over time. Avoid piling mulch against stems—keep it 2 inches away to prevent rot. Water deeply once a week in dry spells, aiming for 1 inch of water per week. Drip irrigation works best here to deliver moisture directly to roots without wetting foliage.
🌱 Step 5: Extend the Season with Fragrant Accents
Add scented perennials like Russian sage or anise hyssop near seating areas or walkways. Their fragrance intensifies when brushed against, creating a sensory experience. I also interplant bulbs like allium or daffodil for early spring color before perennials leaf out. These layers ensure your garden has something blooming—and smelling—from April through October with almost no effort.
Finally, let some stems stand into winter for texture and interest. Seed heads of black-eyed Susan or cone flowers provide food for birds and a rustic charm. If you must clean up, do it in late winter just before new growth appears. This design isn’t just pretty—it’s a low-stress, high-reward way to enjoy gardening all season long.
Tips & tricks for perfecting Laurel's low-maintenance perennial garden
Creating a fragrant, year-round garden doesn't have to be complicated—here's how to make Laurel's design even easier and more effective.
Layering Like a Pro: In Step 1, when planning your seasonal color layers, think of it like building a cake—each layer builds on the last. Start with your tallest plants (like lavender or Russian sage) as the foundation, then work your way down to ground covers. This creates natural height variation and prevents any one plant from overwhelming the others. I like to sketch a quick bird's-eye view first to visualize how the layers will interact throughout the seasons.
Sunlight Strategy: Step 2's sun exposure guidelines are critical, but here's the trick: observe your garden at different times of day. Morning sun is gentler than afternoon heat, so if you have a spot that gets intense afternoon rays, opt for heat-tolerant plants like black-eyed Susan or catmint. I always test my sunny spots for a full week before planting to map out the real conditions—what looks like full sun in spring might be partial shade in summer.
Planting Precision: When you're planting in clusters during Step 3, don't just eyeball those 18-24 inch spacings. Use a simple string and stakes method to create straight lines between plants—this ensures consistent spacing and a professional look. For the root ball placement, I press my finger into the soil around the edges to check the depth after planting. The soil should feel firmly packed but not compressed, and the root ball should sit just below soil level, not buried or exposed.
Fragrance Focus: For Step 5's fragrant accents, place your most aromatic plants where they'll get the most interaction—near seating areas, pathways, or entry points. I like to create "scent trails" by planting fragrant perennials along garden paths so visitors experience a gradual sensory journey. And here's a secret: brush against the foliage occasionally during the growing season to release more fragrance and keep plants bushier.
Pro Tips for Laurel'S Garden Design
- Creating a fragrant, year-round garden doesn't have to be complicated—here's how to make Laurel's design even easier and more effective.
- Layering Like a Pro: In Step 1, when planning your seasonal color layers, think of it like building a cake—each layer builds on the last.
- Sunlight Strategy: Step 2's sun exposure guidelines are critical, but here's the trick: observe your garden at different times of day.
Frequently asked questions
Got questions about creating a stunning, low-maintenance garden with Laurel's Garden Design? You’re not alone! Here are some of the most common inquiries—and their answers—to help you get started with confidence.
What’s the best time of year to plant these perennials?
For most fragrant, low-maintenance perennials, early spring or early fall are ideal. This gives roots time to establish before extreme heat or cold. Avoid planting in summer—high temps can stress young plants. Pro tip: Check your local frost dates for precise timing!
How much sunlight do these perennials really need?
It varies! Some, like lavender or Russian sage, thrive in full sun (6+ hours/day), while others (e.g., astilbes or lungwort) prefer partial shade (3–6 hours). Laurel’s designs often blend both for year-round interest. Always match plants to your garden’s light conditions for best results.
Do these plants need a lot of water once established?
Once settled, most of these perennials are drought-tolerant! Water deeply 1–2 times per week during the first growing season, then taper to weekly or bi-weekly in dry spells. Mulch helps retain moisture—just 2–3 inches of organic mulch works wonders.
What’s the easiest way to maintain this garden long-term?
Low-maintenance doesn’t mean no-maintenance! Focus on:
- Deadheading spent blooms to encourage reblooming.
- Dividing clumps every 3–4 years (spring or fall).
- Light pruning in late winter to shape and remove dead growth.
Can I mix these perennials with annuals for extra color?
Annuals like pansies, snapdragons, or salvias add pops of color and fill gaps. Just plant annuals after the last frost and replace them in fall. Laurel’s designs often pair perennials with seasonal blooms for a nonstop show.
What should I do if my plants look stressed or diseased?
Act fast! First, check for pests (aphids, spider mites) and treat with neem oil or insecticidal soap. For fungal issues (like powdery mildew), improve airflow and avoid overhead watering. If a plant is beyond saving, remove it immediately to prevent spread.
Wrapping up and next steps
Transforming your outdoor space into a fragrant, low-maintenance paradise with Laurel’s Garden Design is simpler—and more rewarding—than you think! 🌿 By blending seasonal perennials, you’ve unlocked year-round color, effortless care, and a sensory escape that blooms with every breeze.
Whether you’re a beginner or a seasoned gardener, this approach proves that beauty and simplicity go hand in hand.
Ready to breathe life into your garden? Start small—pick one fragrant perennial to test the magic, then expand your oasis one season at a time. Your future self (and your nose!) will thank you. Happy planting! 🌸