Tools
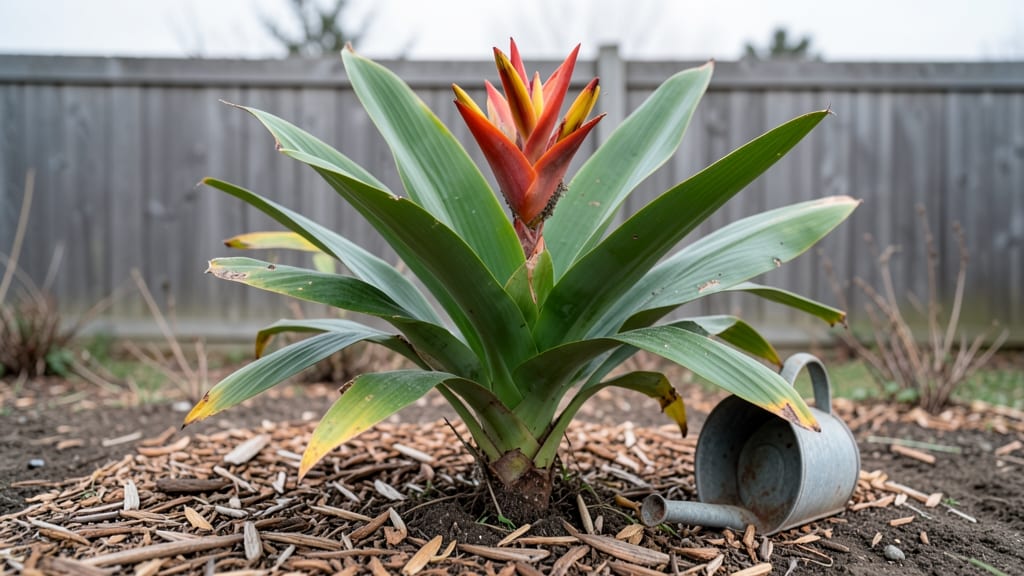
A tropical garden plan transforms any space into a sun-drenched escape where palms sway and ferns unfurl like nature’s own art. I designed my first one after a trip to Costa Rica—now my backyard feels like a hidden jungle, complete with velvety foliage and blooms that never quit.
The key isn’t just picking exotic plants; it’s layering them to create depth, from towering cannas to delicate orchids clinging to driftwood.
You’ll need a mix of sun-lovers and shade-dwellers, plus a few tricks to keep humidity high—like mulching with bark or adding a small water feature. My 10x12-foot plot thrives with just 30 minutes of weekly care, thanks to drought-tolerant picks like bird-of-paradise and low-maintenance calatheas.
Even urban balconies can pull this off with the right containers.
By summer’s end, you’ll have a garden so lush it feels like a vacation. The air hums with the scent of plumeria, and butterflies linger over heliconias.
Start small—maybe a single 5-gallon pot of a bird-of-paradise—and build from there. The best part? This isn’t just a garden; it’s a mood booster that works year-round.
Works in zones 9-11, but even cooler climates can adapt with winter protection. Let’s bring that jungle vibe to life—no green thumb required.
📚 In This Guide
- What you need
- Instructions
- Tips and common mistakes
- Wrapping up and next steps
What you need
- ● Soil: 5–10 bags (2–3 cubic feet each) of well-draining tropical mix (e.g., 60% peat moss, 20% perlite, 20% coconut coir).
- ● Plants: 15–25 mature tropical plants (mix of palm trees, ferns, hibiscus, bird-of-paradise, and bromeliads). Check local climate zones for hardiness.
- ● Mulch: 10–15 bags of organic mulch (pine bark or wood chips) to retain moisture and suppress weeds.
- ● Fertilizer: 1–2 bags of slow-release tropical fertilizer (10-10-10 or 8-3-9 NPK ratio).
- ● Watering System: Drip irrigation kit or soaker hoses (50–100 ft, depending on garden size).
- ● Hand Tools: 1 shovel
- ● 1 garden fork
- ● 1 pruning shears
- ● 1 pair of gloves (waterproof)
- ○ Power Tools (Optional but Helpful): 1 electric hedge trimmer (for shaping)
- ● 1 wheelbarrow (for hauling soil/mulch)
- ● Safety Gear: Sunscreen, hat, and knee pads (if kneeling frequently).
- ● Full-sun to partial-shade location (6+ hours of sunlight daily for most tropical plants).
- ● Access to a water source (hose or irrigation system).
- ● Local knowledge of frost-free zones (USDA Zone 10–12 ideal; adjust for containers if in colder climates).
- ○ Optional: Permits if modifying drainage or large-scale landscaping (check local regulations!).
Instructions for creating a thriving tropical garden plan
Bring that vibrant, ever-blooming tropical vibe home with this layered approach.
Plan Your Garden Layout in Layers
Start by sketching your space on paper, dividing it into three distinct layers: the canopy layer, the mid-story layer, and the understory layer. The canopy layer should be made up of tall plants like banana trees or coconut palms, which will provide shade and structure. Choose plants that reach at least 6-8 feet tall for this top layer. The mid-story layer should include medium-height plants like hibiscus or bird-of-paradise, which will fill in the space and add color. These plants should range between 3-6 feet tall. Finally, the understory layer should be filled with low-growing plants like ferns, calatheas, or bromeliads, which will thrive in the shade and add lush texture.
I like to place the tallest plants toward the back or edges of the garden bed to create a natural focal point. Arrange the mid-story plants slightly in front of the canopy layer, and fill the remaining space with the understory plants. This layered approach mimics the natural structure of a tropical forest, ensuring every plant gets the right amount of light and shade. Make sure to leave at least 18-24 inches of space between each plant to allow for growth and airflow.
Prepare the Soil for Tropical Plants
Tropical plants thrive in well-draining, nutrient-rich soil that retains moisture without becoming waterlogged. Start by removing any grass or weeds from the garden bed, then loosen the soil to a depth of 12 inches using a garden fork. This helps roots penetrate deeply and prevents compaction. Amend the soil with 3-4 inches of organic matter, such as compost or well-rotted manure, to improve fertility and drainage. Mix this thoroughly into the existing soil.
Tropical plants often prefer slightly acidic soil with a pH between 5.5 and 7.0. If your soil is heavy clay or very alkaline, consider adding 1-2 inches of peat moss or pine bark fines to adjust the pH and improve structure. Water the amended soil thoroughly after mixing to help settle everything in place. This preparation ensures your tropical plants have the ideal growing conditions right from the start.
Plant Your Tropical Layers
Begin planting with the tallest plants in your canopy layer. Dig a hole for each plant that is twice as wide as the root ball and just as deep. Gently remove the plant from its container and place it in the hole, ensuring the top of the root ball is level with the surrounding soil. Fill the hole with soil, pressing lightly around the base to eliminate air pockets. Water each newly planted canopy layer specimen deeply to help settle the soil and encourage root growth.
Next, move to the mid-story layer. Dig holes for these plants, following the same depth and width guidelines. Space them 18-24 inches apart to allow room for growth. After planting, add a 2-inch layer of mulch around each plant, keeping it 2-3 inches away from the stem to prevent rot. This mulch will help retain moisture and regulate soil temperature. Finally, plant the understory layer, spacing these plants 12-18 inches apart. Water the entire garden bed thoroughly after planting to ensure all roots are well-hydrated.
Maintain Moisture and Humidity
Tropical plants love humidity and consistent moisture, so aim to keep the soil evenly damp but not soggy. Water deeply 2-3 times per week, depending on your climate and the specific needs of your plants. Early morning is the best time to water, as it allows foliage to dry out during the day, reducing the risk of fungal diseases. Use a drip irrigation system or soaker hose to deliver water slowly and evenly to the root zone, avoiding wetting the leaves whenever possible.
To boost humidity, especially in dry or indoor settings, place trays filled with pebbles and water near your plants. As the water evaporates, it creates a microclimate of higher humidity around the plants. Mist the foliage lightly in the evening, but avoid doing this in direct sunlight, as it can cause leaf burn. Grouping plants together also helps create a more humid environment naturally. Monitor your plants regularly—wilting or yellowing leaves often signal a need for more water or humidity.
Fertilize and Prune for Continuous Blooms
Feed your tropical garden with a balanced, slow-release fertilizer every 4-6 weeks during the growing season to encourage lush growth and vibrant blooms. Choose a fertilizer with an NPK ratio like 10-10-10 or 20-20-20, and follow the package instructions for application rates. In addition to regular feeding, apply a layer of compost around the base of plants once a month to replenish nutrients naturally. This approach keeps your garden thriving without overloading the soil with chemicals.
Prune your tropical plants regularly to encourage bushier growth and remove any dead or diseased foliage. Trim back leggy stems or overgrown branches to maintain the plant’s shape and improve airflow. For flowering plants like hibiscus or bird-of-paradise, deadhead spent blooms to redirect the plant’s energy into producing new flowers. Prune in the early morning when plants are well-hydrated, and use clean, sharp pruners to make clean cuts. This practice keeps your garden looking its best and promotes continuous blooming.
Tips & tricks for perfect tropical garden layers
Creating a thriving tropical garden isn't just about planting—it's about mimicking nature's perfect balance. Here are the secrets I've learned to make your layered garden truly flourish.
Layering Like a Pro: When arranging your plants in Step 1, think of your garden as a forest floor. The canopy layer should receive the most sunlight, while the understory plants will thrive in the filtered light below. I always place my tallest plants—like banana trees or coconut palms—toward the back or edges to create that natural focal point. This arrangement prevents overcrowding and ensures each plant gets the right amount of light for optimal growth.
Soil Secrets for Tropical Thrivers: In Step 2, the key is creating that perfect balance of drainage and moisture retention. After loosening the soil to 12 inches, I like to add a mix of compost and well-rotted manure—this gives you that nutrient-rich foundation tropical plants crave. For heavy clay soils, I've found that adding 1-2 inches of peat moss makes a world of difference in improving both drainage and root penetration. Always water thoroughly after amending to help everything settle properly.
Planting Precision: The hole you dig for each plant in Step 3 should be twice as wide as the root ball, but no deeper. This prevents burying the plant too deeply, which can cause rot. I've made the mistake of planting too deep before, and it took months for the plants to recover. When backfilling, press gently around the base to eliminate air pockets—this helps the roots establish contact with the soil immediately. Don't forget to water deeply after planting to help settle the soil and encourage root growth.
Maintenance Magic: The 2-3 times weekly watering in Step 4 is crucial, but timing matters just as much. Early morning watering gives foliage time to dry during the day, preventing fungal issues. I've found that using a drip irrigation system delivers water right to the root zone without wetting leaves, which is especially important in humid tropical climates. For indoor gardens, those pebble trays create a mini humid microclimate that makes all the difference for plants like ferns and bromeliads.
Pro Tips for Tropical Garden Plan
- Creating a thriving tropical garden isn't just about planting—it's about mimicking nature's perfect balance.
- Layering Like a Pro: When arranging your plants in Step 1, think of your garden as a forest floor.
- Soil Secrets for Tropical Thrivers: In Step 2, the key is creating that perfect balance of drainage and moisture retention.
Frequently asked questions
Got questions about creating your dream tropical garden?
Here are answers to the most common ones to help you plan with confidence!
What’s the best time of year to start a tropical garden plan?
For most tropical plants, spring or early summer is ideal—when soil warms up and rainfall increases. However, if you’re in a warm climate (like Florida or Hawaii), you can plant year-round! Just avoid extreme heat or frost. Pro tip: Start with hardy tropicals like heliconias or gingers if planting outside peak seasons.
How much water do tropical plants really need?
Tropical plants thrive with consistent moisture, but overwatering is a common mistake! Aim for 1–2 inches of water per week, adjusting for rain. Use well-draining soil and mulch to retain humidity. Signs of underwatering: drooping leaves; overwatering: yellowing or mushy stems. Tip: Drip irrigation or soaker hoses work best for deep, even watering.
Can I mix tropical plants with other types (like succulents or perennials)?
Yes, but strategically! Tropicals love shade and humidity, while succulents need full sun and dry soil. Try layering shade-tolerant tropicals (e.g., ferns, calatheas) under taller plants like palms, then add drought-resistant perennials at the edges. Key: Group plants with similar water needs together to simplify care.
What pests should I watch for in a tropical garden?
Common tropical pests include aphids, spider mites, and snails. Preventative care: Prune for airflow, use neem oil for insects, and set out beer traps for slugs. Quick fix: Spray plants with water daily to deter mites. Monitor new leaves—sticky residue or holes mean pests are likely visiting!
How do I keep my tropical garden lush in a hot, dry climate?
Even in arid areas, you can create a tropical oasis! Use shade cloth, windbreaks, and windmills for misting to boost humidity. Opt for drought-tolerant tropicals like bird-of-paradise, agave, or bougainvillea. Pro move: Mulch heavily with wood chips to lock in moisture and add a small water feature (even a shallow dish) to increase local humidity.
Wrapping up and next steps
Creating a tropical garden plan that thrives year-round is all about embracing nature’s vibrancy with intentional layers and care.
Whether you’re a seasoned gardener or just starting, the key is to start small, stay consistent, and let your passion grow—literally! 🌿 With the right plants, soil, and a little creativity, you’ll soon have a lush oasis that feels like a tropical escape.
Ready to dive in? Take the next step:
- Sketch your space and pick your first 3-5 plants based on your climate.
- Gather your tools and get your hands dirty—the magic happens in the doing!
- Join a local gardening group or online community for tips and inspiration.