
Landscaping
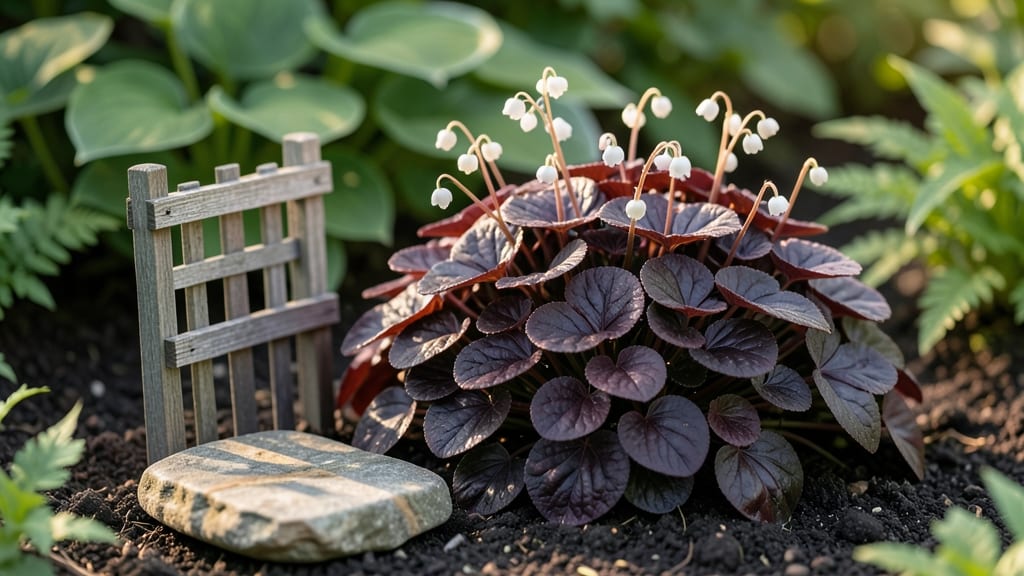
Even with small garden landscaping, turning your tiny outdoor space into a lush, functional retreat is easier than you think. Small garden landscaping proves that beauty thrives in even the tightest corners—my 6-by-8-foot patio now feels like a serene escape thanks to vertical layers and smart plant choices.
The key isn't sacrificing style; it's working with what you've got, whether that's a balcony, side yard, or postage-stamp backyard.
Start with vertical elements like trellises or wall-mounted planters to reclaim wall space for greenery. Mix in dwarf varieties of shrubs and perennials that stay compact but pack a punch, and use mulch to define paths without stealing square footage.
I swapped out bulky furniture for sleek, multi-functional pieces—like a bench with built-in storage—that keep the space usable while adding charm. Even a $20 trip to the nursery can yield big results with the right combinations.
By summer's end, you'll have a space that feels intentional, not cramped—think fragrant lavender spilling over edges, tiny tomatoes climbing a lattice, and cozy seating tucked into every nook.
The best part? Every inch works harder, so you get more impact from less space. Let's make that small plot sing without breaking the bank.
This approach works for urban balconies, suburban side yards, or even community garden plots. The principles scale down to window boxes or up to courtyard-sized spaces. Here's how to make it happen without the overwhelm.
📚 In This Guide
- What you need
- Instructions
- Tips and common mistakes
- Wrapping up and next steps
What you need
- ● Hand trowel (small, 6-inch) – For planting and digging in tight spaces.
- ● Pruners (bypass or anvil type) – Keep plants trimmed and tidy.
- ● Garden shears – Perfect for shaping hedges or trimming ornamental grasses.
- ● Measuring tape (10-25 ft) – Ensures precise spacing for plants and hardscapes.
- ● Wheelbarrow or bucket – Haul soil, mulch, or tools effortlessly.
- ● Garden hose with spray nozzle – Essential for watering and cleaning.
- ○ Level (optional but helpful) – Ensures even surfaces for pathways or raised beds.
- ● Potting soil or garden soil (1-2 bags, 2-3 cubic feet each) – Depends on the size of your garden.
- ○ Mulch (optional) – Shredded bark, gravel, or rubber mulch (1-2 bags) to retain moisture and suppress weeds.
- ○ Fertilizer (optional) – Slow-release granules or liquid feed for nutrient boosts.
- ● Plants (choose space-saving varieties!) – Examples: Succulents or dwarf shrubs (e.g., Dwarf Boxwood or Sedum).
- ● Vertical climbers (e.g., Clematis or Ivy).
- ● Herbs (e.g., Thyme, Rosemary, or Mint in containers).
- ○ Container pots or raised beds (optional) – Choose lightweight options like ceramic or plastic (1-4, depending on your layout).
- ○ Trellis or wall-mounted planters (optional) – Maximizes vertical space (1-2 units).
- ○ Gravel or pavers (optional) – For pathways or borders (quantity depends on area).
- ○ Solar-powered lights (optional) – Adds ambiance without wiring hassles (2-4 lights).
- ○ Decorative stones or pebbles (optional) – Enhances aesthetics in dry gardens.
- ● 🌿 Prioritize multi-functional plants – Choose plants that offer color, fragrance, and attract pollinators (e.g., lavender or marigolds).
- ● 🔨 Rent tools if needed – Heavy-duty equipment like a rototiller or wheelbarrow can often be rented for a day.
- ● 📏 Measure twice, plant once – Sketch your layout first to avoid overcrowding.
Instructions for small garden landscaping
Transforming a compact space into a lush, functional garden starts with smart planning and strategic placement.
Define Zones Based on Function
Begin by sketching your garden layout on paper, dividing it into distinct zones for seating, planting, and pathways. I like to prioritize the focal point—whether it's a small patio, a cozy nook, or a vertical garden—then build around it. For example, place seating areas where you'll spend the most time, like near a south-facing wall for afternoon sun. Keep pathways clear and wide enough for wheelbarrows or gardening tools, aiming for at least 2 feet between plants and walkways.
Use the 4-foot rule for height: taller plants like shrubs or small trees should go at the back or edges of the space, while medium-height plants like perennials fill the middle, and low-growing ground covers or annuals line the front. This creates depth visually, making the space feel larger. If your garden gets partial shade, group shade-tolerant plants together to simplify care.
Choose Multi-Functional Plants and Structures
Select plants that serve multiple purposes, like edible flowers that attract pollinators or climbing vines that provide shade for seating areas. I often incorporate dwarf varieties of trees or shrubs, such as Japanese maples or ornamental grasses, which stay compact but add structure. Vertical gardening is a game-changer for small spaces—use trellises, wall-mounted planters, or hanging baskets to grow herbs, flowers, or even small vegetables like cherry tomatoes.
For seating, opt for built-in benches with storage underneath or foldable chairs that can be tucked away when not in use. A small table made from reclaimed wood or a repurposed door adds functionality without clutter. If space is extremely tight, consider a wall-mounted planter bench that doubles as seating and growing space. This approach keeps everything accessible while maximizing every square foot.
Use Light Colors and Reflective Surfaces
Light-colored paving, gravel, or mulch makes a small garden feel more open and airy. I prefer light gray or beige materials for pathways and borders, as they reflect sunlight and create the illusion of more space. Add reflective elements like a small mirror or a glossy ceramic vase to bounce light around the garden. Even a polished stone or a metallic planter can enhance brightness and make the area feel larger.
Avoid dark colors for large surfaces, as they absorb heat and can make the space feel smaller. Instead, use dark hues in small doses—like a dark green shrub or a deep red pot—to add contrast and visual interest. If you love color, incorporate it through plants and accessories rather than large structural elements. For example, a bright red bird feeder or a yellow-painted trellis adds pops of color without overwhelming the space.
Layer Textures and Heights for Visual Interest
Mix different textures—smooth stones, rough bark, feathery grasses, and glossy leaves—to create depth and draw the eye upward. I often combine smooth river rocks along pathways with soft moss or ground covers in planting beds. Add height with tiered planters, stacked stones, or a small tiered fountain. Even a simple wooden ladder leaned against a fence can serve as a vertical planter while adding a rustic touch.
Incorporate a variety of plant shapes, such as rounded shrubs, spiky ornamental grasses, and cascading vines, to keep the eye moving. For example, pair a boxwood shrub with a sedum that has trailing stems to create contrast. If your garden feels flat, add a single tall element like a bamboo stake or a small obelisk to create a focal point. This layering technique makes the space feel dynamic and intentional, even in a small footprint.
Keep Pathways and Entryways Clear
Design pathways that guide visitors through the garden without creating dead ends or cramped corners. I prefer curving pathways made of stepping stones or crushed gravel, as they feel more inviting and less restrictive than straight lines. Leave at least 18 inches of clearance around seating areas and planting beds so you can move around comfortably with tools or a wheelbarrow. If space is extremely limited, use narrow, winding paths that encourage exploration.
At the entryway, place a small bench, a decorative pot, or a wind chime to create a welcoming transition. Avoid cluttering the entrance with too many plants or decorations, as this can make the space feel smaller. Instead, use the entry as a preview of what’s inside—like a single striking plant or a piece of art that hints at the garden’s charm. Keep pathways well-maintained, removing weeds and debris regularly to ensure they remain functional and visually pleasing.
Tips & tricks for perfect small garden landscaping
Creating a stunning small garden isn't about having more space—it's about working with what you have. These practical tips will help you maximize every square foot while keeping your design functional and beautiful.
Prioritize the Focal Point: In Step 1, when you're sketching your layout, I can't stress enough how important it is to start with your focal point. This could be a small seating area, a vertical garden, or even a decorative planter. Place this centerpiece first, then arrange everything else to complement it. For example, if your focal point is a cozy nook, position seating near a south-facing wall for afternoon sun—this ensures you'll actually use the space. The 2-foot clearance around pathways mentioned in Step 1 becomes even more critical when working around a focal point to maintain accessibility.
Think Vertically: Step 2 highlights vertical gardening as a game-changer, and I couldn't agree more. When space is limited, think upward! Install wall-mounted planters for herbs or trailing flowers, or use trellises for climbing vines like jasmine or clematis. These not only save space but also add height and visual interest. For seating areas, consider a wall-mounted planter bench—it doubles as both seating and growing space, perfect for tiny gardens where every inch counts. Don't forget to utilize vertical space on fences or walls with hanging baskets or mounted shelves for plants.
Use the Illusion of Space: The light-colored materials and reflective surfaces mentioned in Step 3 are absolute game-changers for small gardens. I recommend going one step further by incorporating mirrors strategically. Place a small mirror near seating areas to reflect light and create the illusion of more space. Even a simple polished metal planter can add subtle reflectivity. For pathways, stick to light-colored gravel or stepping stones—this not only makes the space feel larger but also keeps it looking clean and well-maintained. Remember, the goal is to make your garden feel open and airy, not cramped.
Create Visual Layers: When implementing the layering technique from Step 4, consider adding a single tall element like a small obelisk or bamboo stake. This draws the eye upward and creates a sense of height in compact spaces. For texture contrast, pair smooth river rocks along pathways with soft moss or ground covers in planting beds—this combination adds depth without taking up extra space. And when choosing plants, think about their mature size. A dwarf variety of a shrub might look perfect now, but could outgrow its space in a few years. Always check plant tags for mature height and spread information before purchasing.
Pro Tips for Small Garden Landscaping
- Creating a stunning small garden isn't about having more space—it's about working with what you have.
- Prioritize the Focal Point: In Step 1, when you're sketching your layout, I can't stress enough how important it is to start with your focal point.
- Think Vertically: Step 2 highlights vertical gardening as a game-changer, and I couldn't agree more.
Frequently asked questions
Got questions about transforming your small garden into a stunning, functional space? You’re not alone! Here are some of the most common queries—and their straightforward answers—to help you get started with confidence.
What are the best plants for a small garden to save space?
Opt for compact varieties, vertical growers, and layered plants. Succulents, dwarf shrubs, and climbing vines (like jasmine or clematis) thrive in tight spaces. Herbs like thyme or oregano also work well in containers or along borders. Pro tip: Use potted plants for flexibility—rotate them seasonally to keep your garden dynamic!
How can I create the illusion of a larger garden in a small space?
Use light colors for borders and pathways to visually expand your space. Pro tip: Add mirrors or reflective surfaces, repeat plants in odd-numbered groupings, and keep furniture minimal. Vertical elements like trellises or wall-mounted planters draw the eye upward, creating depth.
When is the best time to start small garden landscaping?
Spring and early fall are ideal—soil is workable, and plants establish roots before extreme weather. Start small: Plan your layout in winter, then begin planting in spring. For container gardens, you can plant year-round in mild climates, but avoid frost-prone months.
What’s a budget-friendly way to landscape a small garden?
Repurpose materials like pallets for raised beds or gravel from construction sites as pathways. Shop discount nurseries or divide existing plants to propagate. Pro tip: DIY mulch from yard waste to suppress weeds and retain moisture—saves money and effort!
What do I do if my small garden design isn’t working?
Start by editing overcrowded areas—remove plants that outgrow their space. Swap out fussy plants for low-maintenance alternatives (e.g., hostas instead of ferns). Pro tip: Reassess lighting: Shady spots? Try ferns or astilbes. Sunny areas? Succulents or lavender thrive with minimal care.
Wrapping up and next steps
A small garden doesn’t mean sacrificing style or functionality—with the right space-saving designs, you can create a stunning, functional outdoor oasis that reflects your personality.
Whether you’re using vertical gardening, multi-purpose furniture, or clever lighting, the key is to think vertically, layer wisely, and prioritize what brings you joy. 🌿✨
Now that you’re armed with ideas and inspiration, it’s time to roll up your sleeves and start planning! Sketch a rough layout, gather your materials, and take it one step at a time.
Every great garden begins with a single shovel in the soil—your dream space is closer than you think!