
Tools
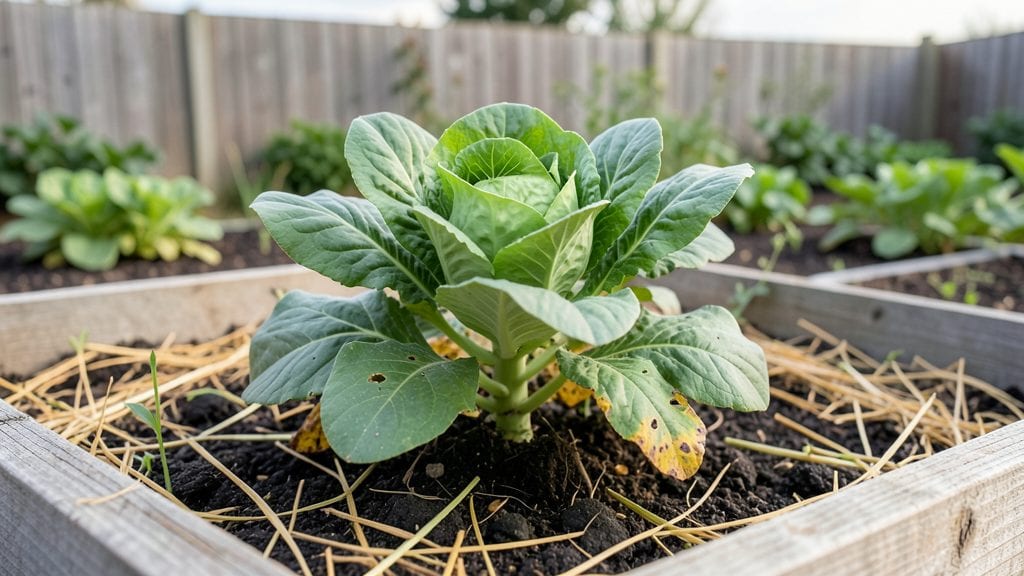
A mobile raised garden lets you grow more in less space by moving your plants to follow the sun—something I wish I’d tried years ago. 🌱 My first attempt was a simple wooden box on wheels, and it completely changed how I garden in my tiny backyard.
Instead of fighting for sunlight, I just roll the bed where it’s needed most.
The beauty of this system is how it adapts to any space—whether you’re a city renter with a balcony or a homeowner with a sliver of yard.
You can grow tall crops like tomatoes in morning sun and move them to shade by afternoon, or rotate beds to keep soil fresh. The key is keeping it lightweight so you’re not wrestling with a heavy planter every time you adjust it.
By summer’s end, you’ll have a harvest that outpaces what you’d get in static beds, all while saving your back from bending. The plants stay healthier, too, since you’re not compacting soil or competing with weeds.
Plus, it’s easier to protect crops from pests by simply moving them out of reach when needed.
Works for herbs, veggies, or even small fruits—just add wheels or casters to any raised bed frame. Perfect for small spaces, seasonal gardens, or anyone who wants to maximize every square foot without digging up their yard.
📚 In This Guide
- What you need
- Instructions
- Tips and common mistakes
- Wrapping up and next steps
What you need
- ● Raised Garden Bed: Wooden frames (cedar or redwood recommended for durability): 4 pieces, 2’–4’ long (adjust based on bed size).
- ● OR Pre-made raised garden kit (e.g., cedar, composite, or metal).
- ● Hardware: Galvanized screws or decking screws: 100+ pieces (2.5”–3” long).
- ○ Corner brackets (optional for extra stability): 4–8 pieces.
- ● Base & Mobility: Heavy-duty casters/wheels: 4 wheels (2 locking, 2 swivel).
- ● Wooden pallets or landscape timbers (for DIY base): 2–4 pieces.
- ● Liner & Drainage: Landscape fabric or hardware cloth: 1 piece (slightly larger than bed).
- ● Gravel or landscape stones: 5–10 lbs (for drainage layer).
- ● Soil & Amendments: High-quality potting mix or garden soil: ~2–4 cubic feet (depends on bed size).
- ● Compost or organic fertilizer: 1–2 bags (5–10 lbs).
- ● Paint or stain (weather-resistant): 1–2 quarts (for aesthetics + protection).
- ● Drip irrigation kit or soaker hoses: 1–2 rolls (for easy watering).
- ● Self-watering reservoir (e.g., fabric grow bags): 1–2 pieces.
- ● Herb or veggie starter plants: 3–6 plants (e.g., lettuce, tomatoes, basil).
Step-by-Step instructions for building your mobile raised garden
Here's how to create a sturdy, movable planter that maximizes your growing space.
🪴 Step 1: Choose and Prepare Your Base Materials
Start with a sturdy platform like a wooden pallet or a lightweight plastic bin—something with four sturdy sides and a flat bottom. I like to use cedar planks because they resist rot and insects naturally. Cut four 2-inch thick wooden boards to 12-inch lengths for the legs. These will elevate your garden, allowing airflow and easy movement.
Sand all edges smooth to prevent splinters. If using untreated wood, apply a non-toxic wood sealant to protect against moisture. For extra mobility, attach two small plastic wheels to the bottom corners of two opposite sides. This keeps the garden stable while allowing you to roll it easily.
☀️ Step 2: Assemble the Frame and Add Wheels
Construct a rectangular frame by screwing the four 12-inch legs to the corners of your base platform. Make sure the legs are plumb (check with a level) so your garden sits flat. If you're using wheels, attach them to the bottom of two legs on one side. I like to add a small lip to the inside of the frame to hold soil in place.
Test the stability by gently rocking the frame. If it wobbles, reinforce the corners with additional screws or corner brackets. Once secure, your mobile garden should feel sturdy enough to hold 20-30 pounds of soil without tipping.
🌱 Step 3: Fill with Quality Soil and Plant
Use the 3 cubic feet of potting mix you’ve prepared—mix it with 1 gallon of compost to boost nutrients. Fill the frame to about 1 inch below the rim, leaving room for watering. Press the soil down lightly to remove air pockets, but don’t compact it too tightly.
Plant your chosen vegetables or herbs, spacing them according to their mature size. For example, leafy greens like lettuce can go 6 inches apart, while tomatoes need 18 inches of space. Water gently after planting to settle the soil around the roots.
💧 Step 4: Water and Maintain for Optimal Growth
Water your mobile garden whenever the top 1 inch of soil feels dry. Since raised beds dry out faster, you’ll likely water every 2-3 days in warm weather. Move the garden to follow the sun—morning sun on one side, afternoon on the other—if you’re using it to extend your growing season.
Fertilize every 4-6 weeks with a balanced organic fertilizer to keep plants thriving. The mobility of this garden means you can easily rotate crops or move it to shadier spots if needed. Keep an eye out for pests—rolling the garden occasionally disrupts their life cycles.
✂️ Step 5: Harvest and Transition for Next Season
Harvest your crops as they mature, cutting or picking leaves and fruits carefully to avoid damaging the plant. When the growing season ends, remove any remaining plants and add a fresh layer of compost to replenish nutrients. Store the garden in a dry place if needed, or leave it outside with a protective cover.
Here’s the thing—this mobile garden isn’t just practical; it’s transformative. You’ll love how it lets you grow more in less space, and the ease of moving it means you can adapt to your garden’s needs year after year.
Tips & tricks for perfect mobile raised gardens
Building a mobile raised garden opens up a world of possibilities for urban gardeners and small-space enthusiasts. Here are the essential tips to make sure your project turns out sturdy, functional, and productive.
Material Selection: Cedar is my go-to for wood because it naturally resists rot and insects, but if you're on a budget, pressure-treated lumber works too. Just make sure to seal it with a non-toxic wood sealant to protect against moisture. For the 2-inch thick legs mentioned in Step 1, avoid pine—it warps more easily under the weight of soil and plants.
Stability is Key: When assembling your frame in Step 2, don't skip the level check! Uneven legs can cause your garden to wobble under the 20-30 pounds of soil it needs to hold. I reinforce corners with corner brackets for extra security, especially if you plan to move it frequently. A small lip inside the frame prevents soil spillage when you roll it around.
Soil Prep Matters: The 3 cubic feet of potting mix with 1 gallon of compost is a great start, but don't skip the gentle pressing down in Step 3. This removes air pockets so roots can establish properly without drying out. For extra drainage, consider adding a layer of perlite or vermiculite to the bottom before filling with soil.
Watering Wisdom: The instructions mention watering every 2-3 days, but timing depends on your climate. In hot weather, you might need to water twice daily. I like to water in the morning so plants have time to dry out before evening, which helps prevent fungal diseases. A drip irrigation system attached to the wheels makes this mobile garden even more convenient!
Pro Tips for Mobile Raised Garden
- Building a mobile raised garden opens up a world of possibilities for urban gardeners and small-space enthusiasts.
- Material Selection: Cedar is my go-to for wood because it naturally resists rot and insects, but if you're on a budget, pressure-treated lumber works too.
- Stability is Key: When assembling your frame in Step 2, don't skip the level check!
Frequently asked questions
Got questions about mobile raised gardens?
You’re not alone! Here are answers to the most common queries to help you get started with confidence.
What’s the best time of year to start a mobile raised garden?
A mobile raised garden can be started anytime you have warm soil and consistent sunlight—typically early spring (after the last frost) or late summer for a fall harvest. If you’re in a mild climate, you can even plant year-round! Just adjust your crop choices for seasonal conditions (e.g., leafy greens in cooler months, tomatoes in heat).
How do I move a mobile raised garden without damaging plants?
Move your garden on a dry, sunny day when soil is firm but not muddy. Use a dolley or wheelbarrow to glide it gently—avoid dragging to protect roots. Water plants lightly before moving to reduce stress, and reposition them every 2–3 weeks for even sunlight exposure. Pro tip: Label plants before moving so you don’t forget their locations!
Are mobile raised gardens more expensive than in-ground options?
Not necessarily! While initial costs (like planter boxes, wheels, or soil) may be higher, they’re space-efficient and reduce long-term expenses like mulch or irrigation. DIY kits (e.g., repurposed wood or cinder blocks) can cut costs further. Think of it as an investment in flexibility and yield—especially for small spaces!
Can I grow vegetables in a mobile raised garden year-round?
Year-round growing is possible in mild climates, but most regions need seasonal adjustments. Use row covers or cold frames in winter for frost-sensitive plants (like lettuce or spinach), and switch to warm-season crops (peppers, cucumbers) in summer. Rotate crops to avoid soil depletion, and consider heat-tolerant varieties if summers are scorching.
What should I do if my mobile garden’s wheels get stuck or wobble?
Stuck or wobbly wheels usually mean uneven weight distribution or dry soil. First, level the ground beneath the garden and check for debris. Add grease or silicone spray to wheels for smoother movement. If wobbling persists, reinforce the base with flat stones or a wooden pallet to stabilize it. Avoid overloading one side—distribute soil and plants evenly!
Are mobile raised gardens eco-friendly?
They reduce water waste (raised beds retain moisture better), minimize soil erosion, and let you compost in-place (no tilling needed). Plus, their mobility lets you follow the sun or avoid pests naturally. For extra sustainability, use untreated wood, recycled materials, or self-watering designs to cut resource use.
Wrapping up and next steps
A mobile raised garden is your ticket to growing fresh, vibrant produce—no matter how small your space! 🌱 Whether you’re a city dweller with a balcony or a homeowner with limited yard room, these space-saving planters make gardening accessible, customizable, and rewarding.
With the right materials and a little creativity, you’ll soon be harvesting homegrown veggies, herbs, and flowers with ease.
Ready to dive in? Start by sketching your garden design, gathering supplies, and assembling your first planter. Your green thumb is just a few steps away—happy planting! 🌿