Landscaping
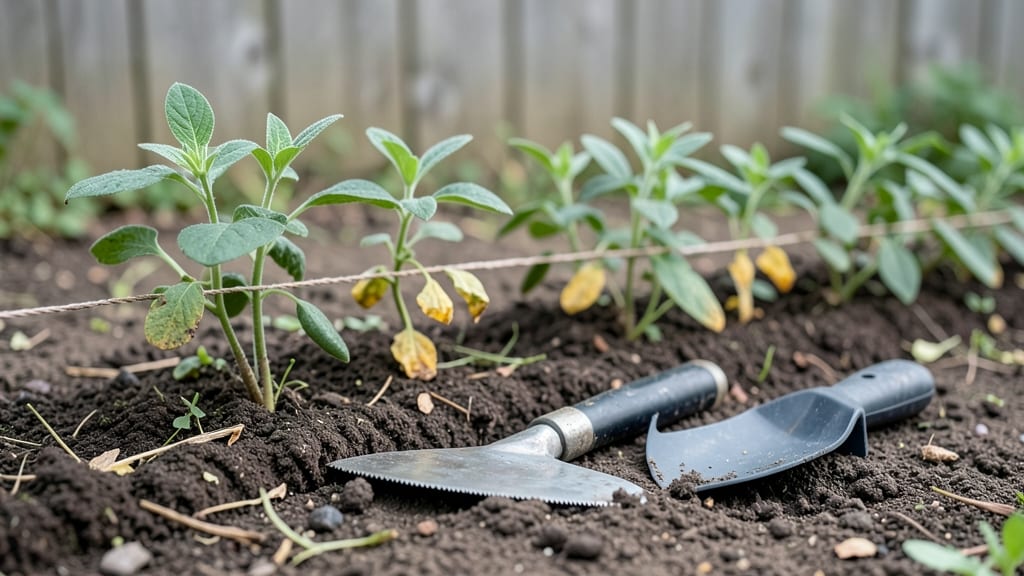
Precision cuts for crisp garden borders start with the right gardening edging tools—no more jagged lines or weed invasions ruining your hard work. 🌱 I’ve spent years wrestling with uneven edges, and the difference between a sloppy border and one that looks like it belongs in a magazine comes down to the tools you use.
The right edger transforms a messy transition between lawn and beds into a clean, professional finish that makes every other gardening effort look intentional.
A metal half-moon edger is my go-to for hard surfaces like concrete or packed soil, while plastic snap-edge tools work wonders for softer garden beds where you need flexibility.
For larger projects, a manual edger with a long handle lets you tackle straight lines without straining your back—just a few passes and your borders will look like they were installed by a pro. The best part?
These tools don’t just look good; they keep weeds from creeping into your flower beds, saving you hours of pulling later.
You’ll end up with edges so sharp they make your neighbors ask for your secret. The satisfaction of running your hand along a perfectly straight border—no rough spots, no wobbles—is unmatched.
Once you see how much cleaner your garden looks, you’ll never go back to hacking at edges with a shovel again. Let’s get those borders looking like they were designed by a landscape architect, not thrown together on a weekend.
Whether you’re working with a small herb spiral or a sprawling perennial border, the right tool makes all the difference. For rocky soil, a chisel-edged tool digs deeper; for delicate borders, a narrow plastic blade keeps things precise.
The key is matching the tool to the job—just like choosing the right shovel for digging. Start with one or two essentials, and you’ll wonder how you ever lived without them.
📚 In This Guide
- What you need
- Instructions
- Tips and common mistakes
- Wrapping up and next steps
What you need
- ● Edging Tool: Choose one based on your project: Handheld edging shears (for small gardens, soft curves) – 1-2 units
- ● Power edger (for large areas, straight lines) – 1 unit (battery or gas-powered)
- ● Half-moon edger (for tight spaces) – 1 unit
- ● Measuring Tape: 25-foot (for accuracy in marking borders)
- ● Spray Paint or Chalk: 1 can/bottle (to mark edging lines)
- ● Stakes & String: 10-15 stakes + 50-foot string (for guiding curves)
- ● Work Gloves: 1 pair (for protection)
- ● Knee Pads: 1 pair (for comfort during long projects)
- ● Rake or Hoe: 1 unit (for clearing debris before edging)
- ● Level or String Line: 1 unit (for perfectly straight edges)
- ● Edging Material: (if installing permanent borders) Metal, plastic, or stone edging strips – varies by project size
- ● Landscape fabric – 1 roll (to prevent weeds)
- ● Dust Mask: 1 unit (if cutting through rocky soil)
- ● Clear the area of weeds, rocks, and debris.
- ● Check soil moisture—dry soil is easier to cut than wet.
- ● Plan your design: sketch or visualize curves vs. straight lines.
How to use gardening edging tools for perfectly defined borders
Crisp, clean edges transform any garden—here’s how to achieve them with the right tools and technique.
🪴 Step 1: Choose the Right Edging Tool for Your Project
Not all edging tools work the same way, so pick based on your border type. For soft, flexible curves, a handheld edging shears (like the type used for lawns) glides effortlessly through grass or mulch. For hard, straight lines—think stone or brick borders—a sharp garden knife gives you precision cuts. If you're working with thick weeds or compacted soil, a vibrating edger saves time and elbow grease.
I always start by testing the tool on a small section. Run your hand along the edge afterward—if it feels rough or jagged, you’ll need to adjust your technique. For example, handheld shears work best in 1-2 inch passes for clean cuts, while knives require shallow, controlled strokes to avoid tearing the soil.
✂️ Step 2: Mark Your Border Line Precisely
Before making a single cut, mark your border line with stakes and string or a garden hose laid along the desired edge. This ensures consistency, especially for long or curved borders. I use wooden stakes every 3 feet and stretch the string taut—any sagging will throw off your cuts. For curves, bend the hose gently to follow your design.
Walk the line with your tool before cutting to visualize the result. If you’re edging around plants, leave a 1-2 inch buffer to avoid damaging roots. Press the tool lightly against the string or hose as your guide—this keeps cuts uniform and prevents wandering.
💧 Step 3: Cut with Control for Clean Edges
Start at one end of your marked line and work methodically to the other. For handheld shears, angle the blade slightly inward (about 15 degrees) to create a clean break. Apply gentle, even pressure—don’t force it, or you’ll tear the soil or bend the tool. If you hit resistance, lift slightly and adjust your angle before continuing.
For a garden knife, use short, controlled strokes (about ½ inch per cut) to avoid overworking the soil. Focus on vertical cuts for mulch or grass edges, and horizontal slices if you’re trimming excess soil from a raised bed. Stop every 5 feet to check your progress—this prevents fatigue and ensures accuracy.
☀️ Step 4: Refine and Smooth the Edges
After your initial pass, inspect the border for rough spots or uneven cuts. Use the flat side of your knife or a rubber-edged tool to smooth out jagged edges, especially around curves. For stubborn areas, like thick weeds or compacted soil, switch to a vibrating edger—it glides through resistance better than manual tools.
Run your fingers along the finished edge. If it feels bumpy or uneven, go over it again with lighter pressure. This step is where attention to detail pays off—crisp edges elevate the entire garden. For mulch beds, rake the edges gently to blend them seamlessly with the surrounding soil.
⏰ Step 5: Maintain Your Edges for Long-Lasting Results
Edging isn’t a one-time task. Revisit your borders every 4-6 weeks to touch up any overgrowth or shifting soil. I set a reminder in my gardening journal—this keeps borders looking sharp without becoming a chore. After rain or heavy watering, check for erosion and reinforce weak spots with a quick trim.
Store your tools in a dry place to prevent rust or dulling. A sharp garden knife or clean edging shears make the job easier and last longer. With regular maintenance, your borders will stay neat, defined, and professional all season long.
Tips & tricks for perfect garden edging
Here's what I've learned after years of perfecting garden borders—these tricks make all the difference between good and show-stopping results.
The Tool Angle Secret: In Step 3, when using handheld shears, that 15-degree inward angle isn't just a suggestion—it's what creates that clean, professional break. I learned this the hard way after making straight cuts that looked more like they were made with scissors than precision tools. For garden knives, keep the blade at a 45-degree angle for mulch beds to prevent tearing the soil fibers.
String Tension Tip: When marking your border line in Step 2, don't just eyeball that 3-foot stake spacing. Use a tape measure to ensure equal tension in the string—even a slight sag can throw off your entire border by ¼ inch or more. For curves, gently bend the hose to match your design, but don't stretch it too tight or it'll distort your shape when you cut.
Pressure Control: The difference between clean edges and torn soil comes down to pressure. In Step 3, apply just enough force to make the cut—think of it like writing with a pencil. Too hard and you'll rip the soil; too light and you'll struggle through compacted areas. For stubborn spots, lift slightly and adjust your angle rather than forcing the tool. This is especially important when working around established plants where you want that 1-2 inch buffer.
Maintenance Reminder: That 4-6 week maintenance schedule in Step 5 is non-negotiable if you want borders that stay crisp. I mark my gardening calendar with seasonal reminders because after rain or heavy watering, edges can shift dramatically. A quick 10-minute touch-up prevents the gradual creep that makes borders look unkempt. Store your tools with a drop of oil on the blades to prevent rust—dull tools are the fastest way to ruin your edges.
Pro Tips for Gardening Edging Tools
- Here's what I've learned after years of perfecting garden borders—these tricks make all the difference between good and show-stopping results.
- The Tool Angle Secret: In Step 3, when using handheld shears, that 15-degree inward angle isn't just a suggestion—it's what creates that clean, professional break.
- String Tension Tip: When marking your border line in Step 2, don't just eyeball that 3-foot stake spacing.
Frequently asked questions
Got questions about gardening edging tools? You’re not alone! Here are some of the most common concerns—and their straightforward answers—to help you tackle your project with confidence.
What’s the best time of year to install garden edging?
Spring or early fall are ideal! During these seasons, the ground is soft enough for easy installation, and you avoid extreme heat or frost. Avoid winter (frozen soil) or peak summer (dry, hard ground). If you’re working with plants, time it with their dormancy to minimize disruption.
Can I use edging tools for both metal and plastic edging?
Yes, but with a few tweaks! Most edging tools (like spades or edging shears) work for both, but plastic edging requires gentler cuts to avoid cracking. For metal, a sturdy tool like a landscaping spade or vibrating edger prevents bending. Always check the manufacturer’s guidelines for specific materials.
What’s the easiest DIY alternative to traditional edging tools?
Try a shovel or flat-nose spade for simple, straight lines! For curves, a garden knife or even a serrated knife (for precision) works in a pinch. Just be patient—hand tools take more elbow grease but save money.
Why does my edging keep shifting after installation?
Shifting often happens due to poor soil prep or lack of depth. Dig a trench at least 4–6 inches deep and tamp the soil firmly before setting edging. For heavy materials (like metal), use landscape staples or concrete anchors to secure it. Weeds or erosion can also cause movement—mulch heavily to stabilize the area.
Are expensive edging tools worth the investment?
It depends on your project size! For small gardens, basic tools like a handheld edger ($20–$50) suffice. If you’re tackling large areas or heavy-duty materials, a vibrating edger ($100+) saves time and effort. Rent one for occasional use to test before buying.
How do I remove old edging without damaging my lawn?
Start by prying up the edges with a flat shovel or edging tool, working at a shallow angle. For stubborn metal, a hacksaw or bolt cutters helps. Pull weeds first, then reseed or sod the disturbed areas to restore your lawn.
Wrapping up and next steps
Choosing the right gardening edging tools can transform your garden from cluttered to crisp and polished with just a few precise cuts! Whether you opt for classic aluminum edging, rustic stones, or sleek plastic borders, the key is selecting a tool that matches your project’s needs and your style.
With the right technique and a little patience, you’ll create clean, defined edges that elevate your outdoor space.
Ready to get started? Grab your favorite tool, roll up your sleeves, and turn your garden vision into reality! 🌿✨