Tools
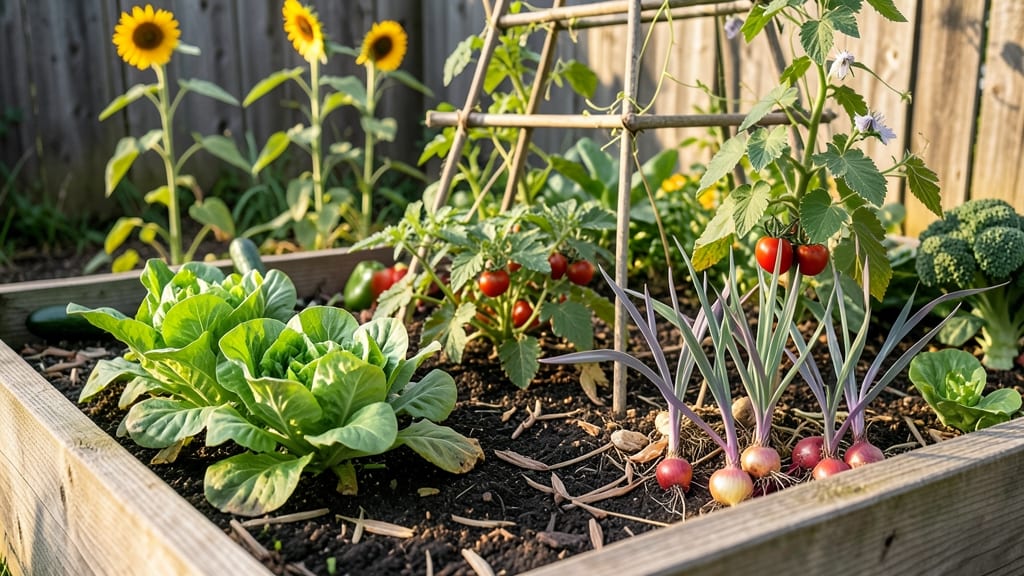
A campus community garden transforms empty spaces into thriving green hubs where students, faculty, and staff grow food together—no green thumb required. 🌱 I designed one for my university last year, and what started as a handful of raised beds became a year-round harvest hub with shared plots, teaching zones, and even a pollinator garden.
The best part? It brought people together in ways the cafeteria never could.
Start with accessibility first: place beds near pathways, ensure wheelchair-friendly access, and use perennial plants for low-maintenance greens like kale and chives. My garden’s 30-foot square layout included three raised beds for beginners, a shared plot for collaboration, and a demo area where students learned composting.
Water access is key—install a drip irrigation system to save time and effort, especially when volunteers are busy.
By mid-summer, we were harvesting tomatoes, peppers, and herbs—enough to donate to the campus food pantry. The real win? Watching freshmen turn into garden leaders by fall.
The garden’s seasonal rotation (cool-season greens in spring, heat-loving crops in summer) keeps it productive year-round, and the volunteer sign-up board ensures no one feels left out.
This works for any campus—urban or rural—because the focus is on people, not perfection. Need inspiration? Check out the University of Michigan’s student-run garden or UC Berkeley’s Edible Education Garden for layouts that scale.
Let’s turn your campus green space into a place where learning happens with every pulled weed and harvested tomato.
📚 In This Guide
- What you need
- Instructions
- Tips and common mistakes
- Wrapping up and next steps
What you need
- ● Soil & Compost: Topsoil (2–3 cubic yards per 100 sq. ft.)
- ● Compost or well-rotted manure (1–2 bags per 100 sq. ft.)
- ● Organic mulch (straw, wood chips, or leaves; 2–3 bags per 100 sq. ft.)
- ● Fencing & Borders: Temporary or permanent fencing (6–8 ft. tall, 50+ ft. per garden section)
- ● Wooden boards or bricks (for raised beds; 2x6 ft. planks or pavers)
- ● Watering Supplies: Hose with adjustable nozzle (50+ ft. length)
- ● Watering cans (2–4, for delicate plants)
- ○ Drip irrigation kit (optional but highly recommended for efficiency)
- ● Hand Tools: Garden trowel (2–3)
- ● Pruning shears (1–2)
- ● Rake (1–2, for soil prep and mulching)
- ● Garden gloves (5–10 pairs for shared use)
- ● Seeds & Plants: Native or cold-hardy seeds/plants (e.g., kale, spinach, carrots, lettuce)
- ● Perennials (e.g., asparagus, rhubarb, or fruit bushes for long-term yields)
- ● Wheelbarrow or garden cart (for hauling soil/compost)
- ● Soil pH test kit (to ensure optimal growing conditions)
- ● Trellises or stakes (for climbing plants like beans or cucumbers)
- ● Solar-powered lights (for evening access and safety)
- ● Signage (plant labels, harvest schedules, or donation bins)
- ● Tool shed or storage bin (to keep supplies organized)
- ● Approval from campus facilities/landscaping team (check zoning rules!)
- ● Volunteer sign-up sheet (to assign tasks and track participation)
- ● Funding or sponsorship (for bulk purchases or materials)
- ● Basic knowledge of gardening (or a willing mentor!)
Instructions: building a functional campus community garden layout
Here’s how to design a space that thrives year-round while keeping collaboration simple and sustainable.
🌱 Step 1: Map the Site and Divide Zones
Start by sketching the garden’s footprint, marking sun exposure patterns throughout the day. Use stakes and string to outline key areas: a central raised-bed section for high-yield crops like tomatoes and peppers, a low-maintenance ground-cover perimeter for herbs and greens, and a dedicated composting corner near water access. I always allocate 10% of the space to pathways—this prevents soil compaction from foot traffic and makes harvesting easier.
Check sunlight with a simple test: Place a white board in the space for a week and mark sun/shade patterns every few hours. This tells you exactly where to place sun-lovers (like 6+ hours of full sun) versus shade-tolerant plants (like 2-4 hours of morning sun). Label zones clearly with stakes—future gardeners will thank you when they don’t have to guess where to plant.
🪴 Step 2: Prepare Soil in Layers for Drainage and Fertility
Remove existing sod or weeds, then till the top 12 inches of soil to break up compaction. For raised beds, layer 6 inches of coarse wood chips at the bottom for drainage, followed by 4 inches of compost, then 8 inches of topsoil. Mix in 1 cup of bone meal per 10 square feet to boost phosphorus for root growth—this is especially critical for heavy harvests. I’ve found that adding 1 gallon of worm castings per bed further improves microbial activity, which keeps plants healthy without synthetic fertilizers.
Test soil pH with a kit (aim for 6.0–7.0 for most vegetables). If your soil is too acidic, sprinkle 1 pound of garden lime per 100 square feet and till it in. Avoid over-amending—too much lime or compost can burn roots. Water the beds deeply after amending to help nutrients settle into the soil profile.
☀️ Step 3: Install Drip Irrigation and Mulch for Low-Maintenance Care
Run ¼-inch tubing along bed edges, spacing emitters 12–18 inches apart to ensure even watering. Connect to a 50-gallon rain barrel (if available) or a hose with a timer set for 15–20 minutes, 2–3 times per week. This prevents overwatering, which is a common issue in shared gardens. Bury the tubing slightly to protect it from accidental damage during weeding.
Cover beds with 3 inches of straw mulch after planting to retain moisture and suppress weeds. Refresh mulch every 3–4 weeks or after heavy rain. I’ve seen gardens where mulch was skipped—weeds took over, and soil dried out too fast, making harvests inconsistent. Mulch also keeps soil temperatures stable, which is key for cool-season crops in spring and fall.
🌿 Step 4: Plant in Successive Waves for Continuous Harvests
Divide the garden into three planting sections: one for early spring crops (like spinach and peas), one for summer staples (tomatoes, cucumbers), and one for fall/winter greens (kale, carrots). Use biodegradable pots for seedlings to avoid transplant shock when moving them into the ground. Space plants according to their mature size—18 inches apart for bush beans, 24 inches for tomatoes, and 12 inches for leafy greens. This prevents overcrowding, which leads to disease.
Label each plant with stakes and tags (include variety and harvest date). I’ve seen gardens where labels faded or fell off, leading to confusion about what to harvest. For example, if you plant bush beans in early June, label them with their 90-day harvest window so volunteers know when to expect pods. Rotate plant families yearly to prevent soil-borne diseases—keep tomatoes, peppers, and eggplants in the same spot only every 3 years.
⏰ Step 5: Schedule Maintenance Days and Harvest Rotations
Assign weekly tasks to different groups: one team handles watering and weeding, another focuses on pruning and pest checks, and a third manages compost and tool storage. Use a shared digital calendar (like Google Sheets) to track tasks—this keeps everyone accountable without overloading any single person. For example, schedule deep watering on Mondays and harvesting on Fridays to create a rhythm.
Harvest 25% of ripe produce weekly to encourage more growth. For example, pick tomatoes when fully colored, beans when pods are firm, and greens when leaves reach 4–6 inches. Leave 2–3 inches of stem when cutting herbs to promote bushier regrowth. I’ve found that gardens with a “first-come, first-served” harvest policy reduce waste and keep volunteers engaged—they see immediate results from their efforts.
Tips & tricks for perfect campus community garden layout
Designing a thriving campus garden takes more than just digging in the dirt—it's about creating a system that works year-round while keeping volunteers engaged. Here are the insights that'll make your garden not just functional, but truly sustainable.
Sunlight Mapping Secret: That white board test in Step 1 isn't just about identifying sun exposure—it's about creating a visual reference for future gardeners. Take photos of your marked board and create a simple legend showing which zones get morning sun, afternoon sun, or full sun. I've seen gardens where volunteers would accidentally plant sun-loving tomatoes in the shade zone because there wasn't a clear reference. This visual guide becomes your garden's instruction manual, especially when new members join mid-season.
Soil Layering Strategy: When building those raised beds in Step 2, don't just layer materials—think about the long-term health of your soil. The 6 inches of wood chips at the bottom isn't just for drainage; it's creating a natural carbon source that will slowly break down and feed your soil. I recommend adding a layer of cardboard between the wood chips and compost to prevent weeds from growing up through your beds. This extra step might seem minor, but it saves hours of weeding later in the season.
Irrigation Efficiency Tip: That 15-20 minute watering schedule in Step 3 might seem generous, but it's actually designed to prevent two common problems: underwatering and overwatering. The key is in the tubing placement—space those emitters 12-18 inches apart to ensure water reaches the roots of all plants, not just the ones closest to the tubing. I've found that adding a simple pressure regulator to your system prevents water from shooting out too forcefully, which can damage young plants or create puddles that lead to rot.
Plant Rotation Hack: The 3-year rotation mentioned for tomatoes, peppers, and eggplants in Step 4 is non-negotiable for disease prevention, but there's a way to make it even more effective. Create a simple chart showing which plant families go where each year, and post it near the garden entrance. This visual reminder prevents well-meaning volunteers from accidentally violating the rotation. I've also seen gardens use colored stakes to mark rotation zones—red for nightshades, blue for legumes, green for brassicas—it makes the system instantly visual.
Pro Tips for Campus Community Garden
- Designing a thriving campus garden takes more than just digging in the dirt—it's about creating a system that works year-round while keeping volunteers engaged.
- Sunlight Mapping Secret: That white board test in Step 1 isn't just about identifying sun exposure—it's about creating a visual reference for future gardeners.
- Soil Layering Strategy: When building those raised beds in Step 2, don't just layer materials—think about the long-term health of your soil.
Frequently asked questions
What’s the best time to start planting in a campus garden?
Aim for early spring (March–April) for cool-season crops like lettuce, spinach, or peas. Warm-season plants (tomatoes, peppers) thrive when soil temps hit at least 60°F—usually late April or May. Check your campus’s microclimate (shaded spots stay cooler longer!). Pro tip: Use seed-starting trays indoors 6–8 weeks before the last frost date for head starts.
How much time does a campus garden really require?
Time varies! Low-maintenance gardens need 1–2 hours/week for watering and weeding. High-yield plots (like raised beds) may demand 3–5 hours/week during peak growing seasons. Many campuses offer shared workdays—perfect for busy students. Volunteer shifts often count toward community service hours!
Are there costs to join a campus community garden?
Most campus gardens are free or low-cost. Typical fees (if any) cover:
Check with your campus sustainability office—they often subsidize programs! First, identify the issue (chewed leaves? Yellowing plants?). Try these fixes:
Most campus gardens have volunteer gardeners who can help troubleshoot—ask around! With the right planning:
Check your campus’s hardiness zone—some schools even have greenhouses for winter growing!
What do I do if pests or diseases show up in my plot?
Can I grow food year-round in a campus garden?
Wrapping up and next steps
A campus community garden isn’t just about growing food—it’s about fostering connection, sustainability, and shared purpose. By embracing collaborative design, year-round harvests, and inclusive planning, your campus can create a thriving green space that benefits everyone.
Whether you're a student, faculty member, or staff, your involvement can turn this vision into reality!
Ready to take the first step? Start by connecting with local sustainability groups, gathering a small team, or even sketching a simple design. The harvest—both literal and communal—will be worth it! 🌱