Landscaping
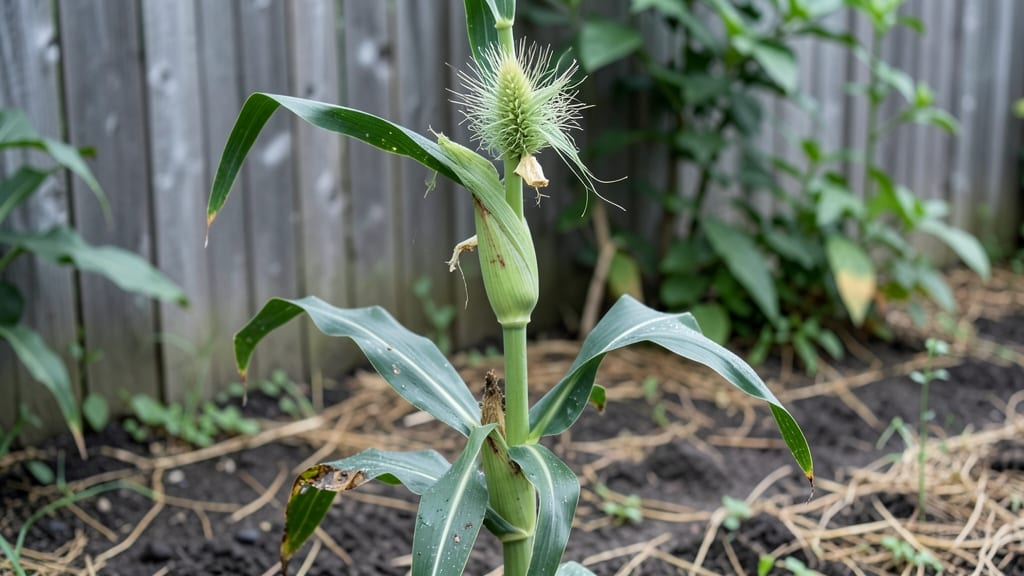
Your corner fence garden can be a lush, private oasis that thrives year-round instead of just another empty space. 🌿 I transformed a dull, neglected corner into a vibrant green screen that blocks neighbors' views while adding beauty and even edible plants to my yard.
The key is choosing the right plants and planters that fit snugly against the fence without overwhelming the space.
Start with vertical planters or tiered shelves to maximize growing area without taking up ground space. I use lightweight fabric pockets for herbs and shallow containers for shallow-rooted plants like lettuce and strawberries. For taller privacy, mix in bamboo stakes, trellises, or climbing roses that grow upward along the fence.
Most of these setups take less than an hour to assemble and can be adjusted as your plants grow.
By summer, you’ll have a dense screen of foliage—think glossy ivy, fragrant lavender, or even dwarf fruit trees—that feels like a natural barrier. In winter, evergreens like boxwood or holly keep the greenery going, while dormant plants like ornamental grasses add texture.
The best part? You can grow everything from veggies to flowers in this small footprint.
Works for any fence material—wood, metal, or even chain-link—with a little creativity. Whether you’re hiding an eyesore or just adding greenery, this corner garden gives you privacy and productivity without sacrificing style. Let’s get planting!
📚 In This Guide
- What you need
- Instructions
- Tips and common mistakes
- Wrapping up and next steps
What you need
- ○ Fencing or trellis panels: 4–6 ft tall (adjust based on desired height); cedar, redwood, or composite for durability. Optional: Pre-planted lattice panels for instant greenery.
- ● Soil: 2–3 cubic yards of high-quality garden soil or a mix of topsoil and compost (aim for 60% organic matter for drainage).
- ● Mulch: 2–3 bags of wood chips, bark, or gravel (3–4 inches deep) to retain moisture and suppress weeds.
- ● Plants: Evergreens (privacy focus): 3–5 dwarf arborvitae, boxwood, or holly bushes (spaced 2–3 ft apart).
- ● Flowering perennials (seasonal color): 5–7 hostas, hydrangeas, or ferns (for shade) or lavender, salvia, or coneflowers (for sun).
- ● Climbing plants (vertical interest): 2–3 vines like clematis, jasmine, or ivy (if using a trellis).
- ○ Optional: 1–2 small ornamental grasses (e.g., fountain grass) for texture.
- ● Fertilizer: Slow-release granular fertilizer (10-10-10 ratio) or organic options like composted manure.
- ● Drip irrigation or soaker hoses: 50–100 ft of tubing + emitters (for consistent watering).
- ● Shovel and spade (for digging)
- ● Wheelbarrow (for hauling soil/mulch)
- ● Measuring tape and stakes (to mark plant spacing)
- ● Gloves, knee pads, and pruners (sharp, bypass-style for clean cuts)
- ○ Optional: Post hole digger (if installing new fence posts) or a level for alignment.
- ● Sunlight assessment: Note if your corner gets full sun (6+ hrs), partial shade (3–6 hrs), or full shade (<3 hrs)—this dictates plant choices!
- ● Measure your fence length/width to calculate materials (e.g., 10 ft fence × 5 ft depth = ~50 sq ft area).
- ● Check local regulations: Some areas restrict fence heights or require permits for structural changes.
- ● Pro tip: Test your soil’s pH (kits cost ~$10) to adjust for acid-loving plants like azaleas or alkaline-tolerant options like lavender! 🌡️
Step-by-Step instructions for building a corner fence garden
Let’s turn that awkward corner into a lush, functional privacy screen that thrives year-round.
🪴 Step 1: Plan and Mark Your Layout
Start by sketching your design on paper—this ensures symmetry and maximizes space. Use a 4-foot wide area along the fence for a balanced look. Mark the outer edges with stakes and string to visualize the shape before digging. For a 3-foot tall screen, space plants 18-24 inches apart to allow airflow and growth.
Check your fence’s height—if it’s 6 feet or taller, you can layer taller plants (like arborvitae) at the back with shorter shrubs (like boxwood) in front. I always measure twice to avoid uneven spacing. A tape measure and pencil help keep lines straight.
🌱 Step 2: Prepare the Soil and Plant Holes
Dig a 12-inch deep trench along the marked line. Amend the soil with 2 gallons of compost per 4-foot section—this improves drainage and nutrient retention. Mix it in until the soil looks dark and crumbly. Avoid compacting the soil; fluffy soil encourages strong root growth.
Dig individual holes twice as wide as the root ball and as deep as the container. If planting from pots, gently loosen the roots before placing them in the hole. I tap the sides of the hole lightly to settle the soil naturally—no need to pack it down aggressively.
☀️ Step 3: Choose and Plant Privacy-Screen Plants
For year-round coverage, mix evergreens (like arborvitae or holly) with deciduous shrubs (like hydrangeas or viburnum). Plant evergreens at the back for structure, then layer shorter plants in front. Water each hole halfway before placing the plant to prevent air pockets.
Fill gaps with mulch (like pine straw or shredded bark) to retain moisture and suppress weeds. Keep mulch 2-3 inches deep and 3 inches away from stems to avoid rot. I always water deeply after planting—1 gallon per plant—to help roots establish quickly.
💧 Step 4: Maintain Watering and Pruning
Water deeply 2-3 times per week for the first month, then taper to once a week once established. Check soil moisture by sticking your finger 2 inches deep—if it’s dry, water again. Drip irrigation works best for even moisture without overwatering.
Prune in late winter or early spring to shape the screen. Cut back overgrown branches by ⅓ to encourage bushier growth. Remove dead or crossing branches first—this keeps the garden healthy and tidy. I use clean, sharp pruners to avoid tearing stems.
✂️ Step 5: Seasonal Care for Long-Term Growth
In spring, fertilize with a balanced 10-10-10 formula to boost growth. In fall, add a 3-inch layer of mulch to protect roots from frost. Evergreens may need extra water in winter if rainfall is scarce—1 inch per month keeps them vibrant.
Watch for pests like aphids or spider mites—spray with neem oil if you spot them early. A well-maintained screen should fill in within 2-3 years, providing full privacy and beauty year-round. Adjust spacing if plants outgrow their spots!
Tips & tricks for perfect corner fence garden
Transforming that tricky corner into a thriving privacy screen takes a few key strategies—here's how to make it look effortless.
Planning for Balance: When sketching your design in Step 1, consider using a 3:1 ratio of evergreens to deciduous plants for year-round coverage. For example, if you're planting 12 shrubs, use 9 evergreens (like arborvitae) and 3 deciduous (like hydrangeas). This creates visual interest while maintaining that lush, green privacy screen. The 4-foot width gives you enough space to work without overcrowding.
Soil Prep Secrets: In Step 2, don't skip the compost amendment—it's the foundation for healthy roots. I've found that mixing in 1 part compost to 3 parts native soil gives the perfect balance. For clay-heavy soil, add an extra 1 gallon of compost per plant to improve drainage. The 12-inch deep trench ensures roots have room to establish without competing with shallow roots.
Planting Technique: When planting in Step 3, the halfway water trick before placing plants prevents air pockets that can cause wilting. For container plants, gently squeeze the root ball to encourage roots to spread outward into the hole. This helps them establish faster. The 1 gallon per plant watering afterward is crucial—it helps settle the soil around roots and washes away any air gaps.
Long-Term Maintenance: The 2-3 inches of mulch in Step 3 is perfect for moisture retention, but keep it 3 inches away from stems to prevent rot. For the 10-10-10 fertilizer in Step 5, I recommend applying it in early spring when plants are actively growing. This timing gives them the nutrients they need for the growing season ahead without overloading them.
Pro Tips for Corner Fence Garden
- Transforming that tricky corner into a thriving privacy screen takes a few key strategies—here's how to make it look effortless.
- Planning for Balance: When sketching your design in Step 1, consider using a 3:1 ratio of evergreens to deciduous plants for year-round coverage.
- Soil Prep Secrets: In Step 2, don't skip the compost amendment—it's the foundation for healthy roots.
Frequently asked questions
Got questions about creating your own corner fence garden? You’re not alone! Here are some of the most common concerns—and their straightforward solutions—to help you get started with confidence.
What’s the best time of year to plant a corner fence garden?
The ideal time depends on your climate, but spring (after the last frost) or early fall are generally best. These seasons give plants time to establish roots before extreme heat or cold. For tropical or Mediterranean climates, late winter works too. Always check your local frost dates!
How much does a corner fence garden cost to install?
Costs vary widely based on materials and size. A DIY project with shrubs (like boxwood or privet) and basic fencing can run $50–$200, while a pre-made lattice or trellis system with climbing plants (e.g., ivy or jasmine) may cost $200–$500+. Factor in soil amendments, mulch, and irrigation for long-term savings.
Can I use a corner fence garden for full privacy, or just decoration?
Dense evergreens (like arborvitae or holly) or fast-growing climbers (e.g., bamboo or wisteria) block views effectively. For a mixed look, combine flowering plants (e.g., roses) with taller privacy screens. Just ensure the plants mature at least 6–8 feet tall for full coverage.
What if my fence is uneven or has gaps? Can I still do this?
Yes! Uneven fences are common—just adjust plant spacing to fill gaps. Use flexible trellises or lattice panels to create a uniform backdrop, or plant sprawling ground covers (e.g., creeping thyme) along the base. For large gaps, consider container plants or a partial wood fence for structure.
Will pests or diseases ruin my corner fence garden?
Most plants are resilient, but prevention is key. Choose native or pest-resistant varieties (e.g., lavender or ninebark). Prune regularly for airflow, and use organic mulch to deter weeds. If pests appear, neem oil or insecticidal soap can help—avoid harsh chemicals near edible plants!
How much sunlight does a corner fence garden need?
Most privacy plants thrive in full sun (6+ hours/day), but some (like hostas or ferns) prefer partial shade. Assess your corner’s light exposure—if it’s shady, opt for shade-tolerant shrubs (e.g., pieris or hydrangeas). For mixed light, layer sun-loving and shade-friendly plants.
Still unsure? Start small! Test a few plants in pots first to see what thrives before committing to a full installation.
Wrapping up and next steps
A corner fence garden isn’t just a stylish addition—it’s a functional, year-round privacy solution that brings life to your outdoor space. Whether you’re drawn to lush climbers, fragrant shrubs, or low-maintenance perennials, the right plants can transform an awkward corner into a thriving, serene retreat.
With the right materials and a little creativity, you’ll enjoy a green oasis that’s as practical as it is beautiful.
Ready to get started? Sketch your design, gather your supplies, and watch your corner bloom! 🌿💚