Picking
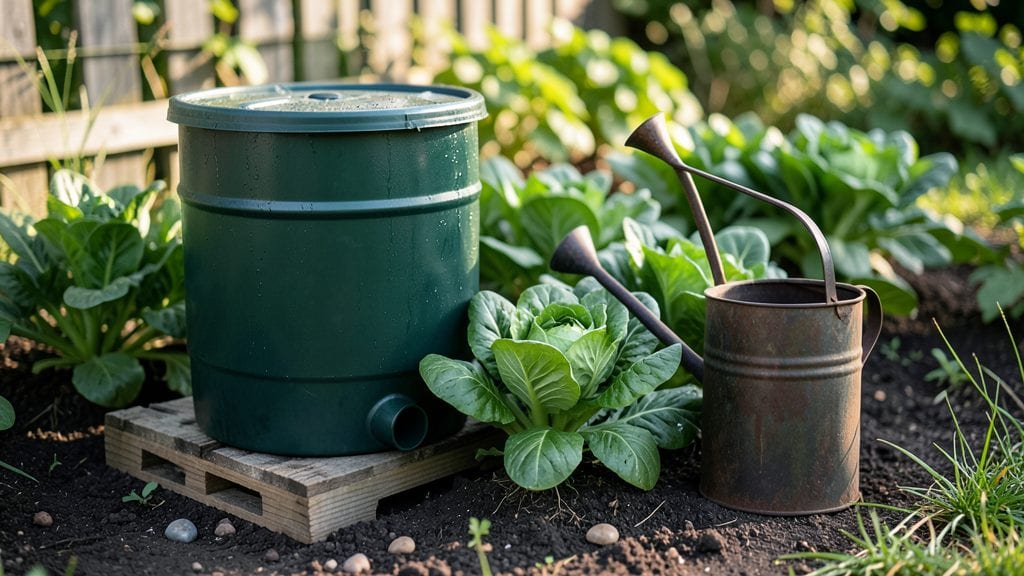
Designing a rainwater harvesting garden turns every downpour into free irrigation for your plants. 🌧️ I started with a simple 55-gallon barrel under my downspout, and now my garden thrives without touching the hose—while my water bill stays flat.
The key isn’t just collecting rain; it’s making that water work harder than your tap ever could.
You’ll need a collection point (roof, gutter system), a storage solution (barrels, cisterns, or even buried swales), and a way to distribute it (drip lines, soaker hoses). For small gardens, a single barrel with a spigot works perfectly.
Larger spaces might need a multi-barrel setup or underground tank. The right setup depends on your rainfall patterns and how much you want to automate.
What you’ll get is a garden that stays lush even during droughts, with water rich in minerals that houseplants and vegetables love. My tomatoes and peppers grow twice as big because they’re drinking rainwater, not chlorinated tap.
Plus, you’ll cut your water usage by up to 50%—and that’s money in your pocket too.
Works for urban balconies, rural homesteads, or anything in between. The biggest mistake? Overcomplicating it. Start small, test what works, and scale up—your plants (and wallet) will thank you.
📚 In This Guide
- What you need
- Instructions
- Tips and common mistakes
- Wrapping up and next steps
What you need
- ● Rainwater collection system: 1–3 food-grade barrels (55–75 gallons each, with tight lids)
- ● 1 first-flush diverter (to filter out debris from the first rain)
- ● Gutters & downspouts: Gutters long enough to cover your roof’s drainage area (e.g., 10–20 ft, depending on roof size)
- ● 2–4 downspout extensions (direct water to barrels)
- ● Filtration & safety: 1 fine mesh screen (for gutters, ~1/16" holes)
- ● 1 water filter (e.g., sediment or charcoal filter for barrels)
- ● 1 pH test kit (to monitor water safety for plants)
- ● Plumbing & connections: 1–2 hose bibs or spigots (for barrel outlets)
- ● Flexible vinyl tubing (½" diameter, 10–20 ft)
- ○ Garden essentials: Drip irrigation kit (optional but highly recommended for efficiency)
- ● Mulch (straw, wood chips, or leaves to retain moisture)
- ● Solar-powered water pump (for larger gardens)
- ● Automatic rain sensor (to prevent overflow)
- ● Decorative planters or rain chains (for aesthetic flair)
- ● Rainwater storage bladder (for underground systems)
Step-by-step guide to building a rainwater harvesting garden
Here's how to transform your yard into a thriving, water-independent garden using simple systems.
🪴 Step 1: Choose and Prepare Your Collection System
Start with a 50-gallon rain barrel or larger, placed under a downspout where it collects water from your roof. Position it on sturdy, level ground to prevent tipping. I always use a barrel with a spigot—it makes accessing water for plants so much easier. Clean the barrel thoroughly before use to avoid algae buildup.
If you have multiple downspouts, consider a first-flush diverter (a simple attachment that redirects the first dirty water). This keeps your collected water clean, which is especially important for edible plants. Place the diverter at the top of your barrel setup—it’s a small investment that pays off in water quality.
💧 Step 2: Install Filtration and Overflow Protection
Attach a fine mesh screen over the barrel’s opening to block leaves, debris, and pests. I use a stainless steel mesh because it lasts years without rusting. Secure it tightly so wind or rain doesn’t blow it off. This step is critical—clogged screens lead to overflows and wasted water.
Next, add an overflow tube connected to a drain or dry well. Run it downhill to direct excess water away from your garden’s foundation. I like to bury the tube slightly underground to blend it in and prevent freezing in colder months. Test the overflow by filling the barrel—water should drain smoothly without pooling.
☀️ Step 3: Set Up Irrigation for Your Plants
Use a drip irrigation system or soaker hoses connected to your barrel’s spigot. I prefer drip lines because they deliver water directly to roots, reducing evaporation and weed growth. Space emitters 12-18 inches apart for even coverage, and bury them slightly to protect from sunlight and pests.
For larger gardens, add a simple pump (like a 12V submersible model) to move water uphill or to raised beds. Place the pump in a mesh bag inside the barrel to keep debris out. Run a test to ensure consistent flow—you’ll know it’s working when plants show steady, healthy growth without wilting.
✂️ Step 4: Select and Plant Drought-Tolerant Species
Choose plants that thrive with collected rainwater, like lavender, rosemary, succulents, and native wildflowers. These require minimal supplemental watering once established. I always mulch with 2-3 inches of organic mulch (like wood chips) to lock in moisture and suppress weeds—this cuts water needs by nearly half.
Avoid water-intensive plants like tomatoes or lettuce unless you supplement with extra rainwater during dry spells. Instead, focus on deep-rooted perennials—they access moisture efficiently and come back year after year. Group plants with similar water needs together for easier maintenance.
🌿 Step 5: Maintain and Monitor Your System
Check your barrel and filtration system monthly to clear debris and prevent mosquito breeding. I use a long-handled net to scoop out leaves and a vinegar solution to scrub the interior if algae starts forming. Empty the barrel before winter in freezing climates to protect the spigot and pump.
Monitor your plants’ response to watering—yellowing leaves or stunted growth often signal over- or under-watering. Adjust your irrigation schedule based on rainfall patterns. In my experience, a well-tuned system can provide all the water your garden needs during the growing season, with minimal extra effort.
Tips & tricks for perfect rainwater harvesting garden
A few simple strategies can make your rainwater harvesting system more efficient and long-lasting.
Barrel Placement Matters: Position your 50-gallon rain barrel as close to your garden as possible to minimize hose length and water pressure loss. I like to place it on a small wooden pallet to elevate it slightly—this prevents standing water around the base and makes accessing the spigot easier. In freezing climates, consider insulating the barrel or moving it to a sheltered location during winter to prevent cracking.
Filtration Upgrade: While the fine mesh screen works well, I recommend adding a secondary filtration layer—a simple sock made from old pantyhose filled with gravel or sand—inside the barrel. This catches finer debris and keeps water cleaner without clogging your irrigation system. Just secure it tightly so it doesn't float to the surface.
Irrigation Efficiency: When setting up your drip irrigation system, space emitters 12-18 inches apart but adjust based on soil type. Sandy soil needs closer spacing (12 inches) while clay soil can handle the full 18 inches. I also like to add a small timer to my irrigation system—set it for 15-20 minutes every other day during dry spells to prevent overwatering.
Plant Selection Strategy: Beyond the recommended lavender, rosemary, succulents, and native wildflowers, consider adding edible perennials like asparagus or rhubarb—they thrive with collected rainwater and come back every year. For container gardening, use self-watering pots connected to your drip system. The 2-3 inches of organic mulch works wonders here too—it not only conserves moisture but also regulates soil temperature.
Pro Tips for Rainwater Harvesting Garden
- A few simple strategies can make your rainwater harvesting system more efficient and long-lasting.
- Barrel Placement Matters: Position your 50-gallon rain barrel as close to your garden as possible to minimize hose le...
- Filtration Upgrade: While the fine mesh screen works well, I recommend adding a secondary filtration layer—a simple s...
Frequently asked questions
Got questions about rainwater harvesting gardens?
You’re not alone! Here are answers to the most common queries to help you build a thriving, zero-waste oasis.
How much rainwater can I realistically collect in my garden?
This depends on your roof size, rainfall, and storage capacity. A typical 2,000 sq. ft. roof can collect 1,300 gallons per inch of rain. Check local averages—most regions get 20–40 inches annually. Start with a 50–100-gallon barrel for small gardens or scale up for larger plots.
When is the best time to install a rainwater harvesting system?
Install before the rainy season! For most U.S. climates, late summer or early fall is ideal—soil is workable, and you’ll capture the first downpours. If you’re in a dry region, set it up right before monsoon season (e.g., Arizona in July). Winter installation is possible but may require extra insulation for pipes.
Are there cheaper alternatives to commercial rainwater harvesting systems?
DIY options include:
- Barrel systems: Repurpose food-grade barrels (e.g., wine/beer barrels) with spigots and screens (~$50–$150).
- Swales: Dig shallow trenches to redirect runoff to plant roots (free–low-cost).
- Rain gardens: Plant native, drought-tolerant species in low spots to absorb excess water.
What should I do if my collected water looks cloudy or smells bad?
Cloudiness or odors usually mean algae, sediment, or bacteria. Fix it with these steps:
- Add a first-flush diverter to skip the first dirty runoff.
- Use a mesh screen (100–200 microns) to filter debris.
- Add 1 tsp of unscented bleach per 100 gallons (for potable use) or hydrogen peroxide (for plants).
- Keep barrels in the shade to slow algae growth.
Can I use harvested rainwater for all my garden plants, or are some unsafe?
Rainwater is safe for most edible plants, but avoid using it on:
- Plants with open wounds (e.g., freshly pruned trees) to prevent fungal infections.
- Soil with high salt or chemical buildup—test pH first (ideal: 6.0–7.0).
Wrapping up and next steps
Creating a rainwater harvesting garden isn’t just about saving water—it’s about crafting a self-sustaining oasis that thrives on nature’s gifts. By collecting rainwater, reducing waste, and nurturing your plants with zero added cost, you’re not only helping the planet but also building a resilient green space. 🌱
Ready to take the next step? Start small—whether it’s installing a simple barrel system or designing a full-scale garden. Every drop counts, and your garden will thank you with lush, vibrant growth! What’s one change you’ll make today?