
Tools
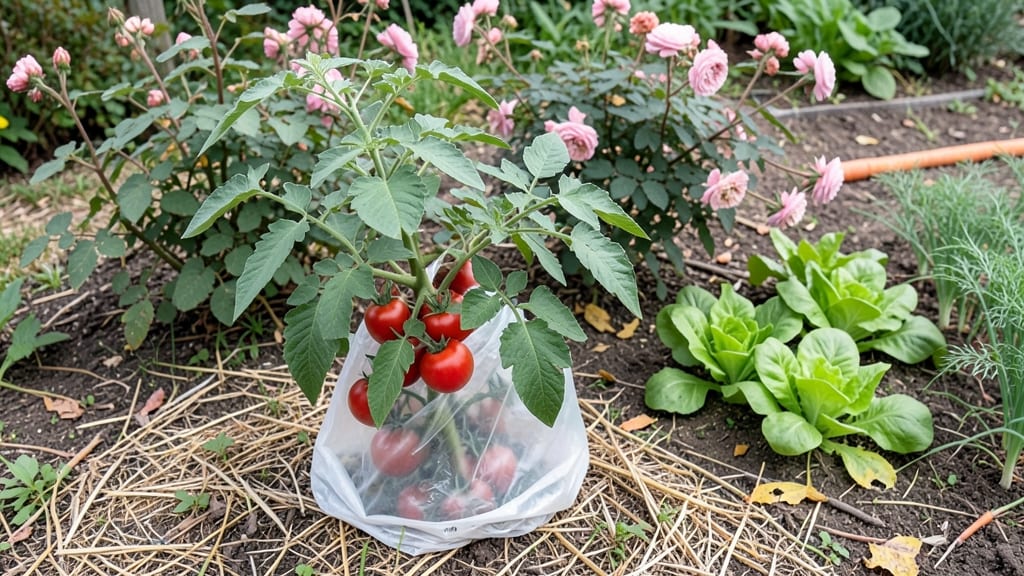
Protecting your garden from pests, weather, and critters isn't just smart—it's the difference between a thriving plot and a frustrating one. 🌱 I've lost entire seasons to deer, slugs, and late frosts before figuring out the right barriers, and now my garden stays lush year-round with minimal effort.
The key is layering defenses: physical barriers for animals, shade cloth for heat, and mulch to regulate soil temperature.
You don’t need expensive materials—simple options like chicken wire for rabbits, row covers for insects, and sturdy fencing for deer work perfectly. For weather protection, shade cloth keeps summer heat from wilting plants, while thick mulch insulates roots during winter freezes.
The best part? These solutions adapt to any season and plant type, from delicate lettuce to hardy tomatoes.
Imagine harvesting crisp greens in July without wilting or watching your spring bulbs survive unscathed through winter. With the right barriers, you’ll cut pest damage by 70-90%, reduce water loss in droughts, and even extend your growing season by 2-4 weeks.
The upfront setup takes under an hour per section, and the payoff lasts all year.
Whether you're dealing with urban squirrels, rural deer, or just scorching summer sun, these methods scale from small containers to full plots. Let’s get your garden armored against whatever Mother Nature—and neighborhood wildlife—throws its way.
📚 In This Guide
- What you need
- Instructions
- Tips and common mistakes
- Wrapping up and next steps
What you need
- ● Barrier Material: Wooden fence panels (6 ft tall, pressure-treated for durability) – quantity depends on garden perimeter
- ● Metal mesh fencing (e.g., chicken wire or hardware cloth, 1"–2" grid) – 100–200 sq ft per small garden
- ● Plastic or PVC garden netting (for lightweight protection) – 1–2 rolls (50–100 ft each)
- ● Bamboo stakes or rolls (natural, biodegradable option) – 20–50 stakes or 1–2 rolls
- ● Fastening Supplies: Galvanized or stainless steel fence posts (4"–6" diameter, 4–6 ft long) – 1 post every 6–8 ft
- ● Concrete mix (for securing posts) – 5–10 bags (80 lb each)
- ● Heavy-duty zip ties, staples, or fencing staples – 1–2 boxes
- ● Screws or nails (deck screws recommended for wood) – 2–3 lbs
- ● Tools: Post hole digger or auger (manual or electric)
- ● Circular saw or handsaw (for cutting wood/mesh)
- ● Drill/driver (with Phillips and hex bits)
- ● Hammer or mallet
- ● Measuring tape (25 ft)
- ● Level (4 ft)
- ● Work gloves and safety goggles
- ● Enhancements: Decorative lattice or trellis (for climbing plants + extra support)
- ● Motion-activated sprinklers (deters pests with water bursts!)
- ● Reflective tape or solar-powered lights (for nighttime visibility)
- ● Natural Defenses: Marigolds, lavender, or garlic plants (repel insects naturally)
- ● Crushed eggshells or diatomaceous earth (for slug/snail barriers)
- ● Maintenance: Wood sealant or paint (for longevity)
- ● Extra zip ties or repair patches (for quick fixes)
How to create effective garden barriers for year-round protection
Here’s how I design resilient garden barriers that keep pests out, retain moisture, and extend growing seasons—no matter the weather.
🪴 Step 1: Assess Your Garden’s Vulnerabilities
Start by identifying the biggest threats to your garden. Is it deer munching through your prized roses? Raccoons digging up your bulbs? Or maybe wind and erosion wearing down your soil? Walk your property and note where damage occurs most frequently—near fences, along property lines, or around raised beds. I like to sketch a quick map with problem areas marked in red and potential barrier locations in blue.
Consider the seasonality of threats. Deer might be a spring/summer issue, while wind and frost heave often strike in winter. If your garden has slopes or exposed areas, prioritize those spots for physical barriers. For example, I installed a 6-foot-tall woven wire fence along my south-facing slope to block deer while allowing airflow for my tomatoes.
🌿 Step 2: Choose the Right Barrier Material for Your Threats
Not all barriers are created equal. For large mammals like deer or rabbits, opt for hardware cloth (½-inch mesh) or woven wire fencing (4-6 feet tall) buried 12 inches deep to deter digging. I’ve found that plastic tree guards work well for young saplings, but they need to be at least 3 feet tall to discourage deer from rubbing against them. For small pests like voles or gophers, a 1-inch mesh hardware cloth buried vertically around beds is a game-changer.
If wind or erosion is your main concern, straw bales or coir logs planted at 45-degree angles along slopes create natural windbreaks while stabilizing soil. For frost-sensitive plants, floating row covers or mini greenhouses (like 10x20-foot hoop houses) are my go-to. The key is matching the barrier to the specific threat—there’s no one-size-fits-all solution.
✂️ Step 3: Install Physical Barriers with Precision
For fencing, start by marking the perimeter with wooden stakes and string to ensure straight lines. Drive T-posts every 6 feet and attach woven wire or hardware cloth securely with staple guns or fence ties. Bury the bottom 12 inches deep and fold it outward at a 45-degree angle to prevent digging. I always add a 2-foot extension above ground to discourage jumping pests.
For row covers or hoop houses, use galvanized metal pipes (2-inch diameter) bent into arches and spaced 3 feet apart. Secure them with u-clips or zip ties and drape the cover loosely—don’t pull it tight, or it’ll tear in wind. If using straw bales as windbreaks, soak them first to prevent fire hazards and stack them 3 bales high in a staggered pattern. Water them lightly after installation to help them settle.
💧 Step 4: Combine Barriers for Multi-Layered Protection
Layering barriers is where real defense happens. For example, I pair a 6-foot deer fence with a 1-inch hardware cloth collar around my blueberry bushes—deer can’t reach over, and rabbits can’t dig under. For vegetable beds, I use row covers during planting to block pests early, then switch to mulch rings (cardboard + straw) to smother weeds and retain moisture.
In high-wind areas, I’ve had success with combination barriers: a straw bale windbreak on the outer edge, followed by bamboo stakes planted 18 inches deep to reinforce soil. The bales break the worst gusts, while the stakes prevent erosion. For frost protection, I combine row covers with black plastic mulch—the mulch warms the soil, and the cover traps heat overnight.
⏰ Step 5: Maintain and Adjust Barriers Seasonally
Barriers aren’t a set-it-and-forget-it solution. Check woven wire fences every 2 weeks for gaps or rusted staples, especially after storms. Replace any damaged sections immediately—even a 2-inch hole is enough for rabbits to squeeze through. For row covers, inspect before heavy rains to ensure they’re still securely fastened; a loose cover can blow away and leave plants exposed.
Seasonal swaps are key. In spring, I remove frost covers but keep pest netting on early bloomers like strawberries. In fall, I switch to heavy mulch to protect roots from freeze-thaw cycles. I also rotate barrier placements yearly to prevent pests from learning patterns—deer, for instance, will eventually figure out weak spots if you don’t vary your approach.
Tips & tricks for effective garden barrier systems
These practical insights will help you transform your garden into a fortress against pests, weather, and erosion—without sacrificing aesthetics or functionality.
Seasonal Threat Assessment: In Step 1, when you're mapping vulnerabilities, pay special attention to microclimates in your garden. A north-facing slope might experience frost pockets while the south side stays warm—this affects which barriers you prioritize. I've found that deer tend to focus on the most accessible plants during dawn and dusk, so placing your tallest barriers (like the 6-foot woven wire) near frequently damaged areas creates an immediate visual deterrent.
Material Selection Nuances: For Step 2, when choosing hardware cloth, opt for galvanized or vinyl-coated mesh that won't corrode over time. The ½-inch mesh for rabbits works perfectly, but I've discovered that ¼-inch mesh becomes essential if you have determined squirrels or chipmunks in your area. For straw bales, select bales that are tightly bound and free of mold—loose hay bales won't provide structural integrity. Remember that coir logs (made from coconut husks) hold up better in wet conditions than traditional straw.
Installation Precision: In Step 3, when burying your fencing 12 inches deep, use a post hole digger to create a trench rather than just holes for each post. This creates a continuous underground barrier that prevents digging pests from finding weak points. For the 2-foot extension above ground, consider adding a slight outward angle—this makes it harder for climbing animals to gain purchase. When working with row covers, leave extra fabric at the edges (about 6 inches) to create a proper seal when securing with rocks or weights.
Maintenance Strategy: The 2-week inspection schedule in Step 5 is crucial, but I've found that adding a quick visual check during your morning coffee routine prevents small issues from becoming major problems. Look for telltale signs like bent fence posts (indicating digging), frayed row cover edges, or straw bales that have settled unevenly. I keep a small toolkit with zip ties, extra staples, and a roll of hardware cloth on hand—this lets me make repairs in minutes rather than hours.
Pro Tips for Protect The Garden
- These practical insights will help you transform your garden into a fortress against pests, weather, and erosion—without sacrificing aesthetics or functionality.
- Seasonal Threat Assessment: In Step 1, when you're mapping vulnerabilities, pay special attention to microclimates in your garden.
- Material Selection Nuances: For Step 2, when choosing hardware cloth, opt for galvanized or vinyl-coated mesh that won't corrode over time.
Frequently asked questions
Got questions about keeping your garden safe all year round?
Here are some of the most common concerns—and practical answers—to help you protect your hard work without the hassle.
What’s the best time of year to install garden barriers?
Install barriers before pests or weather threats arrive! For deer, set up fences in early spring (before new shoots emerge). For seasonal storms, reinforce structures in late summer or early fall. Timing depends on your biggest threats—check local pest cycles or frost dates for precision.
Can I use chicken wire to protect my garden?
Chicken wire works for small pests like rabbits or voles, but it’s not strong enough for deer or determined critters. Bury the bottom 6–12 inches deep and secure it tightly to prevent digging. For tougher threats, opt for hardware cloth (1/4-inch mesh) or woven wire fencing instead.
Are there affordable DIY barrier options?
Try these budget-friendly fixes:
- Coffee grounds or cayenne pepper (repel deer and rabbits—sprinkle around plants).
- Old CDs or aluminum pie pans (hang from trees to deter birds).
- Upcycled pallet wood (build low-cost raised beds or fences).
How do I fix a barrier that’s already been damaged?
Patch holes immediately to avoid bigger problems:
- For fence gaps: Use zip ties, staples, or screws to secure loose sections.
- For chewed wood: Replace damaged panels or reinforce with metal edging.
- For buried tunnels (like gopher holes): Fill with hardware cloth or rock before backfilling.
Will barriers keep out all pests, or do I need extra tricks?
Barriers are your first line of defense, but layered protection works best. Combine them with:
- Natural repellents (like garlic spray for insects).
- Plant companions (e.g., marigolds deter nematodes).
- Motion-activated sprinklers (scare off deer and rabbits).
Wrapping up and next steps
Protecting your garden year-round doesn’t have to be a daunting task—with the right barriers, you can safeguard your plants from pests, weather, and even curious critters while keeping your space thriving! 🌱 From durable fencing to natural mulches, these solutions offer practical, long-lasting defenses that adapt to any season.
Whether you’re a seasoned gardener or just starting out, small steps like choosing the right materials or sealing gaps can make a huge difference.
Ready to take action? Start by assessing your garden’s biggest threats—then pick one barrier solution to implement this weekend. Your future blooms will thank you! 🌿