
Pests and Diseases
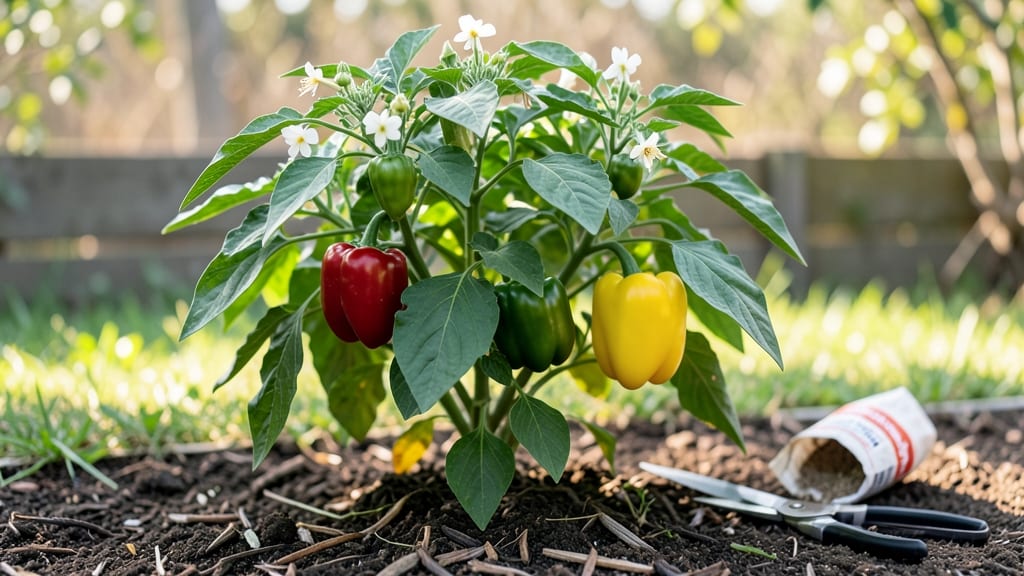
Here are some essential pepper gardening tips that transformed my first jalapeño crop—like tweaking watering and soil—into a thriving harvest. 🌱 added a layer of mulch—now they produce all summer long.
The secret isn’t complicated: it’s matching their needs to your climate and giving them the right conditions from day one.
Start with well-draining soil rich in compost, plant in full sun (6+ hours daily), and keep the soil consistently moist but never soggy. Varieties like bell peppers need slightly more water than jalapeños, and all peppers benefit from a balanced fertilizer every 4-6 weeks.
Prune suckers early to focus energy on fruit production, and watch for common pests like aphids—neem oil or companion plants like basil can keep them at bay.
You’ll end up with glossy green plants loaded with peppers by midsummer, and the harvest keeps coming until frost. The first bite of a homegrown jalapeño or crisp bell pepper makes all the effort worth it.
Next, we’ll cover the exact steps to get your plants growing strong from seed or transplant.
This works for containers or garden beds, hot climates or cooler zones—just adjust watering and mulch thickness. Let’s get your pepper patch started right.
📚 In This Guide
- What you need
- Instructions
- Tips and common mistakes
- Wrapping up and next steps
What you need
- ● Seeds or seedlings: Choose disease-resistant varieties like 'Carolina Wonder' or 'Jalapeño M' for pest resilience. Start with 3–5 plants for a small harvest.
- ● Potting mix: 2–3 gallons of well-draining, sterile potting soil (avoid garden soil to prevent pests/diseases). Add perlite or vermiculite for aeration.
- ● Containers or garden bed: Containers: 5–10-gallon pots with drainage holes (1 plant per container).
- ● Garden bed: Full sun (6+ hours/day), raised beds recommended for better drainage.
- ● Fertilizer: Balanced organic fertilizer (10-10-10) or compost. Use every 4–6 weeks after planting.
- ● Watering can or hose: With a gentle spray nozzle to avoid damaging plants.
- ● Mulch: Straw or shredded leaves (2–3 inches thick) to retain moisture and deter weeds.
- ● Pest control: Neem oil: 1–2 tbsp per gallon of water (spray weekly for prevention).
- ● Insecticidal soap: For aphids or spider mites (follow label instructions).
- ● Row covers: Lightweight fabric to protect seedlings from pests.
- ● Grow lights: For indoor starts or low-light conditions (12–16 hours/day).
- ● Trellis or cages: To support heavy pepper varieties like bell peppers.
- ● pH test kit: Ideal soil pH for peppers: 6.0–6.8.
- ● Companion plants: Basil, marigolds, or onions to repel pests naturally.
Step-by-Step instructions for growing healthy pepper plants
Here's how I grow peppers that thrive year-round with minimal pest trouble—no fancy tricks, just proven techniques.
🌱 Step 1: Start Seeds Indoors at the Right Time
Peppers need warmth to germinate, so I start seeds indoors 8-10 weeks before the last frost date. Use the seed-starting mix and fill small pots or seed trays to within ¼ inch of the rim. Plant seeds ½ inch deep—burying them too deep delays germination because they struggle to reach the light.
Cover the pots with plastic wrap to retain moisture and place them in a warm spot, ideally 75-85°F. A seedling heat mat helps if your home runs cooler. Keep the soil consistently moist but never soggy—you'll see germination in 7-14 days, depending on the variety. Once sprouts appear, remove the plastic wrap immediately to prevent mold.
☀️ Step 2: Provide Bright Light and Prevent Leggy Growth
Peppers need 12-16 hours of light daily to grow strong. A south-facing window won’t cut it—seedlings stretch toward the light and become weak. I use a grow light positioned 2-3 inches above the plants and keep it on for 14-16 hours per day. Raise the light as the plants grow to maintain that distance.
Leggy seedlings have thin stems and leaves spaced far apart. If you see this, move the light closer or add another light source. Strong seedlings have thick stems, deep green leaves, and compact spacing between nodes. Once seedlings have 2-3 sets of true leaves, they’re ready to harden off.
🪴 Step 3: Transplant Outdoors After Hardening Off
Two weeks before the last frost, start hardening off seedlings by placing them outside in a sheltered spot for 1-2 hours the first day. Gradually increase their outdoor time over 7-10 days, ending with a full day in the sun. This prepares them for the garden without shocking their system.
Transplant seedlings into the garden after all danger of frost has passed. Choose a spot with full sun (6-8 hours daily) and well-draining soil. Space plants 18-24 inches apart to allow airflow, which reduces pest issues. Water deeply at transplanting to settle the soil around the roots and encourage new growth.
💧 Step 4: Water Consistently and Fertilize for Fruit Production
Peppers hate inconsistent moisture—too little causes blossom end rot, while too much leads to root rot. Water 1-2 inches per week, keeping the soil evenly moist but not waterlogged. Use a drip irrigation system or water at the base of the plant in the morning to prevent fungal diseases.
Feed plants with balanced fertilizer (10-10-10) every 4-6 weeks to encourage fruiting. I also add a handful of compost around the base of each plant to improve soil fertility. Yellowing leaves signal a need for more nitrogen, while stunted growth may mean phosphorus or potassium is lacking. Adjust fertilizer accordingly.
✂️ Step 5: Prune and Protect for Pest-Free Harvests
Prune peppers by removing suckers (the small shoots that grow in the leaf axils) to direct energy toward fruit production. I also pinch off the first few flowers if the plant looks stressed—this ensures stronger growth before heavy fruiting. Use clean, sharp pruners to avoid damaging the plant.
Pests like aphids and spider mites love peppers, but a strong plant deters them. Spray plants with neem oil weekly as a preventative measure. If pests appear, isolate the plant and treat with insecticidal soap. Harvest peppers when they reach full color and firmness—this encourages more fruit to develop.
Tips & tricks for perfect pepper gardening
These battle-tested techniques will help you grow peppers that produce like crazy while keeping pests at bay—no green thumb required.
Timing Secret for Germination: In Step 1, don't rush the germination process. Those 7-14 days vary by variety, but you can speed things up by placing a heating pad under your seed trays. I've seen germination cut to 5-7 days this way, but never skip the 75-85°F warmth requirement—peppers need that consistent heat to break dormancy.
Lighting Strategy for Strong Seedlings: For Step 2, I've learned the hard way that 14-16 hours of light is non-negotiable. If you notice seedlings stretching toward the light (called "legginess"), it's already too late to save them. Start with the grow light 2-3 inches above and adjust as they grow. A good rule of thumb: if you can see your hand between the light and seedlings, it's too high.
Hardening Off Hack: When you begin the 7-10 day hardening off process in Step 3, I recommend starting with just 30 minutes on day one, not the full 1-2 hours. This gradual approach prevents shock. Also, choose a sheltered spot that gets morning sun but has afternoon shade—this mimics natural conditions and builds resilience.
Pest Prevention Proactive: In Step 5, while neem oil is great, I've found that introducing ladybugs (available at garden centers) creates a natural pest control system. Release them weekly alongside your neem oil treatments. The ladybugs will eat aphids and spider mites before they become a problem, saving you from chemical treatments later.
Pro Tips for Pepper Gardening Tips
- These battle-tested techniques will help you grow peppers that produce like crazy while keeping pests at bay—no green thumb required.
- Timing Secret for Germination: In Step 1, don't rush the germination process.
- Lighting Strategy for Strong Seedlings: For Step 2, I've learned the hard way that 14-16 hours of light is non-negotiable.
Frequently asked questions
Got questions about growing peppers like a pro? You’re in the right place! Here are answers to the most common pepper gardening dilemmas—from timing to pests and everything in between.
When is the best time to plant peppers?
Peppers thrive in warm soil—wait until after the last frost (when nighttime temps stay above 50°F/10°C) or start seeds indoors 8–12 weeks before transplanting. For year-round harvests, succession plant every 2–3 weeks in mild climates. Pro tip: Use black plastic mulch to warm the soil faster!
How do I keep pests like aphids and spider mites off my peppers?
Prevent pests with neem oil or insecticidal soap (spray early morning/evening). Introduce beneficial insects like ladybugs or lacewings. For severe infestations, prune affected leaves and remove debris. Bonus: Plant basil or marigolds nearby to repel pests naturally!
Why aren’t my pepper plants fruiting?
Peppers need full sun (6–8 hours/day), consistent watering, and balanced fertilizer (high in phosphorus). Check for underwatering, overcrowding, or temperature stress (below 55°F/13°C halts flowering). Fix it: Thin plants, mulch, and hand-pollinate flowers if needed!
Can I grow peppers in containers? What’s the best setup?
Use 5-gallon pots or larger with well-draining soil (mix potting soil with compost). Place containers in full sun and water frequently (containers dry out faster). Dwarf varieties like ‘Shishito’ or ‘Jalapeño M’ work best. Pro tip: Add a time-release fertilizer to avoid nutrient loss!
How do I extend the pepper-growing season in cold climates?
Use row covers or cold frames to protect plants in early spring/fall. For winter, grow pepper varieties like ‘Arpad F1’ (tolerates cooler temps) or harvest before frost. Greenhouse growing is ideal for year-round success—just keep temps above 60°F/15°C! →
What’s the fastest way to revive a struggling pepper plant?
Check for root rot (yellow leaves = overwatering) or nutrient deficiency (purple stems = phosphorus lack). Trim dead growth, repot if roots are crowded, and fertilize with a balanced 10-10-10 mix. Revive tip: Water deeply at the base (not leaves) to prevent fungal issues!
Wrapping up and next steps
Growing your own pest-proof peppers is not only rewarding but also a delicious way to enjoy fresh, homegrown produce year-round! 🌱 With the right soil prep, pest management strategies, and consistent care, you’ll be harvesting vibrant, healthy peppers in no time.
Remember, the key lies in prevention—whether it’s companion planting, organic sprays, or strong plant hygiene.
Now that you’re armed with these pepper gardening tips, it’s time to roll up your sleeves and get growing! Start small with a few plants, experiment with varieties, and soon you’ll be sharing your bountiful harvest with friends and family. Happy gardening! 🌶️✨