Advice
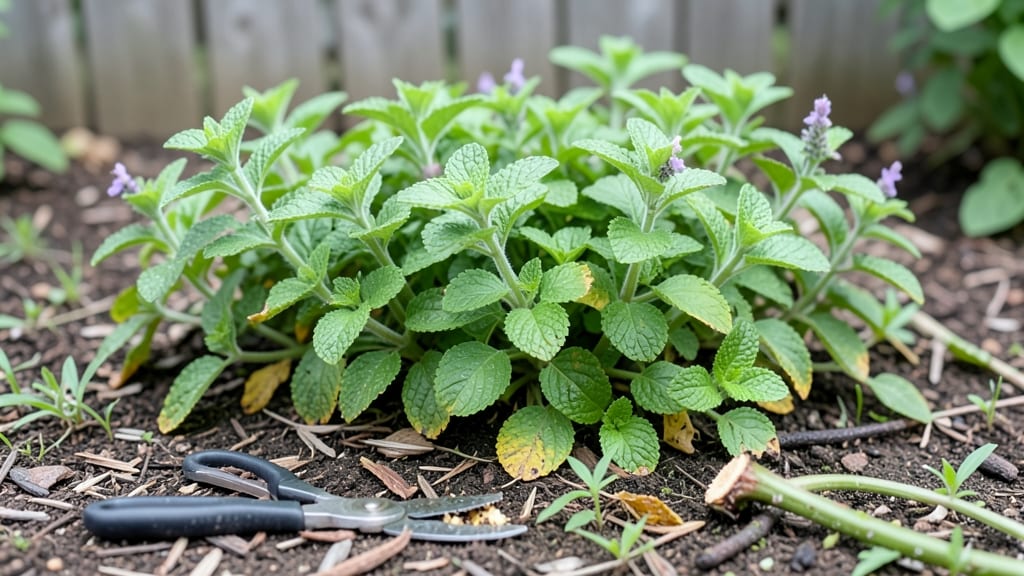
Here are a few mint gardening tips you’ll wish you knew sooner—growing it from cuttings instead of seeds is the game-changer you never knew you needed. 🌿 I’ve battled invasive mint patches that took over entire garden beds, but these simple steps keep it contained—whether in pots or the ground—while still giving you lush, fragrant harvests all season.
The secret lies in aggressive pruning and root management. Mint grows fast, so cutting back stems by half every few weeks keeps it compact. For containers, use at least a 12-inch-deep pot with drainage holes—this slows root spread while keeping the plant happy.
Water when the top inch of soil feels dry, but never let it sit soggy, or you’ll invite fungus gnats.
📚 In This Guide
- What you need
- Instructions
- Tips and common mistakes
- Wrapping up and next steps
What you need
- ● Mint plants: 1–3 starter plants (preferably organic or disease-free). Choose varieties like peppermint, spearmint, or chocolate mint.
- ● Containers: 1–2 12-inch deep pots (or larger) with drainage holes. OR a raised garden bed (minimum 12" deep).
- ● Potting soil: 3–5 gallons of well-draining, organic potting mix (avoid garden soil—it spreads weeds!).
- ● Pruning shears: Sharp, clean pair for trimming (sterilize with rubbing alcohol between cuts!).
- ○ Gloves: 1 pair (optional but recommended—mint can irritate skin!).
- ● Watering can or hose: With a gentle spray nozzle to avoid disturbing roots.
- ● Compost or worm castings: 1–2 cups to boost soil fertility.
- ● Slow-release fertilizer: Balanced 10-10-10 or organic option (follow package rates).
- ● Mulch: Straw or shredded leaves to retain moisture and suppress weeds.
- ● Root barrier: Plastic or landscape fabric (if planting in-ground to contain roots).
- ● Spray bottle: For misting seedlings or young plants.
Step-by-Step guide to growing mint without it taking over
Here’s how to create a lush, manageable mint patch that stays put where you want it.
🪴 Step 1: Choose Your Containers and Soil
Mint thrives in 6-8 inch deep containers with drainage holes—no exceptions. I use terra cotta pots because they wick away excess moisture, which mint roots love but soil hates. Fill each with a mix of 50% potting soil and 50% perlite to prevent compaction and root rot.
Press the mix down gently until it’s firm but still crumbly. The goal is a loose, airy medium that lets roots spread without suffocating. Skip garden soil—it’s too dense and will strangle your mint’s growth. A 1-inch layer of gravel at the bottom of each pot ensures water drains freely.
🌱 Step 2: Plant Mint Cuttings or Seeds
For fastest results, use 4-inch mint cuttings from a healthy plant. Dip the cut end in rooting hormone (optional but helpful) and place it 1 inch deep in the soil. If starting from seed, scatter them lightly on the surface—mint seeds need light to germinate, so don’t bury them.
Space cuttings 3 inches apart in each pot. Crowding leads to weak stems and more invasive spread later. Water gently until the soil is evenly moist but not soggy. You’ll know it’s right when water runs out the drainage holes without puddling.
☀️ Step 3: Position for Sun and Water Regularly
Mint loves 4-6 hours of morning sun and tolerates afternoon shade—too much direct sun scorches the leaves. Place pots where they get bright, indirect light for most of the day. If outdoors, move them to a shadier spot during peak afternoon heat.
Water when the top inch of soil feels dry. Mint hates drying out but despises soggy roots. I water deeply once a week in summer and reduce to every 10-14 days in winter. Yellowing leaves mean you’re overwatering; crispy edges mean it’s thirsty.
✂️ Step 4: Prune and Harvest to Control Growth
Here’s the secret to preventing mint from spreading: prune aggressively. Pinch back the tips of new growth when stems reach 4-6 inches tall. This encourages bushier, denser plants and fewer runners. Harvest leaves regularly—2-3 times a month—to redirect energy into growth, not roots.
Never let mint flower if you want to keep it contained. Snip off blooms as soon as they appear—they signal the plant to focus on spreading instead of leaf production. Deadhead spent flowers immediately to maintain a tidy, manageable patch.
🌿 Step 5: Divide and Refresh Every Year
Mint’s roots grow dense over time, so divide clumps annually in spring. Gently remove the plant from its pot, separate the roots into 2-3 smaller sections, and replant each in fresh soil. This rejuvenates growth and prevents the pot from becoming root-bound.
Replace old soil with new potting mix and perlite to avoid nutrient depletion. A little balanced fertilizer (like 10-10-10) in spring jumpstarts growth. Dividing also lets you share cuttings with friends—just root a few stems in water first for easy propagation.
Tips & tricks for perfect mint gardening
Here’s what I learned after years of battling invasive mint—these tricks keep your plants lush and contained.
Container Depth Matters: Those 6-8 inch deep pots in Step 1 aren’t arbitrary—they give roots room to grow downward instead of sending out aggressive runners. Shallow containers force mint to spread sideways, which is exactly what you want to avoid. If you’re using window boxes, make sure they’re at least 6 inches deep, or you’ll be fighting escapees all season.
Rooting Hormone Hack: While rooting hormone in Step 2 is optional, I’ve found it cuts rooting time by nearly half. For stubborn stems that won’t root, try soaking the cut end in water for 24 hours before planting—this jumpstarts the process. Just don’t skip the 1-inch depth placement, or your cuttings will rot instead of root.
Sunlight Strategy: The 4-6 hours of morning sun in Step 3 is perfect, but watch for your local climate. If you’re in a hot, dry area, even morning sun can scorch leaves. Test your spot by moving the pot around for a few days—look for bright, indirect light that doesn’t cause leaf burn. A sheer curtain can help diffuse harsh afternoon rays if needed.
Pruning Timing: When Step 4 says to pinch back at 4-6 inches, don’t wait until the stems are taller. The younger the growth, the more bushy your plant will become. I prune every 2-3 weeks during growing season to keep my mint compact. And here’s a secret: the leaves you pinch off are perfect for immediate use—no waste!
Pro Tips for Mint Gardening Tips
- Here’s what I learned after years of battling invasive mint—these tricks keep your plants lush and contained.
- Container Depth Matters: Those 6-8 inch deep pots in Step 1 aren’t arbitrary—they give roots room to grow downward instead of sending out aggressive runners.
- Rooting Hormone Hack: While rooting hormone in Step 2 is optional, I’ve found it cuts rooting time by nearly half.
Frequently asked questions
Got questions about mint gardening?
You’re not alone! Here are answers to the most common queries—from controlling spread to harvesting tips—so you can grow a lush, manageable patch with confidence.
How do I stop mint from spreading everywhere?
Mint’s invasive roots are notorious! Plant it in containers (like pots with drainage) or bury them below ground to contain roots. For in-ground growth, use a root barrier (like buried plastic or metal) at least 12 inches deep. Divide and replant aggressively every 2–3 years to keep it in check.
When is the best time to plant mint?
For outdoor gardens, plant mint in early spring (after the last frost) or late summer (6–8 weeks before your first frost). If starting indoors, sow seeds 8–10 weeks before the last frost. Mint thrives in warm soil (60–70°F), so avoid planting when temps are still chilly!
Can I grow mint from a store-bought bunch?
Place the stems in a jar of water until roots form (about 1–2 weeks), then transplant to soil. For faster growth, cut the stems just below a node (where leaves grow) and snip the lower leaves to encourage root development. Pro tip: Use this method to propagate multiple varieties from one bunch!
Why is my mint turning yellow or wilted?
Yellowing leaves often signal overwatering or poor drainage. Let soil dry slightly between waterings—mint prefers consistently moist but not soggy soil. Wilting can also mean underwatering or pests (like aphids). Check the undersides of leaves and treat with neem oil if needed. Too much sun can scorch leaves too!
What’s the best way to harvest mint without killing the plant?
Harvest mint in the morning after dew dries but before the sun peaks (for maximum flavor). Snip stems just above a leaf node (where new growth appears) to encourage bushier plants. Avoid cutting more than 1/3 of the plant at once, and leave some leaves for photosynthesis. Bonus: Regular harvesting keeps mint compact and flavorful!
Are there mint varieties that spread less aggressively?
Yes! Try ‘Mocha’ mint (slow-spreading, great for containers) or ‘Apple Mint’ (fragrant and less invasive). Peppermint and spearmint are classic but spread faster. For minimal fuss, grow ‘Chocolate Mint’—it’s delicious and slightly less aggressive. Always pair with containers or barriers!
Wrapping up and next steps
Growing mint doesn’t have to be a headache—with the right containers, pruning habits, and a little patience, you can enjoy a thriving, manageable patch without the chaos. Remember, confining mint to pots or barriers and regular harvesting are your best tools for keeping it happy (and contained!).
Ready to dive in? Start small—pick one or two mint varieties—and watch your garden (and tea stash) flourish! 🌱✨ Grab your supplies and get growing today!