
Tools
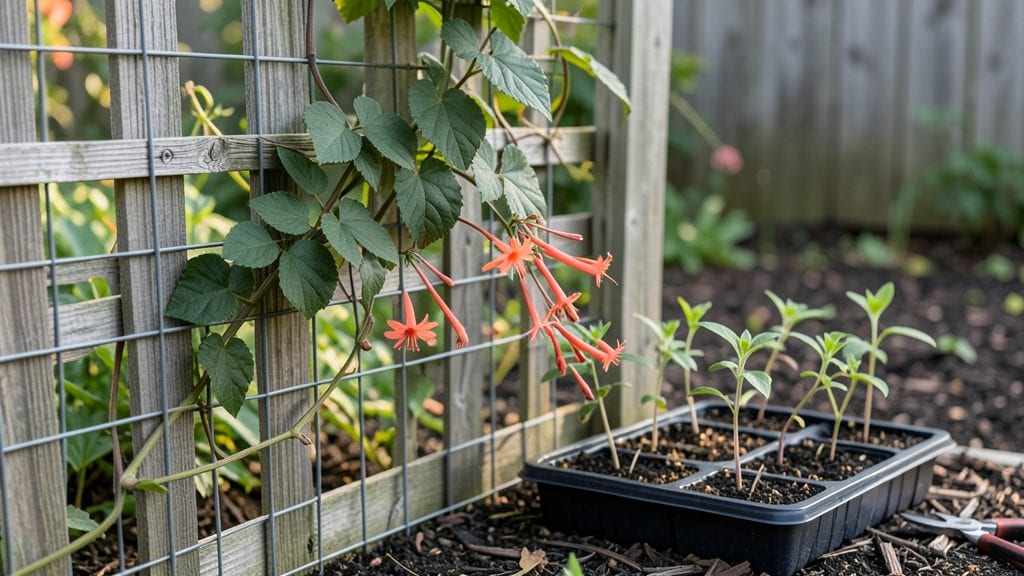
Garden mesh transforms floppy vines into showstopping vertical displays—no more sprawling tomatoes or hidden weeds ruining your design. 🌿 I’ve used it to turn a bare fence into a lush green wall and keep pests out of my strawberries without chemicals.
The right mesh does double duty: support, protection, and even a decorative edge for raised beds.
Plastic mesh is lightweight and affordable for annuals, while metal lasts decades for permanent structures like trellises. Biodegradable options work well for short-term projects or organic gardens. For climbing plants, opt for 1-inch square mesh—it’s sturdy enough for cucumbers but lets air circulate to prevent disease.
My go-to is heavy-duty plastic mesh stretched between posts for peas and beans, and it’s held up for five seasons with minimal maintenance.
You’ll love how mesh elevates your garden’s look while making harvests easier. Imagine sunflowers reaching 10 feet tall along a fence or eggplants growing vertically to save space. It’s the secret to turning awkward corners into productive zones or creating privacy screens that double as living walls.
Plus, it keeps critters from nibbling your greens without harsh sprays.
Works for everything from container gardens to sprawling backyard plots—just match the mesh type to your needs. Whether you’re a beginner or a seasoned gardener, this tool is one of the simplest ways to make your space both functional and stunning. Let’s get your plants climbing!
📚 In This Guide
- What you need
- Instructions
- Tips and common mistakes
- Wrapping up and next steps
What you need
- ● Garden mesh: 1–3 rolls (depending on project size). Opt for galvanized steel mesh (0.5"–1" openings) for durability or plastic mesh (0.25"–0.5" openings) for lightweight flexibility. Standard width: 3–4 feet.
- ● Stakes or posts: 4–12 wooden, metal, or plastic stakes (4–6 ft tall). Use T-posts for heavy-duty support or bamboo stakes for a rustic look.
- ● Twine or zip ties: 1–2 spools (for securing mesh to stakes). Choose UV-resistant twine or heavy-duty zip ties.
- ● Garden staples: 1 box (for attaching mesh to wood frames or fences). Use galvanized staples for longevity.
- ● Scissors or wire cutters: 1 pair (for trimming mesh to size). Heavy-duty wire cutters work best for metal mesh.
- ● Measuring tape: 1 (50+ ft for accuracy).
- ● Hammer or staple gun: 1 (for securing stakes and mesh). A cordless staple gun adds convenience.
- ● Gloves: 1 pair (to protect hands from sharp edges or splinters). Opt for gardening gloves with grip.
- ● Corrosion-resistant paint: 1 can (for metal stakes or mesh in harsh climates).
- ● Landscape fabric: 1 roll (to block weeds if installing mesh near soil).
- ● Decorative elements: Solar lights, vines, or paint (to personalize your mesh structure!).
Step-by-Step guide for installing garden mesh support
Here's how to use mesh for garden structures that adapt as your plants grow—no more flopping greens or tangled vines.
🌱 Step 1: Measure and Cut Mesh to Fit Plant Height
Start by measuring the height of your tallest plants or the space you want to cover. For most garden greens like pole beans or cucumbers, a 4-6 foot tall mesh section works perfectly. Use sharp garden shears to cut the mesh along the marked lines—never tear it, as rough edges can snag stems and damage plants.
I like to cut a few extra inches at the top to allow for securing the mesh to stakes or trellises. For a 5-foot-tall structure, cut the mesh 5 feet 2 inches to account for overlap when attaching. Always wear gloves when handling mesh to avoid skin irritation from the fibers.
🪴 Step 2: Assemble the Support Frame
Drive 4-6 foot wooden stakes into the ground at 2-foot intervals along the garden bed. For a sturdy structure, use 2 stakes per 4-foot section of mesh. Hammer the stakes firmly until they’re stable but not wobbling—you want them to stay upright without bending when plants lean against them.
For taller plants like trellised tomatoes, add a horizontal crossbar between stakes at 3 feet and 5 feet heights. Use zip ties or sturdy garden twine to secure the crossbars tightly. This creates multiple attachment points for the mesh, preventing it from sagging as vines grow heavier.
💧 Step 3: Attach Mesh to the Frame
Unroll the mesh and drape it over the frame, starting at one end. Secure the bottom edge to the stakes using plastic-coated wire or twist ties—this keeps the mesh taut and prevents it from slipping downward as plants grow. For a 5-foot-tall structure, attach the mesh at 6-inch intervals along the frame to ensure even support.
At the top, fold the excess mesh over the highest crossbar and secure it tightly. If you’re using a continuous mesh row, overlap sections by 6 inches and attach with zip ties or wire. This creates a seamless growing surface that vines can climb without gaps. Avoid using nails—they can damage the mesh and make future adjustments difficult.
☀️ Step 4: Train Plants to Use the Mesh
As your plants grow, gently guide the main stems and side shoots toward the mesh. For vining plants like cucumbers or squash, tie the first tendril to the mesh with a soft plant tie when it’s 4-6 inches long. This encourages upward growth and prevents the plant from sprawling on the ground, where it’s more susceptible to rot and pests.
For bushier plants like pole beans or peas, weave the stems through the mesh holes every 2-3 inches as they grow. This distributes the plant’s weight evenly and reduces the risk of breakage. Check the mesh weekly—if any sections sag, reinforce them with additional ties or adjust the stakes for better stability.
✂️ Step 5: Maintain and Adjust as Plants Grow
Every 2-3 weeks, inspect the mesh for signs of wear or sagging. If vines have grown too heavy for the original stakes, add supporting stakes in the middle of the structure. For example, if your cucumber vines are now 8 feet tall but your mesh only goes to 6 feet, extend the structure by adding another 2-foot section of mesh and stakes.
Prune any lateral shoots that grow away from the mesh—this directs the plant’s energy upward and keeps the structure tidy. In late summer, remove any dead or diseased leaves that accumulate on the mesh to prevent fungal growth. With proper care, your mesh support will last multiple growing seasons and adapt to your plants’ needs.
Tips & tricks for perfect garden mesh support
Here's what I've learned from years of using mesh supports—these tricks will help you create sturdy, long-lasting structures that actually work for your plants.
Mesh Selection Matters: Not all mesh is created equal. For vining plants like cucumbers or pole beans, choose mesh with 1-inch square holes—this gives stems enough room to grow through while still providing support. For heavier climbers like tomatoes or melons, opt for 1.5-inch holes to prevent the mesh from tearing as vines thicken. I've found that polypropylene mesh is the most durable and UV-resistant for long-term use.
Stake Placement Strategy: In Step 2, when driving your 4-6 foot wooden stakes at 2-foot intervals, consider the wind patterns in your garden. For exposed areas, add an extra stake between each 4-foot section of mesh to prevent swaying. I like to position stakes diagonally in windy spots to create a triangular support system—this dramatically improves stability without needing more stakes.
Attachment Technique: When securing the mesh in Step 3, use plastic-coated wire instead of zip ties for the bottom edge—it's more secure and won't cut into the mesh over time. For the top attachment, fold the excess mesh over the crossbar twice to create a 4-inch overlap rather than the standard 6 inches. This creates a tighter, more professional-looking finish that won't sag as vines grow heavier.
Seasonal Maintenance: Don't wait until Step 5 to check your structure! In late summer, when plants are at peak growth, I inspect my mesh supports every 10-14 days instead of every 2-3 weeks. Look for yellowing mesh (sign of UV damage) or stretched holes (sign of overloaded vines). Replace damaged sections immediately—it's easier to swap out a 2-foot section of mesh than to deal with broken plants later.
Pro Tips for Mesh For Garden
- Here's what I've learned from years of using mesh supports—these tricks will help you create sturdy, long-lasting structures that actually work for your plants.
- Mesh Selection Matters: Not all mesh is created equal.
- Stake Placement Strategy: In Step 2, when driving your 4-6 foot wooden stakes at 2-foot intervals, consider the wind patterns in your garden.
Frequently asked questions
Got questions about using mesh for garden? You’re not alone! Here are some of the most common queries—plus straightforward answers to help you get the most out of your plant support system.
What types of plants benefit most from garden mesh?
Garden mesh is especially helpful for vining plants like cucumbers, beans, peas, and squash. It also supports heavy foliage (e.g., tomatoes, melons) and prevents sprawling weeds. For lightweight flowers or herbs, lighter mesh works well—just avoid overcrowding!
How tall should my garden mesh be?
Height depends on your plants! For most vegetables, 4–6 feet is ideal. Tall crops like pole beans or trellised cucumbers may need 6–8 feet. Measure from the ground to the plant’s expected mature height, then add a foot for good measure.
When is the best time to install garden mesh?
Install mesh early in the season—right after the last frost—so plants can climb as they grow. If retrofitting, set it up as soon as seedlings are 4–6 inches tall. Pro tip: Pre-drive stakes into the ground before planting for easier setup!
Can I reuse garden mesh year after year?
Mesh is durable and reusable for 3–5 years if stored properly. Clean it with a hose or mild soap to remove debris, then dry it in the sun. Avoid leaving it damp to prevent mold or rust.
What if my plants aren’t climbing the mesh?
Encourage growth with these fixes:
- Train vines gently by weaving them through the mesh.
- Ensure the mesh is tight enough (not floppy) but not too dense.
- Check for pests or disease—healthy plants climb better!
Are there alternatives to plastic garden mesh?
Yes! Consider:
- Bamboo or wood trellises (eco-friendly, biodegradable).
- Metal cages (durable, great for tomatoes).
- Twine or string (budget-friendly, but requires more effort).
Plastic mesh is still the most affordable and versatile option for most gardeners!
Wrapping up and next steps
Choosing the right mesh for garden support can transform your gardening game—whether you're training vines, protecting delicate plants, or creating a structured growing space. From durable garden mesh for trellises to lightweight options for climbing plants, the key is matching the material to your plants' needs.
With the right setup, you’ll enjoy healthier harvests and a more organized garden layout!
Ready to upgrade your garden? Start by assessing your plants’ growth habits and picking the mesh type that fits best. Grab your tools, roll up your sleeves, and watch your garden thrive! 🌱✨