
Container Gardens
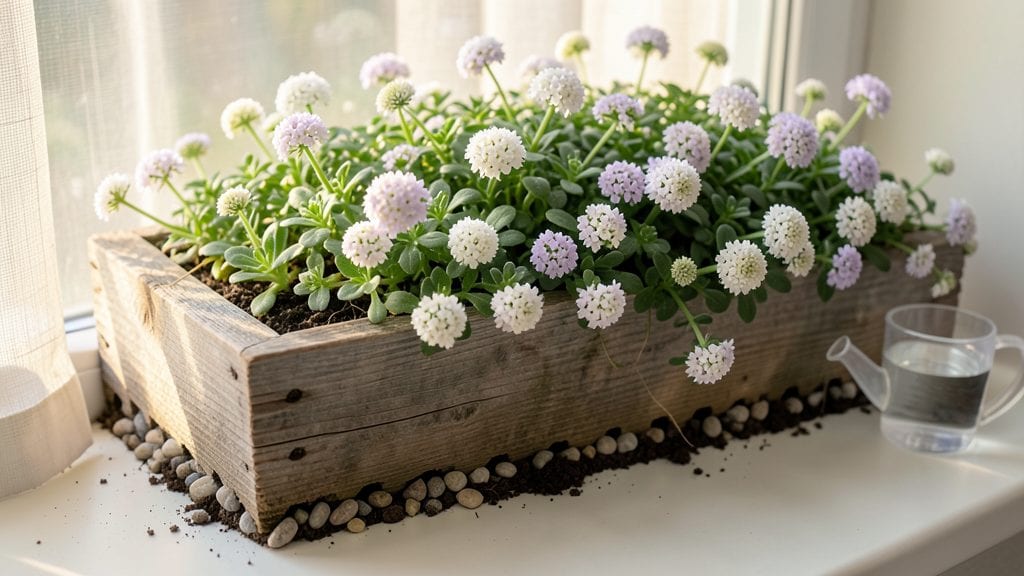
Window box gardening turns empty windows into vibrant vertical gardens that brighten your home year-round. ✨ I used to think window boxes were just for flowers—until I filled mine with trailing herbs, succulents, and seasonal blooms that actually thrive in tight spaces.
The right mix of plants creates a living tapestry that changes with the seasons, from spring bulbs to winter greenery.
You don’t need fancy supplies—just sturdy boxes, quality potting mix, and plants that love bright light. My go-to setup includes cascading petunias for summer color, dwarf boxwood for structure, and creeping thyme that spills over the edges.
The key is matching plant heights and textures so they complement each other, not compete. A 12-inch box can hold three to five plants if you choose wisely.
By summer, your window box will be a riot of color and fragrance, drawing in pollinators and neighbors alike. The best part? It’s low-maintenance once established—just water when the top inch feels dry and trim back leggy growth.
Even in winter, evergreens and dormant plants keep the space looking intentional. This is gardening that works with your space, not against it.
Perfect for apartments, porches, or cozy cottages—window boxes elevate any home’s curb appeal. Let’s get yours planted with a design that wows all year.
📚 In This Guide
- What you need
- Instructions
- Tips and common mistakes
- Wrapping up and next steps
What you need
- ● Window box: Width: 6–12 inches (15–30 cm) deep (shallow for annuals, deeper for perennials or root veggies). Length: Customize to fit your window sill (common sizes: 12–36 inches or 30–90 cm). Material: Wood (cedar or redwood for durability), metal, or plastic (ensure drainage holes are pre-drilled or drilled yourself).
- ● Drainage: 1–2 layers of landscape fabric or plastic mesh (cut to fit the box bottom). Small gravel or pebbles (½–1 inch diameter, 1–2 inches deep) for drainage.
- ○ Potting soil: High-quality container mix (avoid garden soil—it compacts!). Look for blends labeled for flowers, herbs, or vegetables (1–2 bags, depending on box size). Perlite or vermiculite (optional, 1 cup) for extra aeration.
- ● Plants: Choose compact varieties suited for window boxes (e.g., petunias, pansies, herbs like thyme or basil, or dwarf vegetables like lettuce). Quantity: Space plants 6–12 inches apart (check tags for spacing guidelines).
- ○ Tools: Trowel or small hand shovel for planting. Gloves (optional but handy for messy soil). Watering can or spray bottle (with a rose nozzle for gentle watering). Measuring tape or ruler for spacing plants evenly.
Step-by-step instructions for window box gardening
Here’s how to create a stunning window box that brings life to any space—no green thumb required.
🪴 Step 1: Choose and Prepare Your Window Box
Start with a box that’s at least 12 inches deep to accommodate roots and drainage. If yours doesn’t have holes, use a drill to add 2-3 drainage holes near the bottom—this prevents soggy soil that rots roots. Line the box with landscape fabric to keep soil in place while still allowing water to drain freely. I like to secure the fabric with a staple gun or zip ties so it doesn’t shift when I fill it with soil.
Next, fill the box ¾ full with lightweight potting mix—avoid garden soil, which compacts and drains poorly. Mix in a handful of perlite or vermiculite (about 1 cup per 2 gallons of soil) to improve aeration. This ensures roots get the oxygen they need without suffocating. Tap the box gently on the table to settle the soil, then water it until moisture reaches the bottom—this preps it for planting.
🌱 Step 2: Plan Your Planting Scheme
For a 4-foot window box, I recommend 3-5 plants total—this creates a balanced look without overcrowding. Place taller plants (like snapdragons or salvia) at the back, mid-height plants (like petunias or lobelia) in the middle, and trailing plants (like ivy or sweet alyssum) at the front. This tiered approach ensures nothing gets hidden and light reaches all foliage.
Dig holes twice as wide as the root ball but only as deep as the container’s original level. Gently remove plants from their nursery pots and loosen any circling roots with your fingers—this encourages outward growth. Space plants 6-12 inches apart, depending on their mature size. Larger plants (like geraniums) need more room, while smaller annuals (like bacopa) can sit closer together.
💧 Step 3: Plant and Water for Immediate Stability
Place each plant in its hole and fill the gap with soil, pressing lightly around the base to eliminate air pockets. Avoid packing too firmly—you want roots to spread easily. For trailing plants, tuck them into the front edges of the box so they cascade gracefully. Once all plants are in, water deeply until water runs out the drainage holes—this settles the soil and hydrates roots.
After watering, add a 1-inch layer of mulch (like shredded bark) on top of the soil. This keeps moisture in, suppresses weeds, and gives your window box a polished finish. I like to use orchid bark mulch because it’s lightweight and breaks down slowly. Avoid mulching right up against stems—leave a 1-inch gap to prevent rot.
☀️ Step 4: Position for Sunlight and Maintenance
Place your window box where it gets at least 4-6 hours of sunlight daily—most annuals thrive in full sun, but some (like impatiens) tolerate partial shade. If your window faces north, opt for shade-loving plants like begonias or ferns. Rotate the box a quarter turn weekly so plants grow evenly toward the light, not lopsided.
Water every other day during the first week to help roots establish, then adjust based on weather. Stick your finger 1 inch into the soil—if it feels dry, water thoroughly. Avoid overhead watering after planting; instead, water at the base to keep foliage dry and prevent fungal diseases. Fertilize every 2-3 weeks with a balanced liquid fertilizer (like 10-10-10) to keep blooms vibrant.
✂️ Step 5: Prune and Refresh for Long-Lasting Beauty
Deadhead spent blooms weekly to encourage more flowers and prevent leggy growth. Pinch back leggy stems just above a leaf node to promote bushier growth—this keeps plants compact and full. For trailing plants, gently weave new growth into the box to fill gaps as they grow. I also trim any yellow or brown leaves immediately to keep the display looking fresh.
By mid-season (around 6-8 weeks in), you may notice plants outgrowing their space. This is normal! Simply thin out the smallest or weakest plants and replant with new annuals for a fresh look. In fall, remove spent plants, refresh the soil with new potting mix, and add winter-hardy plants like pansies or dusty miller for year-round interest.
Tips & tricks for perfect window box gardening
A few simple tricks will help your window box thrive all season long—no guesswork required.
Soil Preparation Secret: When mixing your ¾ full lightweight potting mix, add ½ cup of worm castings per 2 gallons of soil for an extra nutrient boost. This gives your plants a head start and reduces the need for frequent fertilizing. I also recommend sifting the soil before adding perlite—this creates a finer texture that roots love.
Plant Selection Strategy: For a 4-foot window box, I suggest starting with 3 plants instead of 5 if you're a beginner. This gives each plant enough space to establish without competing for sunlight. Choose plants with similar water needs—like grouping succulents together or pairing annuals with similar sunlight requirements. This makes maintenance much easier!
Watering Wisdom: That initial deep watering in Step 3 is crucial—it should take about 10-15 minutes for water to run out the drainage holes. After planting, I like to water again the next morning to ensure roots are properly hydrated. For the first week, water every other day at the same time each day to establish a routine for your plants.
Seasonal Refresh: Around mid-season (6-8 weeks in), I recommend refreshing your window box by removing one-third of the weakest plants and replacing them with new annuals. This gives your display a facelift while preventing overcrowding. In fall, swap out summer plants with winter-hardy varieties like pansies—they'll keep your window box looking vibrant even when temperatures drop.
Pro Tips for Window Box Gardening
- A few simple tricks will help your window box thrive all season long—no guesswork required.
- Soil Preparation Secret: When mixing your ¾ full lightweight potting mix, add ½ cup of worm castings per 2 gallons of soil for an extra nutrient boost.
- Plant Selection Strategy: For a 4-foot window box, I suggest starting with 3 plants instead of 5 if you're a beginner.
Frequently asked questions
Got questions about window box gardening? You’re not alone! Here are some of the most common concerns—plus quick, practical answers to help you grow with confidence.
What’s the best soil mix for window box plants?
Use a lightweight, well-draining potting mix blended with perlite or vermiculite (20-30% by volume). Avoid garden soil—it compacts easily and suffocates roots. For herbs and succulents, add extra perlite (40%) to prevent sogginess. Pro tip: Sterilize soil with a 10-minute bake at 200°F (93°C) to kill pests before planting!
When is the ideal time to plant a window box?
For cool-season plants (pansies, violas, lettuce), plant in early spring or fall (after frost risk). Warm-season favorites (petunias, basil, geraniums) thrive when soil temps hit 60°F (15°C)—usually late spring. Year-round tip: Use cold-hardy herbs (thyme, rosemary) or evergreen ferns in winter for color!
How often should I water window box plants?
Check soil moisture daily—window boxes dry out 2-3x faster than ground beds. Water early morning (avoid evening to prevent fungal growth) until water runs from the bottom. Drip irrigation or self-watering planters are game-changers for busy gardeners. Overwatering is the #1 killer!
How do I keep pests out of my window box?
Prevent pests with physical barriers: Install fine mesh (like floating row covers) for aphids/caterpillars. Use neem oil or insecticidal soap for early infestations. Copper tape on edges deters slugs. Pro tip: Interplant with marigolds or basil—they repel pests naturally!
Can I use window boxes on balconies with no drainage?
Yes! Drill drainage holes in the bottom (or use a cache pot with holes). Place a saucer or tray underneath to catch overflow. For renters, opt for hanging planters with built-in saucers or DIY a box with a removable false bottom. Warning: Never let plants sit in standing water—root rot waits!
What are some low-maintenance window box plants for beginners?
Start with drought-tolerant picks:
- Succulents (sedum, echeveria) – Need water every 2 weeks.
- Herbs (thyme, oregano) – Thrives on neglect.
- Annuals (petunias, begonias) – Blooms nonstop with minimal care.
- Fern (Boston fern) – Adds lush greenery with shade tolerance.
Wrapping up and next steps
Window box gardening isn’t just about adding beauty to your space—it’s a creative, rewarding, and low-maintenance way to bring nature indoors year-round! Whether you’re a seasoned gardener or a curious beginner, these vertical gardens offer endless possibilities for color, texture, and even edible harvests. 🌸
Ready to dive in? Start small—pick a sunny spot, gather your supplies, and let your green thumb shine! Your window box awaits—what will you plant first?
- Next step: Sketch a simple design or browse seed catalogs for inspiration!
- Pro tip: Share your progress with fellow gardeners for tips and encouragement.