Blooming
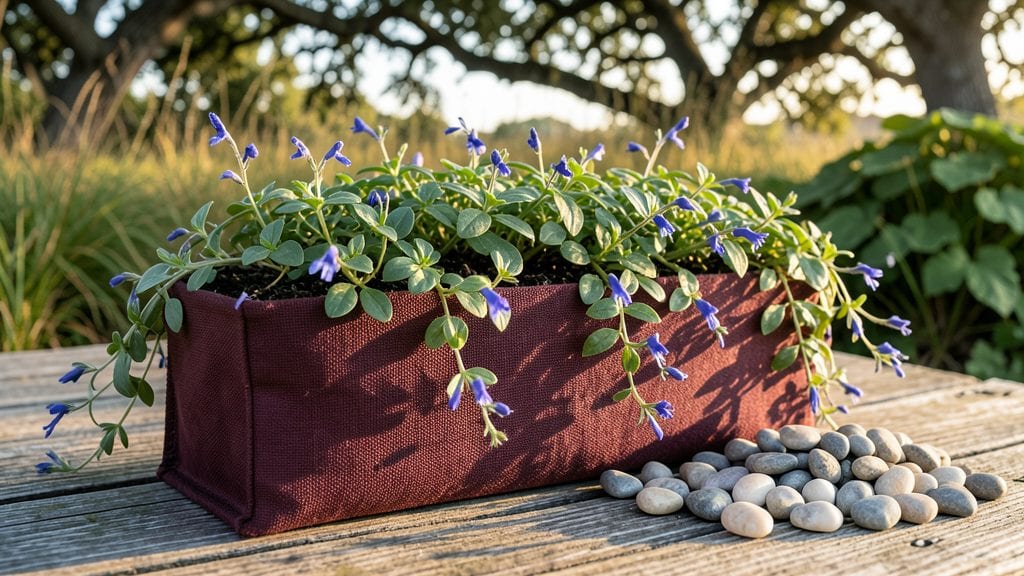
Long garden planters turn narrow spaces into lush vertical gardens that spill over with color. 🌿 I used to think planters were just for pots—until I lined mine along a fence and watched petunias, ferns, and trailing lobelia create a living tapestry that lasts all season.
The secret isn't fancy materials; it's the right plant mix and a little structural support.
You'll need planters that are at least 12-18 inches deep (shallower for annuals, deeper for perennials), sturdy enough to hold moisture, and with drainage holes. Cedar and galvanized metal last years without rotting, while plastic keeps costs low.
Pair them with cascading plants like sweet potato vine, bacopa, or nasturtiums—they'll spill over edges like a waterfall of blooms.
By midsummer, your planters will be a burst of fragrance and texture, with velvety foliage framing bright flowers. The best part? You'll reclaim dead space—balconies, porches, or even tight yard corners—without sacrificing curb appeal.
Just remember: water deeply but let the soil dry slightly between drinks to keep roots happy.
Works for urban balconies or sprawling backyards—just adjust plant sizes to your space. Here's how to make them thrive without the fuss.
📚 In This Guide
- What you need
- Instructions
- Tips and common mistakes
- Wrapping up and next steps
What you need
- ● Long Planter Box: Wooden planter (cedar, redwood, or treated pine) – 12–24 inches wide, 4–12 inches deep, and 4–8 feet long (adjust based on space).
- ● OR Pre-made fabric or metal grow bags – 12–18 inches wide, 10–12 feet long (check drainage holes!).
- ● Drainage Solutions: Plastic plant saucers (if using a wooden box) – 1–2 per planter.
- ● Drainage fabric or landscape cloth – 1 roll (to prevent soil loss).
- ● Pebbles or gravel – 1–2 inches layer per planter (for drainage).
- ● Soil & Fertilizer: High-quality potting mix – 2–3 cubic feet per 4-foot planter (lightweight and well-draining).
- ● Slow-release fertilizer (14-14-14 or organic) – 1–2 cups per planter.
- ● Plants: Trailing plants (e.g., petunias, fuchsias, or ivy) – 3–5 plants per 4-foot planter (spaced 6–12 inches apart).
- ● Upright fillers (e.g., snapdragons, salvia, or ornamental grasses) – 2–3 plants per planter.
- ● Thriller plants (e.g., cannas or hostas) – 1–2 per planter (for height).
- ● Watering can with a long spout – for even watering without over-saturation.
- ● Plant ties or stakes – to support trailing vines.
- ● Decorative edging (e.g., metal trim or rope) – for a polished look.
- ● Solar-powered planter lights – to highlight your cascading blooms at night.
- ● Mulch (e.g., bark chips) – to retain moisture and suppress weeds.
Step-by-Step instructions for creating long garden planters with cascading blooms
Here's how to transform vertical space into a lush, seasonal display using proven layering techniques.
🪴 Step 1: Select and Prepare the Planter Structure
Choose a long, narrow planter with built-in drainage holes—at least 12 inches deep to accommodate root systems and cascading plants. I prefer cedar or composite materials because they resist rot and stand up to seasonal weather. If using a repurposed container, drill additional drainage holes along the bottom if needed—this prevents root rot and ensures water flows freely.
Line the bottom with landscape fabric to block soil from clogging the drainage holes while allowing excess water to escape. Secure the fabric with a few staples or bend the edges inward slightly. This step is critical: without proper drainage, your plants will suffocate in soggy soil, even if they're drought-tolerant varieties.
🌱 Step 2: Layer Soil and Plants for Optimal Growth
Fill the bottom third of the planter with a lightweight potting mix blended with 20% perlite for aeration. This layer supports the heaviest plants—typically trailing varieties like petunias or fuchsias—that will anchor the display. Press the soil down gently but firmly to eliminate air pockets, then water thoroughly until it's evenly moist but not saturated.
Place your largest plants at the back, working toward smaller or trailing varieties in the front. I arrange plants in 3-inch deep layers, with each tier slightly higher than the last to create a natural waterfall effect. Space plants 6-12 inches apart depending on their mature size, leaving room for foliage to spill over the edges.
💧 Step 3: Water and Mulch for Season-Long Beauty
Water the planter deeply after planting, allowing water to run through the drainage holes completely. This settles the soil and removes any air gaps that could stunt root growth. I like to water from the top, then let it drain for 10-15 minutes before adding a 1-inch layer of mulch on the surface. Mulch retains moisture, regulates soil temperature, and prevents weeds from competing with your cascading plants.
Use a slow-release fertilizer mixed into the top layer of soil to provide nutrients throughout the growing season. Avoid fast-acting fertilizers—they burn tender roots and can wash away during heavy watering. Here's the thing: mulch and fertilizer work together to keep your planter thriving without constant maintenance.
☀️ Step 4: Position and Maintain for Maximum Impact
Place your planter in a location with 6-8 hours of sunlight daily, adjusted for the specific needs of your chosen plants. Most trailing annuals and perennials thrive in full sun**, but varieties like lobelia or impatiens prefer partial shade. Rotate the planter quarter-turn weekly to ensure even growth—you'll notice plants leaning toward the light if they're not getting balanced exposure.
Check soil moisture daily during the first week, then every 2-3 days once established. Water in the morning to reduce evaporation and fungal risks. You'll see the perfect moisture level when the top inch of soil feels dry to the touch but the lower layers remain damp. Overwatering is the fastest way to kill a cascading display—roots need oxygen as much as they need hydration.
✂️ Step 5: Prune and Deadhead for Continuous Blooms
Pinch back leggy stems when they reach 6-8 inches tall to encourage bushier growth and more abundant flowering. This is especially important for trailing plants like nasturtiums or sweet alyssum, which can become woody if left unchecked. Use clean, sharp pruners to make cuts just above a set of leaves—this ensures the plant redirects energy to new growth rather than wasting it on elongated stems.
Deadhead spent blooms regularly to prolong flowering and prevent seed production, which drains the plant's energy. I make it a habit to remove faded flowers every 3-5 days during peak bloom season. You'll see a noticeable surge in new blossoms within a week of consistent deadheading—it's like hitting the reset button on your planter's productivity.
Tips & tricks for perfect long garden planters
Here's what I've learned from years of perfecting cascading planters—these details make all the difference between a pretty display and a thriving vertical garden.
Drainage is Non-Negotiable: In Step 1, if your repurposed container lacks drainage holes, drill them along the bottom and sides—this prevents root rot that can silently kill your plants. I always add an extra hole or two beyond what's strictly necessary, because waterlogged soil is the silent killer of cascading displays. Use a drill bit slightly smaller than your finger to ensure proper drainage without damaging the container.
Soil Layering Secret: When creating those 3-inch deep layers in Step 2, mix in a handful of worm castings into the bottom layer. This boosts microbial activity right where your heaviest plants need it most. The castings break down slowly, feeding roots continuously without the risk of burning that comes with fast-acting fertilizers. Think of it as a slow-release nutrient boost from nature itself.
Watering Wisdom: That 10-15 minute drainage time in Step 3 is crucial—it's not just about letting water out, but also about ensuring your soil settles properly. I've seen planters collapse under their own weight when soil wasn't properly compacted. After draining, gently press down on the soil surface with your fingers to eliminate any remaining air pockets that could stunt root growth.
Sunlight Strategy: For those 6-8 hours of sunlight in Step 4, consider the sun's arc across your yard. Morning sun is gentler and prevents scorching, while afternoon sun can intensify colors. If you're using heat-sensitive varieties like impatiens, position them to receive morning sun and afternoon shade. A simple way to test is to observe your planter's shadow—if it's fully in shade by mid-afternoon, you're likely giving too much direct sun.
Pro Tips for Long Garden Planters
- Here's what I've learned from years of perfecting cascading planters—these details make all the difference between a pretty display and a thriving vertical garden.
- Drainage is Non-Negotiable: In Step 1, if your repurposed container lacks drainage holes, drill them along the bottom and sides—this prevents root rot that can silently kill your plants.
- Soil Layering Secret: When creating those 3-inch deep layers in Step 2, mix in a handful of worm castings into the bottom layer.
Frequently asked questions
Got questions about long garden planters? You’re not alone!
Here are some of the most common queries—and answers—to help you grow with confidence. Whether you’re a first-timer or a seasoned gardener, these tips will keep your vertical blooms thriving all season.
What’s the best way to prepare soil for long garden planters?
Start with a lightweight, well-draining mix. Combine equal parts potting soil, perlite, and compost for aeration and nutrients. Avoid garden soil—it compacts and drains poorly in narrow planters. For extra moisture retention, add coco coir or peat moss. Pro tip: Sterilize soil with a 10-minute bake at 200°F to kill pests before planting!
When is the ideal time to plant in long garden planters?
For annuals, plant after the last frost when soil temps hit 60°F+. Perennials and shrubs thrive when roots can establish before winter—aim for early spring or fall. Check your zone! If your area has mild winters, you can plant perennials in late fall for early spring blooms.
Can I reuse long garden planters year after year?
Clean them thoroughly after each season to prevent disease. Scrub with a 10% bleach solution, rinse well, and let dry in the sun. Store planters in a dry place to avoid mold. Pro tip: Line them with landscape fabric to reduce soil erosion and extend their lifespan.
What are some budget-friendly alternatives to traditional long planters?
No need to break the bank! Repurpose wooden crates, plastic gutters, or even old pallets with drainage holes. For a rustic look, use galvanized troughs or window boxes. Just ensure they’re weather-resistant and have proper drainage. DIY tip: Paint or stain them to match your garden aesthetic!
How do I keep pests out of my long garden planters?
Prevention is key! Use row covers or mesh screens for delicate plants. Plant pest-repelling herbs like basil or marigolds nearby. For stubborn bugs, try neem oil or insecticidal soap. Quick fix: Remove affected leaves immediately to stop infestations fast.
Do long planters need special care during droughts or heavy rain?
Yes! In droughts, water deeply every 2–3 days (early morning is best). Use mulch to retain moisture. During heavy rain, ensure planters have overflow holes to prevent root rot. Pro move: Group planters together to create a microclimate that regulates temperature and humidity.
Wrapping up and next steps
Long garden planters are a game-changer for adding height, drama, and year-round beauty to your outdoor space—without taking up precious ground area! 🌿 Whether you’re a seasoned gardener or just starting out, these vertical blooms bring effortless elegance and versatility to decks, patios, or even urban balconies.
With the right plants, placement, and care, you’ll create a stunning, low-maintenance oasis that thrives all season long.
Ready to transform your space? Start by sketching your vision—pick your favorite plants, measure your space, and gather supplies. Then, dive in with confidence! Your dream garden is just a few steps away. 🌸