Light Requirements
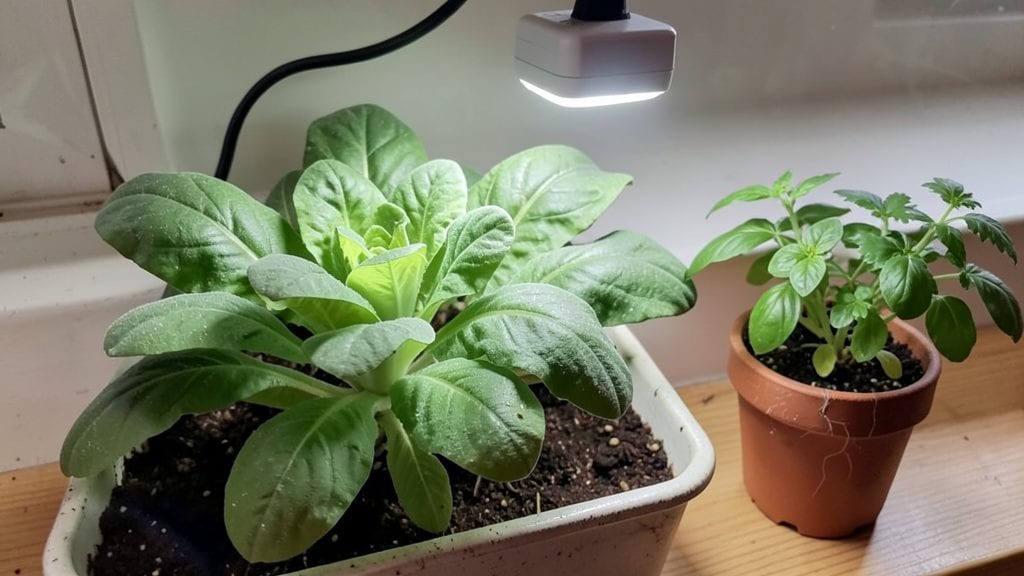
My indoor kitchen garden thrives where others fail—no fancy grow lights or greenhouse setups, just clever sunlight hacks that turn a tiny windowsill into a productive green oasis. The key is understanding which plants play well with limited light and how to stretch what sunlight you have across your space.
I’ve grown basil so fragrant it makes the whole kitchen smell like a Mediterranean market, and microgreens that emerge in just five days with the right setup.
You don’t need a sunroom or even a south-facing window to make this work. Start with a south- or west-facing windowsill—the brightest spots in most kitchens—and supplement with reflective surfaces like aluminum foil or a mirror to bounce extra light onto your plants.
Herbs like parsley, mint, and chives are the easiest to grow indoors, while microgreens like radish or broccoli sprout in as little as 3-7 days with minimal light. Even a basic LED grow light on a timer for 12 hours a day can keep greens thriving year-round.
What you’ll end up with is fresh herbs within weeks and baby greens that taste shockingly crisp compared to store-bought. The best part? No more forgetting to water—these plants thrive in small containers, so they’re forgiving when you’re busy.
Plus, the setup blends seamlessly into kitchen decor, whether you use stackable pots, a vertical wall garden, or even repurposed jars. The only thing you’ll miss is the grocery store trip.
This works for apartments, tiny homes, or even a single sunny corner. The same principles apply whether you’re growing on a 5-foot countertop or a 10-foot windowsill—it’s all about maximizing light and choosing the right plants. Let’s get started with the simplest setup that actually delivers results.
📚 In This Guide
- What you need
- Instructions
- Tips and common mistakes
- Wrapping up and next steps
What you need
- ● Containers: 1–3 window-box planters (6–12" deep, with drainage holes) or self-watering pots (for herbs/greens).
- ● 1 shallow tray (for microgreens, 2–3" deep).
- ● Growing Medium: 1 bag well-draining potting mix (look for "seed-starting" or "herb mix").
- ○ 1 bag coco coir or peat moss (optional, for moisture retention).
- ● Seeds/Plants: Herb seeds: basil, parsley, cilantro, or mint (or young seedlings for faster growth).
- ● Green seeds: lettuce, spinach, or kale (or microgreen kits for quick harvests).
- ● Lighting (Critical!): 1 grow light (LED, 12–18" above plants, 12–16 hrs/day) OR
- ● South-facing window (6+ hrs direct sunlight) OR
- ● 1 reflective surface (aluminum foil or mirror) to maximize natural light.
- ● Tools: 1 spray bottle (for gentle watering).
- ● 1 small hand trowel (for planting/seeding).
- ○ 1 moisture meter (optional, to track soil hydration).
- ● 1 humidity dome (to retain moisture for seedlings).
- ● 1 timer (for automated grow-light scheduling).
- ● 1 fertilizer (organic, water-soluble, for nutrient boosts).
- ● 1 label maker (to track plant varieties and harvest dates).
Step-by-Step instructions for creating an indoor kitchen garden
Let’s turn your kitchen into a thriving herb and greens oasis using smart sunlight strategies.
Select the Right Containers and Growing Materials
Start with containers that have drainage holes—herbs and greens despise soggy roots. I recommend using 4-6 inch pots for individual plants or a long shallow tray for greens like lettuce or spinach. The materials list includes 4 gallons of potting mix—this light, airy blend drains well and prevents compaction, which is critical for container gardening.
Fill each container about 1 inch below the rim with the potting mix. Tap the sides gently to settle the soil without packing it down. Pre-moisten the mix with warm water until it’s damp but not dripping. This ensures roots establish quickly without shock. If you’re using a tray, add a 1-inch layer of perlite at the bottom for extra drainage.
Choose Sun-Loving or Low-Light Varieties
Not all herbs and greens thrive indoors, so pick wisely. For sunlight-rich spots (like south-facing windows), grow basil, thyme, or parsley—they need at least 6 hours of direct light daily. If your kitchen only gets bright indirect light, opt for mint, chives, or leafy greens like Swiss chard, which tolerate lower light better.
I like to group plants by their light needs. Place sun-lovers near the brightest window and move shade-tolerant varieties to slightly darker corners. Watch for leggy growth—a sign your plants aren’t getting enough light. If stems stretch thin and leaves space far apart, it’s time to adjust their position or supplement with a grow light.
Plant and Water for Immediate Success
Dig a hole in the potting mix twice as deep as the root ball for transplants, or sow seeds ¼ inch deep for herbs like dill or cilantro. Gently press the soil around the roots to secure them, then water lightly but thoroughly until moisture seeps from the drainage holes. This ensures the roots make contact with damp soil right away.
After planting, let the top ½ inch of soil dry out before watering again. Overwatering is the fastest way to kill container plants—roots need air as much as moisture. I set a reminder to check soil moisture every 2-3 days, especially in dry indoor air. If the soil feels dry to the touch, it’s time to water again.
Supplement Light with Grow Lights or Reflective Surfaces
If natural light is lacking, a full-spectrum LED grow light is a game-changer. Position it 4-6 inches above the plants and keep it on for 12-14 hours daily. I use a simple clip-on light for my windowsill setups—it’s affordable and adjustable. For greens like spinach or arugula, 10-12 hours of light is enough, while herbs like basil need the extra 2 hours.
No grow light? No problem. Place a white or silver reflective tray under the containers to bounce extra light onto the plants. Even a mirror propped behind pots can double the light exposure. Watch for yellowing leaves—a classic sign of insufficient light. If you see this, move plants closer to the light source or extend their exposure time.
Maintain and Harvest for Long-Term Growth
Once your plants establish (usually 2-3 weeks after planting), fertilize lightly with a balanced liquid fertilizer every 4-6 weeks. I dilute it to half-strength to avoid burning tender roots. Herbs like basil and cilantro grow fast—harvest outer leaves regularly to encourage bushier growth. For greens, snip outer leaves at the base, leaving the inner growth intact.
Rotate containers a quarter turn weekly so plants grow evenly toward the light. This prevents them from leaning or growing lopsided. If you notice pests like aphids, spray plants with neem oil or rinse them under lukewarm water. Most indoor pests are easy to manage with early intervention—don’t wait until they spread.
Tips & tricks for perfect indoor kitchen gardens
Creating a thriving indoor herb and greens garden doesn't have to be complicated—just a few simple strategies can make all the difference.
Container Size Matters: The 4-6 inch pots mentioned in Step 1 are perfect for individual herbs, but if you're growing greens like spinach or lettuce, consider using slightly larger containers—around 8 inches wide. Larger root systems need more space to establish, and this prevents overcrowding as plants mature. For the shallow tray, ensure it's at least 6 inches deep to accommodate greens' longer roots.
Light Exposure is Everything: In Step 2, when selecting varieties, remember that the 6 hours of direct light required for sun-lovers like basil is non-negotiable. If your kitchen only gets 4 hours of direct light, consider using a grow light for the remaining 2 hours to meet their needs. For greens like Swiss chard, you can get away with slightly less light, but they still need at least 4-5 hours of bright indirect light daily to thrive.
Watering Wisdom: The instructions mention letting the top ½ inch of soil dry out before watering again, but this can vary based on your kitchen's humidity. In dry climates or during winter when indoor air is especially dry, you might need to water every 2 days instead of every 3. Always check moisture by sticking your finger about an inch into the soil—if it feels dry, it's time to water. Overwatering is the silent killer of container gardens, so when in doubt, water less often.
Harvesting for Health: In Step 5, when harvesting outer leaves, be sure to use clean, sharp scissors or fingers to avoid damaging the plant. For herbs like basil, you can pinch off the top sets of leaves to encourage bushier growth, but always leave at least a few leaves on each stem. For greens, cutting leaves at the base promotes regrowth, but avoid taking more than one-third of the plant at a time to prevent stress.
Pro Tips for Indoor Kitchen Gardens
- Creating a thriving indoor herb and greens garden doesn't have to be complicated—just a few simple strategies can mak...
- Container Size Matters: The 4-6 inch pots mentioned in Step 1 are perfect for individual herbs, but if you're growing...
- Light Exposure is Everything: In Step 2, when selecting varieties, remember that the 6 hours of direct light required...
Frequently asked questions
Got questions about indoor kitchen gardens?
Here are some of the most common ones—and their easy solutions!
What’s the best light source for an indoor kitchen garden?
Natural sunlight is ideal, but if that’s limited, grow lights (LED or fluorescent) work great! Place them 6–12 inches above plants for 12–16 hours daily. For herbs, bright windowsills (south-facing) are perfect. Leafy greens like spinach need more light—supplement with artificial sources if needed.
How quickly will I see results with an indoor kitchen garden?
Fast-growing herbs like basil or cilantro may sprout leaves in 2–3 weeks, while slower greens (kale, Swiss chard) take 4–6 weeks. Consistency is key—water, light, and warmth speed up growth! Start with quick winners like mint or chives for instant gratification.
Are there budget-friendly alternatives to expensive grow lights?
Yes! Use reflective surfaces (aluminum foil, mirrors) to bounce natural light deeper into rooms. DIY grow light setups with LED bulbs (6000K–6500K color temp) in lamps or even phone flashlights (for seedlings) work in a pinch. Repurpose old lamps or thrift-store fixtures to save cash!
Why are my indoor herbs turning yellow or leggy?
Yellow leaves often mean overwatering or nutrient deficiency—let soil dry slightly between waterings. Leggy herbs? They’re stretching for light—move them closer to a brighter spot or add grow lights. Rotate plants weekly for even growth, and trim leggy stems to encourage bushier growth.
Can I grow an indoor kitchen garden in a small apartment?
Opt for compact setups like windowsill herb gardens, vertical planters, or self-watering pots. Dwarf varieties (e.g., ‘Thai Basil,’ ‘Baby Leaf Lettuce’) thrive in tight spaces. Even a sunny bathroom or kitchen counter can work—just ensure proper drainage and airflow to prevent mold.
Wrapping up and next steps
Creating an indoor kitchen garden is easier than you think—even with limited sunlight! 🌱 By leveraging clever placement, reflective surfaces, and smart lighting, you can grow fresh herbs and greens year-round.
Whether you’re a beginner or a seasoned plant parent, these sunlight hacks make it simple to bring nature into your home.
Ready to take the next step? Start small with a windowsill setup or invest in a grow light—your future meals (and taste buds!) will thank you. Happy growing! 🌿