Tools
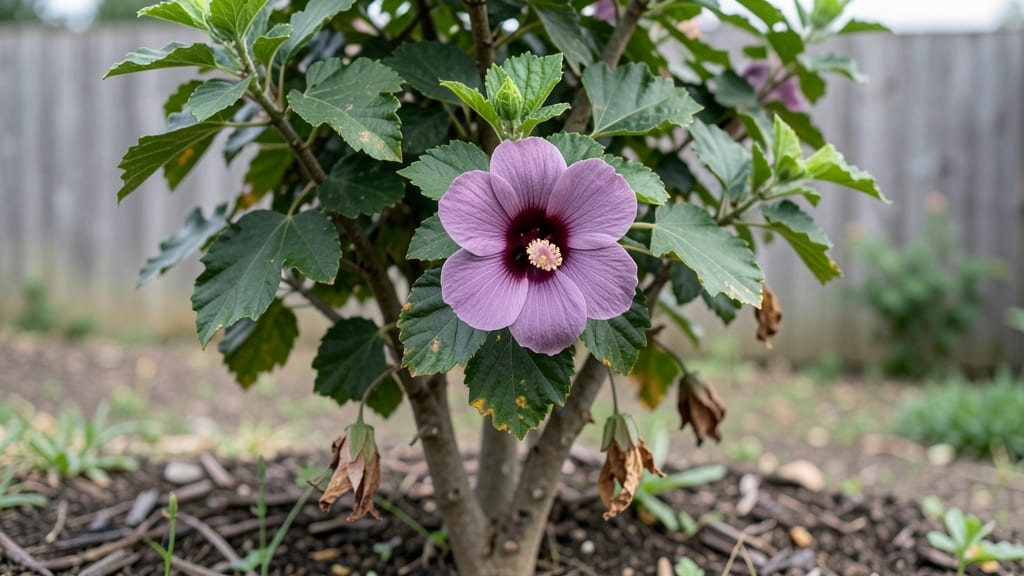
Hibiscus in garden designs turns ordinary spaces into vibrant tropical escapes with their bold, velvety blooms that last all season. 🌺 I’ve used them to transform dull corners into eye-catching focal points—just one plant can anchor a whole bed with its dramatic color and lush foliage.
The key to making hibiscus shine is smart placement: group them with deep greens like coleus or dusty miller to make the flowers pop, or pair them with bright annuals like cannas for a wild, jungle-like vibe.
In containers, they thrive in large pots with trailing plants like sweet potato vine to soften their bold presence.
With the right care, your hibiscus will bloom from early summer until frost, offering nonstop color that outshines most annuals. The secret? Full sun, consistent watering, and a little deadheading to keep flowers coming. You’ll end up with a garden that feels like a resort—without the travel.
Works in borders, as standalone specimens, or even in mixed containers. Let’s make your garden the talk of the neighborhood with these tropical stars!
📚 In This Guide
- What you need
- Instructions
- Tips and common mistakes
- Wrapping up and next steps
What you need
- ● Hibiscus plants: Choose between: Potted hibiscus (1-3 plants for small gardens, 4+ for larger spaces)
- ● Seeds (50+ for better germination rates)
- ● Cuttings (3-5 healthy stems, 4-6 inches long)
- ● Well-draining potting mix: 5-10 gallons (or enough to fill your containers/garden beds). Mix with perlite or sand (1 part perlite/sand per 3 parts soil) for optimal drainage.
- ● Fertilizer: Balanced 10-10-10 fertilizer (1 lb for every 10 sq ft of garden)
- ○ Slow-release osmocote (optional, for convenience)
- ● Mulch: 2-3 inches of organic mulch (e.g., pine bark or shredded leaves) to retain moisture.
- ● Gardening gloves (1 pair, heavy-duty for protection)
- ● Trowel or spade (for planting and soil prep)
- ● Pruners or sharp scissors (for trimming cuttings or deadheading)
- ● Watering can or hose with a gentle spray nozzle (hibiscus loves hydration!)
- ○ pH testing kit (optional but helpful—hibiscus thrives in 6.1-6.5 pH)
- ○ Support stakes or trellis (optional, for climbing varieties like Hibiscus rosa-sinensis)
- ● Full sunlight exposure (6+ hours daily). Partial shade works for cooler climates.
- ● Warmth-loving plant! Ensure minimum temperatures above 50°F (10°C) for planting.
- ● Access to regular watering (especially in dry climates). Hibiscus roots need consistent moisture!
- ● Space! Hibiscus can grow 6-10 feet tall/wide—plan accordingly.
Step-by-step guide to planting hibiscus for stunning year-round color
Here’s how I turn my garden into a vibrant hibiscus paradise—bold blooms that last from spring through fall with the right care.
🌱 Step 1: Choose the Perfect Planting Spot
Hibiscus thrives in full sun—at least 6-8 hours daily—so pick a location where they’ll get morning light and afternoon warmth. I always test spots by watching how long shadows linger; if the area gets shade after noon, supplement with a sun-loving companion plant like lantana or salvia to fill gaps.
Soil should drain well but hold moisture—hibiscus roots rot easily in soggy conditions. If your garden soil feels heavy when squeezed, mix in 2-3 inches of compost from your materials list to lighten it up. The ideal spot also has shelter from strong winds, which can tear delicate blooms.
🪴 Step 2: Dig and Prepare the Planting Hole
Dig a hole twice as wide as the hibiscus’s root ball but only as deep as the container it came in. Loosen the sides of the hole with a shovel or hands—hibiscus roots spread wide, so they need room to establish quickly. If planting multiple bushes, space them 4-6 feet apart for airflow and growth.
Before placing the plant, mix 1 cup of slow-release fertilizer (like the 10-10-10 type) into the native soil at the bottom of the hole. This gives roots a nutrient boost right away. Tap the plant gently from its container to check for root-bound growth—if roots circle tightly, tease them apart with your fingers before setting it in.
💧 Step 3: Plant and Water Deeply
Lower the hibiscus into the hole, keeping the top of the root ball level with the ground. Fill the hole with soil, pressing lightly to remove air pockets but not compacting too firmly. Water deeply—about 1 gallon per plant—to settle the soil and encourage roots to spread outward. You’ll see the soil sink slightly as it absorbs moisture.
Mulch around the base with 2-3 inches of organic mulch (like shredded bark) to retain moisture and regulate soil temperature. Keep mulch 2 inches away from the stem to prevent rot. Hibiscus love humidity, so this step mimics their tropical origins—just don’t let mulch pile up against the trunk.
☀️ Step 4: Feed and Prune for Continuous Blooms
After the first flush of blooms fades, feed your hibiscus with ½ cup of balanced fertilizer every 4-6 weeks during the growing season. I use a liquid bloom booster in late spring and again in midsummer to keep flowers coming. Watch for yellowing leaves—this often means it’s time to feed again.
Deadhead spent blooms by pinching off the flower head just above a set of leaves. This encourages new growth and prevents seed formation, which drains the plant’s energy. In late fall, trim back one-third of the plant’s height to shape it and remove any dead or diseased branches. This rejuvenates the bush for next year’s blooms.
⏰ Step 5: Winter Care for Year-Round Color
In colder climates, hibiscus need protection when temperatures drop below 30°F. I wrap the base of the plant with burlap or frost cloth and mound 4-6 inches of mulch around it. For potted hibiscus, move them to a garage or sheltered porch where temps stay above freezing. Water sparingly in winter—just enough to keep the soil slightly moist but not soggy.
Prune back lightly in early spring before new growth starts. Look for shriveled buds or blackened stems—these are signs of winter damage. Once temperatures stay above 50°F consistently, resume regular watering and fertilizing. Hibiscus are forgiving, but consistency in winter care ensures they burst back into bloom come spring.
Tips & tricks for perfect hibiscus planting
Here's what I've learned after years of growing vibrant hibiscus—these little tricks make all the difference between a struggling plant and one that bursts with bold color.
The Sunlight Secret: That 6-8 hours of sunlight is non-negotiable, but here's the thing: morning sun is your best friend. I've found hibiscus handle the afternoon heat better when they've had their full morning dose of light. If you notice buds wilting in hot afternoons, give them a little afternoon shade with a sheer curtain or nearby taller plants.
Root Ball Rescue: When you tap that container to check for root-bound growth, you might find roots circling tightly. This is a common issue with nursery plants. Don't just tease them apart—cut through any tight circles with clean scissors before planting. It's like giving your hibiscus a fresh start right from the beginning.
Watering Wisdom: That initial 1-gallon deep watering is crucial, but don't stop there. For the first two weeks, water every other day to help roots establish. After that, let the top inch of soil dry out between waterings—hibiscus hate soggy roots but also can't handle drought. I test this by sticking my finger in the soil; if it's dry at that depth, it's time to water.
Winter Protection Hacks: When temps drop below 30°F, I don't just mound mulch—I create a mini greenhouse effect. After adding that 4-6 inches of mulch, I drape a clear plastic bottle (cut in half) over the plant like a cloche. It traps warmth while still letting light through. For potted hibiscus, I move them to my garage but leave them near a window to catch any sunlight.
Pro Tips for Hibiscus In Garden
- Here's what I've learned after years of growing vibrant hibiscus—these little tricks make all the difference between a struggling plant and one that bursts with bold color.
- The Sunlight Secret: That 6-8 hours of sunlight is non-negotiable, but here's the thing: morning sun is your best friend.
- Root Ball Rescue: When you tap that container to check for root-bound growth, you might find roots circling tightly.
Frequently asked questions
Got questions about growing hibiscus in your garden?
You’re not alone! Here are answers to the most common queries to help you cultivate stunning, vibrant blooms with ease.
When is the best time to plant hibiscus in my garden?
For tropical hibiscus (like Hibiscus rosa-sinensis), plant in spring or early summer after the last frost when soil is warm (60°F+). Hardy hibiscus varieties can tolerate cooler climates—plant them in late spring to avoid early frosts. Give them 6+ hours of sunlight daily for best results!
How often should I water hibiscus plants?
Hibiscus loves consistent moisture—water deeply 2-3 times per week (daily in extreme heat). Let the top 1-2 inches of soil dry out between waterings to prevent root rot. Mulch around the base to retain moisture and protect roots. Overwatering is worse than underwatering!
What pests or diseases should I watch for with hibiscus?
Common issues include:
- Aphids/spider mites: Spray with water or use neem oil.
- Whitefly: Yellow sticky traps help.
- Fungal diseases (like powdery mildew): Improve airflow and avoid overhead watering.
- Root rot: Ensure well-draining soil and never let plants sit in soggy conditions.
Can hibiscus grow in containers, or do they need a garden bed?
Hibiscus thrives in large containers (15+ gallons) with drainage holes. Choose a pot at least 12 inches deep and use a well-draining potting mix. Move containers indoors (or to a sheltered spot) if temps drop below 40°F. Dwarf varieties are ideal for small spaces!
How and when should I prune hibiscus for more flowers?
Prune tropical hibiscus in late winter/early spring (before new growth) to shape the plant and encourage blooms. Cut back 1/3 of the plant to remove dead wood and crowded branches. For hardy hibiscus, prune after flowering to maintain shape. Never prune in fall—it reduces winter hardiness!
Can hibiscus survive winter, or do I need to dig them up?
It depends! Tropical hibiscus (non-hardy) cannot tolerate frost—dig up pots or mulch heavily and wrap in burlap. Hardy hibiscus (like Hibiscus moscheutos) survive USDA zones 5-9. In cold climates, cut back stems and mulch 6+ inches deep to protect roots.
Wrapping up and next steps
Adding hibiscus plants to your garden is a fantastic way to bring vibrant tropical flair and year-round color to your outdoor space! 🌺 Whether you're drawn to their bold blooms or their low-maintenance charm, these plants offer beauty with minimal fuss.
Now that you’re armed with the right knowledge—from soil prep to pest control—it’s time to roll up your sleeves and get planting!
Start small if you’re new to gardening, or go all out with a stunning hibiscus border. Next step? Pick your favorite variety, grab your gardening tools, and let your garden thrive with tropical elegance!