Tools
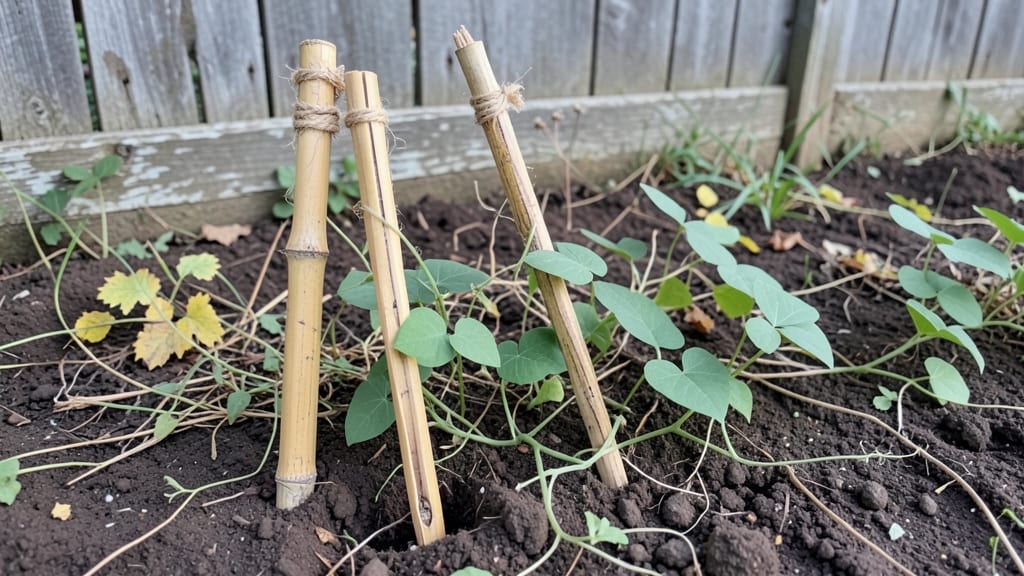
Turn these garden stakes DIY from scrap wood into the sturdy supports your climbing plants deserve—no more flimsy store-bought versions that bend at the first gust of wind. 🌱 I’ve turned old fence slats, pallet wood, and even broken ladders into supports that last through multiple growing seasons, saving money while giving my tomatoes and cucumbers the strong foundation they need.
The beauty of this project lies in its simplicity: you only need basic tools—a saw, drill, and sandpaper—and materials you might already have lying around. A 4x4 post makes a great stake for tomatoes, while thinner strips work perfectly for lighter climbers like beans or morning glories.
The key is cutting the wood to the right height—5 to 6 feet for most vining plants—and reinforcing the base to prevent wobbling.
Once assembled, these stakes become the backbone of your garden, guiding plants upward to maximize sunlight and airflow while keeping fruits off the ground. My cucumbers now sprawl neatly along their supports, producing heavier yields than ever before, and the wooden stakes blend seamlessly into the garden’s natural look.
The best part? You can customize them for trellises, espalier frames, or even decorative garden borders.
This method works for any climate or space—whether you’re growing in a backyard, balcony, or raised bed. Let’s get your hands on some wood and turn those scraps into functional, long-lasting supports that’ll make your plants thrive.
📚 In This Guide
- What you need
- Instructions
- Tips and common mistakes
- Wrapping up and next steps
What you need
- ● Wood scraps or pallets: Untreated, straight-grained wood (e.g., pine, cedar, or oak). Aim for 1x2 or 2x2-inch lumber, at least 4-6 feet long. Pro tip: Check local hardware stores or reuse old fences/deck planks!
- ● Sandpaper (80-120 grit): For smoothing rough edges—1 sheet per 5-10 stakes.
- ○ Wood stain or paint (optional but recommended): Weather-resistant finish (e.g., polyurethane, linseed oil, or non-toxic exterior paint). 1 quart per 10-15 stakes.
- ● Twine, jute rope, or zip ties: For securing plants to stakes. 1 spool (50 ft) covers ~20 stakes.
- ● Measuring tape or ruler: For precise cuts (even a 12-inch tape works!).
- ● Hand saw or circular saw: A fine-tooth saw (like a Japanese pull saw) minimizes splintering.
- ○ Drill (optional): If pre-drilling holes for twine/rope (use a 1/8-inch bit).
- ● Paintbrush or foam brush: For applying stain/paint evenly.
- ● Work gloves & safety glasses: Because safety first! 🛡️
- ● Wood glue: For reinforcing joints if crafting angled or decorative stakes.
- ● Stencils or woodburning tool: To add personalized designs (e.g., plant names or patterns).
- ● Waterproof sealant: Extra layer for stakes in high-moisture areas.
- ● Level: Ensures stakes stand perfectly straight in the ground.
Step-by-step instructions for building upcycled garden stakes
Here's how to create sturdy, eco-friendly supports using scrap wood—no special tools required.
🪴 Step 1: Gather and Prepare Wooden Materials
First, collect 2x4 lumber scraps or 1x2 boards at least 4 feet long—old fence pickets, pallet wood, or leftover construction pieces work perfectly. I like to use untreated wood for longevity, but if you must seal it, apply non-toxic stain or paint before assembly. Cut pieces to your desired stake length (typically 5-6 feet for most climbing plants).
Sand rough edges and splinters with 80-grit sandpaper to prevent injury when handling. Here's the thing—rough edges will eventually tear plant vines, so smooth everything thoroughly. Test the wood by running your hand along it; if you feel any snags, sand again until it's completely smooth.
✂️ Step 2: Cut and Shape the Stakes
For single-stake supports, simply cut your wood to 5-6 feet and bevel one end at a 30-degree angle to help it sink easily into the soil. Use a handsaw or circular saw with a fine-tooth blade for clean cuts. I mark my cuts with a pencil first—this prevents mistakes and gives you a visual guide for alignment.
For trellis-style stakes, cut 4-6 horizontal slats at 12-inch intervals along the length of your stake. These will support vines as they grow upward. Space the slats evenly—uneven spacing will cause vines to sag or bunch up awkwardly. Sand the cut edges again after shaping to maintain smoothness.
💧 Step 3: Reinforce Stability and Prevent Splitting
Drill ¼-inch pilot holes at each horizontal slat connection point to prevent wood from splitting when you attach them. Use a drill bit slightly smaller than your screws—this ensures a snug fit without tearing the wood. I pre-drill all holes before assembling, which saves time and frustration later.
Attach the horizontal slats using 2-inch deck screws or galvanized nails. Drive them in at a slight angle for extra strength, but don’t overtighten—just enough to hold the slats firmly in place. For extra stability, add a diagonal brace between the top and bottom of the stake using a scrap piece of wood. This keeps the stake from leaning or bending in windy conditions.
☀️ Step 4: Weatherproof and Position the Stakes
If your stakes will be exposed to rain or sun, apply a non-toxic wood sealant or beeswax coating to protect them from rot and warping. Let the sealant dry completely before planting—rushing this step can lead to sticky residue that attracts pests. I like to use a natural linseed oil mix for an eco-friendly finish that also adds a subtle sheen.
Drive your stakes into the ground at a 45-degree angle about 6 inches deep, then straighten them upright. Space them 3-4 feet apart for most climbing plants like beans, peas, or cucumbers. For heavy vines like grapes or morning glories, add a second stake on the opposite side and tie the plants between them for extra support. Water the soil around the base to help it settle firmly.
🌿 Step 5: Secure Plants and Monitor Growth
Once your plants start climbing, gently tie the main stems to the stake using soft plant ties or old fabric strips. Avoid wire or zip ties—they can damage stems as plants grow thicker. I like to use strips of old T-shirts because they’re stretchy and biodegradable. Loosen the ties every few weeks as the plant thickens to prevent constriction.
Check your stakes weekly for stability, especially after rain or wind. If a stake starts to lean, dig a shallow trench around the base and pack soil into it to anchor it deeper. You’ll know your stakes are working when vines spread evenly across the horizontal slats without sagging—this means your supports are strong enough to handle the plant’s weight.
Tips & tricks for perfect DIY garden stakes
These practical tips will help you build garden stakes that last through multiple growing seasons—and save you from common mistakes that lead to flimsy supports.
Wood Selection Wisdom: Untreated wood lasts longest, but if you must seal it, choose a non-toxic, plant-safe sealant like beeswax or linseed oil. Pressure-treated wood contains chemicals that can harm plants, so avoid it entirely. For extra durability, look for hardwood scraps like oak or maple—they resist rot better than softwoods like pine.
Cutting and Beveling: When cutting your 5-6 foot stakes, use a fine-tooth blade to prevent splintering. For the 30-degree bevel in Step 2, I recommend using a handsaw with a 10-12 tooth-per-inch blade—it gives you more control than a circular saw. Mark your cuts with a pencil and double-check measurements before cutting to avoid wasting wood. Here's the thing: a slightly uneven bevel won't sink as easily, so take your time with this step.
Pilot Hole Protection: Drilling ¼-inch pilot holes before attaching the horizontal slats is non-negotiable for preventing splits. Use a drill bit that's 1/16-inch smaller than your screws—this creates just enough clearance to avoid tearing the wood fibers. I pre-drill all holes before assembling because it's much easier than trying to drill through already-attached pieces. Pro tip: Clamp your wood securely before drilling to prevent it from shifting.
Stability Secrets: The diagonal brace mentioned in Step 3 is worth the extra effort—it transforms a wobbly stake into a sturdy support. Cut the brace at a 45-degree angle to match the stake's angle for a clean look. For windy areas, consider adding a second brace on the opposite side. And when positioning your 3-4 foot spacing between stakes, remember that heavier vines like grapes need closer support—reduce spacing to 2-3 feet for these plants.
Pro Tips for Garden Stakes Diy
- These practical tips will help you build garden stakes that last through multiple growing seasons—and save you from common mistakes that lead to flimsy supports.
- Wood Selection Wisdom: Untreated wood lasts longest, but if you must seal it, choose a non-toxic, plant-safe sealant like beeswax or linseed oil.
- Cutting and Beveling: When cutting your 5-6 foot stakes, use a fine-tooth blade to prevent splintering.
Frequently asked questions
Got questions about DIY garden stakes?
You’re not alone! Here are answers to the most common queries to help you tackle your project with confidence.
What’s the best wood to use for homemade garden stakes?
Opt for cedar, redwood, or pressure-treated pine—they resist rot and pests. Avoid untreated softwoods like pine if buried long-term, as they’ll degrade faster. For quick, temporary stakes, reclaimed lumber or bamboo works great too!
When is the best time to install DIY garden stakes?
Install stakes before planting (early spring) so roots grow around them naturally. If adding later, gently loosen soil to avoid damaging plants. For perennials or woody vines, late winter is ideal—stakes last years!
Can I use non-wood materials like metal or plastic for stakes?
Metal rebar or wire mesh works for heavy climbers like grapes, while plastic stakes or bamboo are lightweight and reusable. Just ensure they’re sturdy enough—test with a tug before planting!
How do I prevent DIY stakes from leaning or breaking in wind/rain?
Drive stakes at a 15° angle (away from prevailing wind) and bury 1/3 of their length underground for stability. For extra support, tie plants to stakes with soft twine or fabric strips to avoid cutting into stems.
What can I do with leftover wood after making stakes?
Upcycle scraps into trellises, raised bed frames, or mulch! Short pieces make great plant markers, and wider slabs can become garden edging or compost bins. Get creative—waste not, garden more!
Wrapping up and next steps
Creating your own garden stakes DIY is not only a rewarding project but also a sustainable way to support your climbing plants while adding charm to your garden.
With just a few upcycled materials and a little creativity, you can craft sturdy, stylish stakes that blend seamlessly with your outdoor space. Whether you're a seasoned gardener or just starting out, this project is a great way to green your garden—literally!
Now that you’re armed with ideas and tips, why not grab those leftover wood scraps or old fencing and get started? Your plants (and your wallet) will thank you! 🌱✨