Tools
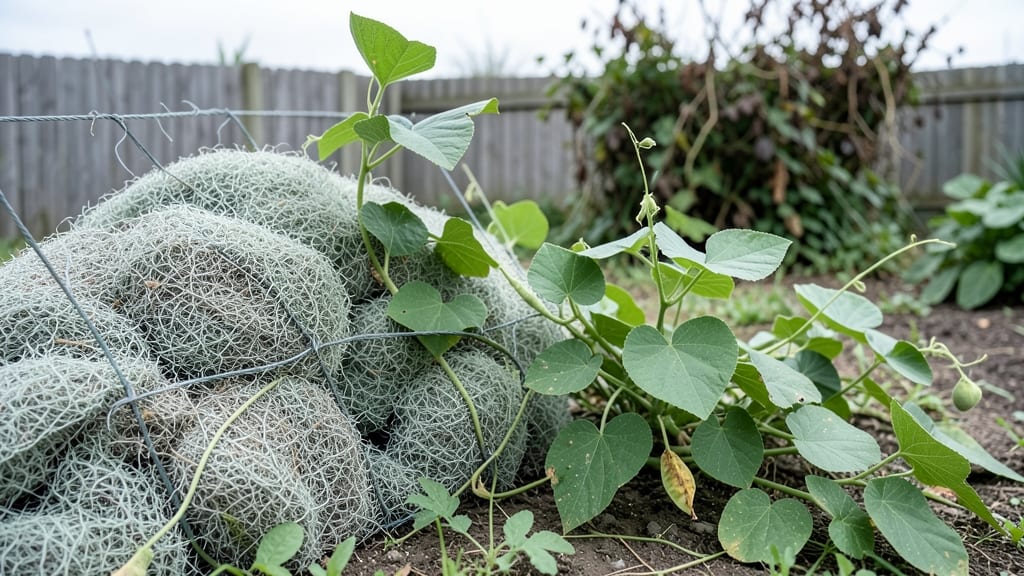
A garden box trellis turns wasted space into a lush vertical garden where cucumbers, beans, and flowers climb toward the sky. 🌱 I built my first one after watching my pole beans sprawl across the entire box, shading out tomatoes—now I use trellises for everything from delicate morning glories to heavy vining squash.
The right materials make all the difference: cedar resists rot, powder-coated metal stays sturdy, and bamboo adds rustic charm. You’ll need basic tools—a drill, screws, and maybe some zip ties—and about 30 minutes to assemble something that lasts all season.
Stability is key, so anchor your trellis to the box frame or bury stakes deep enough to handle wind.
Imagine snapping fresh cucumbers from waist height instead of bending over muddy soil, or watching purple morning glories spill over the edges like a waterfall. With the right plants, your trellis becomes the garden’s centerpiece—functional, beautiful, and impossible to ignore.
The best part? You’ll free up precious box space for more roots below.
Works for raised beds, window boxes, or even small balconies—just adjust the height and plant choices to your space. Let’s turn that empty corner into a climbing paradise.
📚 In This Guide
- What you need
- Instructions
- Tips and common mistakes
- Wrapping up and next steps
What you need
- ● Trellis frame: Wooden posts (4x4 or 2x4 lumber) – 2-4 pieces, 6-8 ft long (depending on height)
- ● Horizontal slats or lattice panels – 2-4 pieces, 4-6 ft long (cedar or redwood recommended for durability)
- ● Fasteners: Galvanized screws or deck screws – 50-100 pieces (2.5"–3" length)
- ○ Wood glue (optional but helpful for extra strength)
- ● Garden box: Wooden planks or composite panels – 4-6 pieces, 8-10 ft long (for sides and base)
- ● Corner brackets or L-brackets – 4-6 pieces (for sturdy assembly)
- ● Extras: Non-toxic wood sealant or paint (if finishing the wood)
- ● Landscape fabric (to line the base and prevent weeds)
- ● Measuring tape
- ● Circular saw or handsaw
- ● Drill/driver with screw bits
- ● Level (to ensure your trellis stays straight!)
- ● Sandpaper (80-120 grit, for smooth edges)
- ● Paintbrush or roller (if staining/painting)
- ● Staple gun (for securing landscape fabric)
- ● Pre-made trellis panels (for a quicker build)
- ● Metal edging (to reinforce corners and prevent warping)
- ● Self-watering reservoir (if integrating irrigation into your garden box)
- ● Decorative vines or flowers (like clematis, morning glories, or ivy)
Step-by-Step instructions for building a garden box trellis
This simple design maximizes vertical space while keeping your climbing plants happy and supported.
🪴 Step 1: Gather Materials and Plan Your Design
For a 4-foot-long garden box, you'll need two 4-foot wooden posts (2x2 or 2x3 lumber), four 12-inch wood screws, one roll of heavy-duty landscape fabric, and one roll of garden twine or thin wire. I prefer cedar for its natural rot resistance, but treated pine works too. Measure your garden box width—most standard boxes are 2-3 feet wide, so adjust post spacing accordingly.
Sketch a quick design: Place one post at each end of the box, about 6 inches outside the box edges. This keeps the trellis stable without crowding the plants. If your box is wider than 3 feet, add a center post for extra support. Mark screw placement on the posts—12 inches apart vertically—to create horizontal rungs for vines to climb.
☀️ Step 2: Install the Posts and Secure the Base
Drive the first post into the ground 6 inches deep at one end of the garden box, using a post hole digger or mallet. Angle it slightly outward (about 5 degrees) so the trellis leans ever so gently away from the box—this prevents rain from pooling against the wood. Repeat at the other end. For extra stability, especially in windy areas, hammer a stake into the ground next to each post and screw the post to it.
Cover the bottom 6 inches of each post with landscape fabric before planting. This deters burrowing pests like voles and keeps gophers from chewing the wood. If your soil is loose, mix in 1 part sand to 3 parts soil around the base to anchor the posts firmly. Double-check that the posts are plumb (straight up and down) before moving to the next step.
✂️ Step 3: Add Horizontal Supports for Vine Growth
Using a speed square, mark the posts at 12-inch intervals starting 6 inches from the base. This creates rungs for vines to grip. At each mark, pre-drill a small hole to prevent wood splitting, then screw a horizontal 1x2 board (cut to match your box width) between the posts. For a diagonal trellis, attach the boards at a 45-degree angle instead—this gives vines more surface area to climb.
If you’re using twine or wire instead of wood, wrap it horizontally between the posts at the same 12-inch intervals. Stretch it tightly and secure it with zip ties or small nails driven into the posts. This lightweight option works well for lighter climbers like morning glories or nasturtiums, while wood supports heavier vines like pole beans or cucumbers.
🌿 Step 4: Train Plants to Use the Trellis
Once your climbing plants are 4-6 inches tall, gently tie the main stem to the lowest rung or twine using soft garden twine. Avoid metal ties—they can cut into stems as plants grow. I like to use figure-eight loops so the vine can thicken without restriction. Space new ties every 6-8 inches as the plant grows upward.
For fast-growing vines like cucumbers, prune side shoots to encourage upward growth. Pinch off any flowers that appear on the lower 12 inches of the vine—this forces energy into the main stem and higher yields. Watch for new leaves forming at the trellis level—this is your cue to add another tie or let the vine wrap naturally around the supports.
💧 Step 5: Maintain and Adjust as Needed
Check the trellis weekly for loose screws or sagging boards. Tighten any that feel wobbly, especially after heavy rain or wind. If your plants are outgrowing the trellis, add an extension post in the middle and attach a new horizontal support. For heavy vines like grapes or kiwi, reinforce the structure with metal brackets at the post-to-board connections.
In late fall, remove dead vines and scrub the trellis with a 10% vinegar solution to prevent fungal growth. Store lightweight trellises vertically or disassemble them for winter. For permanent wood trellises, apply a beeswax or linseed oil finish annually to protect against rot. This keeps your trellis looking fresh and functional for years of vertical gardening.
Tips & tricks for perfect garden box trellises
A sturdy trellis transforms your garden box into a vertical paradise—here's how to build one that lasts.
Post Placement Precision: In Step 1, those 6 inches outside the box edges matter more than you'd think. I learned this the hard way when my first trellis leaned into the box, making watering a nightmare. The slight outward angle (about 5 degrees) in Step 2 also makes a difference—it prevents water from pooling against the wood, which can cause rot over time. Trust me, this small detail keeps your trellis standing strong for seasons.
Material Matters: While cedar is my go-to for its natural rot resistance, don't overlook treated pine as a budget-friendly alternative. For the 1x2 boards in Step 3, consider using pressure-treated lumber if you're supporting heavy climbers like grapes or kiwi. The extra durability is worth the slight cost increase, especially if you're building a permanent structure. For lightweight options, bamboo stakes work beautifully for smaller trellises.
Tie-Tight Technique: When training plants in Step 4, those figure-eight loops with soft garden twine are a game-changer. I've seen metal ties cut through stems as plants grow, leading to broken vines. The twine gives just enough flexibility while providing support. Pro tip: Keep a small spool of twine handy—you'll want to add ties every 6-8 inches as your plants grow upward, especially for fast growers like cucumbers.
Maintenance Matters: That weekly check in Step 5 isn't just about aesthetics—loose screws can lead to collapsed trellises during windstorms. I recommend carrying a small toolkit with you during garden visits so you can tighten screws immediately when you notice wobble. For winter prep, the 10% vinegar solution is my secret weapon against fungal growth—it's simple, effective, and won't harm your plants when they return in spring.
Pro Tips for Garden Box Trellis
- A sturdy trellis transforms your garden box into a vertical paradise—here's how to build one that lasts.
- Post Placement Precision: In Step 1, those 6 inches outside the box edges matter more than you'd think.
- Material Matters: While cedar is my go-to for its natural rot resistance, don't overlook treated pine as a budget-friendly alternative.
Frequently asked questions
Got questions about maximizing your garden box trellis? Here are answers to the most common ones—so you can grow like a pro!
What’s the best material for a sturdy garden box trellis?
A garden box trellis can be made from wood, metal, PVC pipes, or even bamboo. For durability, powder-coated metal or cedar are top picks—they resist rot and weather well. If you’re DIY-savvy, PVC pipes are lightweight and budget-friendly, while wooden lattice panels offer a rustic, decorative touch.
When is the best time to install a trellis in a garden box?
Install your trellis before planting—ideally in early spring—so climbing plants (like cucumbers, beans, or peas) have support from day one. If retrofitting, wait until seedlings are 2–3 inches tall to avoid damaging roots. Pro tip: Secure it firmly to prevent toppling as vines grow heavy!
Can I use a trellis for non-climbing plants like herbs or lettuce?
While trellises are designed for vining plants, you can creatively adapt them for herbs (like basil or thyme) or leafy greens by using smaller mesh or lattice strips to elevate plants for better airflow. Just avoid overcrowding—herbs prefer space to thrive. For lettuce, a low, wide trellis can help keep leaves off the soil and deter pests.
How do I fix a wobbly or sagging trellis in my garden box?
If your trellis is unstable, reinforce the base with stakes or concrete anchors for heavy-duty support. For wooden trellises, check for loose screws or warping—tighten hardware and add horizontal braces if needed. If using PVC, ensure connectors are snug and add cross supports for extra rigidity. A little landscape fabric around the base can also prevent shifting.
Are there space-saving alternatives to a traditional trellis?
Yes! Try wall-mounted trellises, hanging pockets, or obelisks to save space. For small boxes, vertical planters with built-in trellis grids (like fabric grow bags with lattice) work wonders. If you’re super tight on space, espalier training (pruning vines flat against a wall) is a sleek, modern hack!
Wrapping up and next steps
Transforming your garden box into a lush vertical paradise with a trellis isn’t just practical—it’s a game-changer for small spaces! 🌿 Whether you’re growing vines, flowers, or veggies, a sturdy trellis maximizes growth, improves airflow, and adds beauty to your garden.
With the right materials and a little creativity, you’ll create a thriving, space-efficient oasis that’s both functional and stunning.
Ready to get started? Sketch your design, gather your supplies, and build your trellis today! Your plants (and your neighbors) will thank you. 🌱✨