
Vegetables
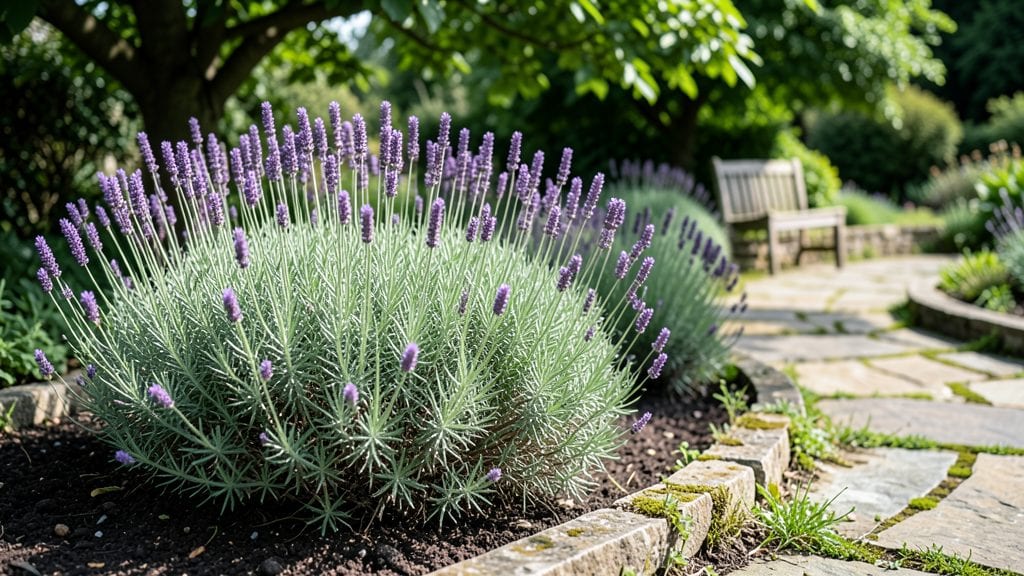
That friendly neighbor garden began with a single patch of dead grass and a shared dream—where native milkweed, coneflowers, and black-eyed Susans turned barren soil into a buzzing haven. linger. These aren’t just gardens; they’re living rooms for bees, butterflies, and humans alike.
You’ll need a mix of sun-loving perennials and shade-tolerant annuals to keep color going from spring through frost. Add a few benches or a simple fire pit, and suddenly your yard becomes a gathering spot.
Privacy comes down to strategic planting—tall ornamental grasses or flowering shrubs like lilacs create natural screens without blocking light or conversation.
Within weeks, you’ll see hummingbirds darting between blooms and neighbors bringing over lemonade. The real magic happens when kids spot monarch caterpillars or grandmas share cuttings. It’s not just about the flowers—it’s about the stories they inspire. This is how communities grow, one season at a time.
Works in any yard size, from suburban strips to urban balconies with containers. The only rule? Start small, plant what you love, and leave room for others to add their touch. That’s how neighbor gardens truly thrive.
📚 In This Guide
- What you need
- Instructions
- Tips and common mistakes
- Wrapping up and next steps
What you need
- ● Native pollinator-friendly plants: Choose a mix of annuals (e.g., coneflowers, black-eyed Susans) and perennials (e.g., bee balm, milkweed)—aim for 3–5 varieties to ensure year-round blooms.
- ● Well-draining soil: 50 lbs of organic potting mix or native soil amended with 10 lbs of compost (or a slow-release fertilizer like 10-10-10).
- ● Watering supplies: A watering can (2–3 gallons) or drip irrigation kit (for larger gardens).
- ● Mulch (2–3 cubic feet) (straw, wood chips, or shredded leaves) to retain moisture.
- ● Basic gardening tools: Trowel or hand shovel for planting.
- ● Pruners (for trimming dead blooms).
- ○ Gloves (optional but recommended!).
- ● Pollinator hotels: A small wooden bee house or bamboo tubes for solitary bees.
- ● Birdbath or shallow dish: Fill with 1–2 inches of water and add pebbles for safe landing.
- ● Pest deterrents: Neem oil or row covers (if dealing with pests like aphids).
- ● Decorative elements: Stakes, trellises, or solar-powered lights for a cozy vibe.
Instructions for designing a pollinator-friendly neighbor garden
Here’s how to craft a garden that welcomes bees, butterflies, and hummingbirds while keeping your yard vibrant year-round.
Plan for Season-Long Color and Texture
Begin by sketching your space with 4 distinct planting zones—each zone should include a mix of native perennials, annuals, and shrubs that bloom at different times. I like to use a sun exposure map to group plants by their light needs, ensuring no area is left bare. For example, place early spring bloomers like Virginia bluebells in partial shade, while black-eyed Susans thrive in full sun for late summer color.
Layer plants by height: tall grasses like switchgrass in the back, mid-height shrubs such as buttonbush, and low-growing ground covers like creeping thyme in the front. This creates visual interest and provides shelter for pollinators at different heights. Avoid overcrowding—18-24 inches of spacing between mature plants ensures airflow and reduces disease.
Incorporate Nectar-Rich and Host Plants
Pollinators need both nectar sources (for food) and host plants (for laying eggs). Include at least 3 varieties of milkweed (essential for monarch butterflies) and purple coneflower (a magnet for bees). Pair these with native asters and bee balm to extend the blooming season from early spring to late fall.
I always add 1-2 small shrubs, like serviceberry or elderberry, for early spring blooms and berries that feed birds later in the season. These plants also provide year-round structure. For example, serviceberry blooms in April, produces fruit in summer, and turns brilliant red in fall—making it a multi-season workhorse.
Add Water and Shelter for Pollinators
A shallow birdbath or pollinator pond (no deeper than 2 inches) with smooth stones for landing spots is a game-changer. Place it in partial shade to prevent evaporation and add a few flat rocks so bees and butterflies can perch safely. I’ve seen bumblebees drink from the edges while hummingbirds hover above—it’s fascinating to watch.
Create small hiding spots with native grasses, leaf litter, or a small brush pile in a corner. These provide shelter from predators and harsh weather. Avoid pesticides entirely—even "organic" sprays can harm beneficial insects. Instead, handpick pests or use neem oil sprays only as a last resort.
Maintain with Pollinator-Friendly Practices
Leave some "wild" areas—untidy as it may seem, dead stems and seed heads offer winter shelter for bees and butterflies. I resist the urge to clean up until late winter, when new growth begins. Mulch lightly with 2-3 inches of shredded bark to retain moisture and suppress weeds without smothering beneficial insects.
Water deeply 2-3 times per week during dry spells, but avoid wetting foliage to prevent fungal diseases. Early morning is the best time to water—this allows leaves to dry quickly and gives pollinators a chance to visit before the heat of the day. If your soil drains poorly, amend it with compost to improve structure and water retention.
Monitor and Adjust for Continuous Bloom
Keep a simple bloom calendar to track which plants fade and when new ones should be added. For example, if dahlias finish blooming in early fall, plant sedum or goldenrod nearby to pick up the slack. I’ve found that succession planting—adding new blooms every 4-6 weeks—keeps the garden lively and ensures pollinators always have fresh resources.
Watch for gaps in pollinator activity—if you notice fewer bees in July, it’s time to add summer-blooming annuals like zinnias or cosmos. Adjust lighting if shadows shift with tree growth, and prune selectively to maintain airflow. A well-tended pollinator garden feels alive, not static.
Tips & tricks for perfect pollinator gardens
Creating a thriving pollinator garden requires thoughtful planning and a few strategic choices that make all the difference between a mediocre yard and one buzzing with life. Here’s what I’ve learned from years of designing gardens that attract bees, butterflies, and hummingbirds while keeping them healthy year-round.
Native Plants Are Non-Negotiable: While the instructions mention specific plants like milkweed and purple coneflower, I can’t stress enough how important it is to prioritize native species. These plants have co-evolved with local pollinators, making them far more effective than non-native alternatives. For example, native asters support over 100 species of butterflies and moths, while many garden-center plants offer little nutritional value. Start with at least 70% native plants in each of your 4 zones to maximize impact.
Layering Creates Microhabitats: The instructions emphasize creating height layers, but here’s the secret: each layer should serve a specific purpose. Tall grasses like switchgrass provide windbreaks and nesting sites for bees, while mid-height shrubs such as buttonbush offer sheltered feeding areas. The low-growing creeping thyme creates ground-level shelter for small insects and prevents soil erosion. I’ve found that adding a 6-inch layer of mulch around these plants helps maintain consistent moisture levels while protecting beneficial soil microbes.
Water Sources Need Strategic Placement: While the instructions specify a shallow birdbath or pond no deeper than 2 inches, placement is equally critical. Position water sources near—but not directly in—the center of your planting zones. This encourages pollinators to move through your garden rather than clustering in one spot. I’ve noticed hummingbirds are particularly drawn to water sources placed near high-traffic flowering areas, where they can refuel between feeding sessions. Consider adding a small solar-powered fountain to create movement that attracts even more visitors.
Seasonal Succession Is the Key to Year-Round Success: The 4-6 week succession planting window mentioned in the instructions is your best tool for maintaining continuous bloom. I’ve developed a simple system: divide your garden into three seasonal groups. Early spring features Virginia bluebells and serviceberry, summer highlights dahlias and zinnias, and fall showcases sedum and goldenrod. By rotating plants every 4 weeks, you ensure pollinators always have fresh resources. This approach also prevents any single plant from becoming overcrowded, which can attract pests.
Pro Tips for Friendly Neighbor Gardens
- Creating a thriving pollinator garden requires thoughtful planning and a few strategic choices that make all the difference between a mediocre yard and one buzzing with life.
- Native Plants Are Non-Negotiable: While the instructions mention specific plants like milkweed and purple coneflower, I can’t stress enough how important it is to prioritize native species.
- Layering Creates Microhabitats: The instructions emphasize creating height layers, but here’s the secret: each layer should serve a specific purpose.
Frequently asked questions
What’s the best time of year to start a pollinator-friendly garden?
For most climates, spring (after the last frost) is ideal—it gives plants time to establish roots before summer heat. However, fall planting (6-8 weeks before your first frost) works too! If you’re in a warm region, you can even start in late winter. Just match your plants to your local growing season for best results.
Will these gardens attract pests like bees or wasps?
Not if you plan it right! Pollinator gardens attract beneficial insects (like bees and butterflies) that help control pests by pollinating plants and preying on garden nuisances. To minimize stings, avoid sweet-smelling flowers near seating areas and opt for native, non-invasive species—they’re less likely to draw aggressive wasps.
Are there low-cost or free ways to start a friendly neighbor garden?
Seed swaps
, community garden plots, or even repurposing old containers (like buckets or pallets) can cut costs. Check local Facebook groups or Buy Nothing projects for free plants or soil. Mulching with grass clippings or leaves also saves money while retaining moisture—win-win!
How do I keep my garden thriving all year without overwatering?
Layer mulch (2-3 inches) to retain moisture and suppress weeds. Use drip irrigation or soaker hoses for efficient watering, and group plants with similar needs together. Drought-tolerant natives (like lavender or coneflowers) need less water once established. Always water deeply but infrequently—early morning is best!
What if my neighbors complain about my garden?
Address concerns proactively! If your garden includes fragrant herbs or tall grasses, plant them away from shared spaces. Offer to trim overgrowth or share harvests (e.g., herbs for their kitchen). Most neighbors love the aesthetic and ecological benefits—just be transparent and willing to adjust.
Wrapping up and next steps
Creating a friendly neighbor garden isn’t just about growing beautiful blooms—it’s about fostering connections, supporting pollinators, and enjoying a thriving space year-round! 🌸 With the right plants, tools, and a little community spirit, you can turn even a small patch into a buzzing hub for bees, butterflies, and happy neighbors.
Whether you’re a seasoned gardener or just starting, every seed planted is a step toward a greener, more vibrant world.
Ready to dive in? Start small—pick one corner of your yard or balcony, gather your supplies, and let nature (and your neighbors) do the rest. Who knows? Your garden might just inspire the next pollinator paradise down the street! 🌿