Pruning
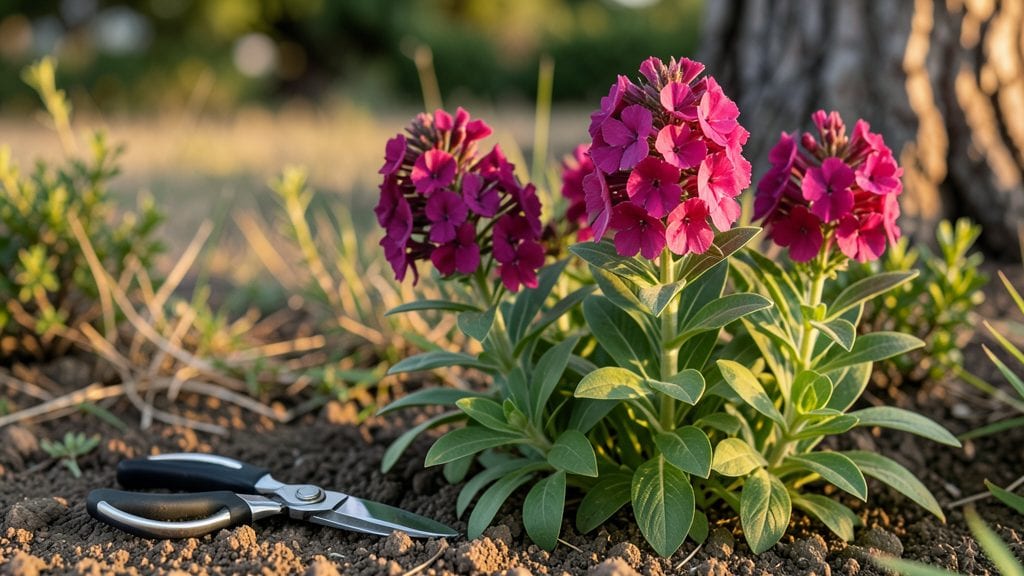
Deadheading garden phlox transforms a single flush of blooms into a 6-8 week floral display—no fancy tools or botanical expertise required. I learned this the hard way after watching my first phlox plants fade within three weeks, only to rediscover their potential when I finally picked up the shears.
The key lies in timing, technique, and consistency, not strength or precision.
You’ll need just three things: clean pruning shears, a sunny morning, and about 10 minutes every few days during peak bloom. The tools don’t need to be expensive—any sharp pair that can cut stems cleanly will do.
What matters most is knowing exactly where to cut: just above the first set of healthy leaves below each spent bloom cluster. This simple snip redirects the plant’s energy toward new growth instead of seed production.
The payoff is immediate and dramatic. Within days of proper deadheading, you’ll see fresh buds forming along the stems, and the plant’s overall shape stays compact and bushy.
My purple phlox now blooms so densely that neighbors ask how I keep it looking so fresh—no secret, just consistent deadheading and a little patience. The flowers also last longer when cut for bouquets, making this technique a double win.
This method works equally well for single-stemmed varieties and clumping types, though late-season deadheading should stop by early August to allow foliage to harden off for winter.
The only real mistake is cutting too late in the season or removing too much growth at once—both can stress the plant when it needs to prepare for dormancy.
📚 In This Guide
- What you need
- Instructions
- Tips and common mistakes
- Wrapping up and next steps
What you need
- ● Sharp pruning shears or bypass pruners – Choose a pair with stainless steel blades (4-6" length) for clean cuts. (Avoid dull tools—they crush stems!)
- ○ Hand pruners (optional but handy) – For smaller clusters or tight spaces (3-4" blades).
- ● Garden gloves (recommended) – Protect your hands from thorns or sticky sap (nitrile-coated for grip).
- ● Clean bucket or trash bag – For collecting spent blooms (5+ gallon capacity).
- ● Disinfectant (70% isopropyl alcohol or bleach solution) – Wipe tools between cuts to prevent disease (1:9 bleach-to-water ratio).
- ● Knee pad or stool – For comfort if phlox is tall (12"+ varieties).
- ● Sharpie marker (if labeling) – To mark pruned stems for future reference.
- ● Choose a dry, overcast day to minimize stress on plants.
- ● Work during early morning or late afternoon to avoid wilting.
- ● Wear comfortable clothing—phlox can be bushy!
Instructions for deadheading garden phlox
Here's the straightforward method I use to keep my garden phlox flowering for weeks longer.
Wait for the Right Time to Deadhead
Don't rush—wait until the blooms on a stem have fully faded and turned brown. This signals the flower has completed its cycle and the plant is ready to redirect energy to new buds. I always check multiple stems before starting; if some still have color, leave them be. The goal is to remove only spent flowers, not healthy ones.
Work in the morning when temperatures are cooler. This reduces stress on the plant and prevents wilting. Avoid deadheading after a hot afternoon—you'll see leaves droop if you cut too late in the day. A gentle pinch test helps: if the bloom head feels dry and crumbly, it's ready for removal.
Use Clean, Sharp Pruners for Precision Cuts
Grab your pruners and make a clean cut just above the first set of healthy leaves below the faded bloom. This ensures you're not leaving a stub that could rot. I angle my cuts slightly downward to prevent water from pooling on the stem, which keeps diseases at bay. Never cut into the woody part of the stem—focus on the green growth area where new buds form.
Wipe your pruners with rubbing alcohol between cuts to prevent spreading any potential bacteria. I keep a small bottle of 70% isopropyl alcohol in my gardening tool pouch for this exact purpose. Sharp tools make cleaner cuts, which heal faster and encourage stronger regrowth. Dull blades tear stems, inviting infections that can weaken your phlox.
Remove Only the Spent Blooms, Not the Entire Stem
The key to extended blooming is selective removal. Cut back only to the first healthy leaf set or side bud, never the entire stem. This leaves the plant's energy reserves intact for producing new flowers. I always scan each stem for side buds before cutting—sometimes they're hidden behind the main bloom.
If you accidentally cut too much, don't panic. Simply leave the remaining stem alone and focus on the next one. Over time, you'll develop an eye for where to make the cleanest cuts that still preserve growth points. The plant will thank you with a fresh flush of blooms within 2-3 weeks.
Monitor and Repeat Weekly
Check your phlox every 7-10 days for new spent blooms. Consistent deadheading is what keeps the flowering cycle going. I set a reminder on my phone for every Saturday morning—it's become a regular part of my garden maintenance routine. The more you stay on top of it, the longer your phlox will continue producing fresh flowers.
Look for new buds forming at the base of where you made your cuts. These are your signal that the plant is actively responding to your pruning. If you notice buds forming but not opening, it might mean your phlox needs more sunlight or water. Adjust your care accordingly while continuing with regular deadheading.
Finish the Season with Proper Cleanup
As fall approaches and blooms become scarce, it's time for final cleanup. Cut back all stems to about 2-3 inches above the ground. This prevents disease from overwintering in dead plant material. I always use clean pruners for this final cut to avoid introducing any pathogens to next year's growth.
Remove all plant debris from the garden bed immediately after cutting. I collect the clippings in a bucket and either compost them or dispose of them in yard waste. Never leave cuttings on the soil surface—they can harbor pests and diseases that will attack your phlox when it regrows in spring. A quick sweep with a leaf rake ensures you get every last piece.
Tips & tricks for perfect deadheading garden phlox
These simple strategies will help you maximize your phlox blooms with minimal effort—and avoid common mistakes that shorten the flowering season.
Timing is Everything: In Step 1, when checking for fully faded blooms, look for a distinct color change to brownish-gray. The moment you see this, it's time to act. I've learned that waiting until the next morning after a bloom fades gives me the most accurate assessment—sometimes what looks ready in the evening isn't quite there yet. This precision prevents you from removing flowers that could still produce seeds and potentially form new blooms.
The Precision Cut Technique: For Step 2, focus on making your cuts at a 45-degree angle just above a leaf node or side bud. This angled cut helps water run off the stem, reducing disease risk. I always make the cut between the bloom and the first healthy leaf set—never below it. If you're unsure where to cut, look for small buds forming in the leaf axils (the area where leaves meet the stem). These are your growth signals that new blooms will emerge from.
Weekly Maintenance Matters: The 7-10 day monitoring schedule in Step 4 pays off big time. I've found that sticking to this routine prevents a backlog of spent blooms that can overwhelm the plant. Set a recurring reminder on your phone or calendar—this simple habit makes all the difference. When you see new buds forming within 2-3 weeks of your cuts, you'll know you're doing it right. This visual feedback loop is your confirmation that the plant is responding well to your care.
Seasonal Cleanup is Critical: When performing the final cleanup in Step 5, don't be tempted to cut back too aggressively. The 2-3 inch recommendation isn't arbitrary—it preserves enough foliage to protect the crown from winter cold. I've seen many gardeners cut back too much in fall, only to have their phlox struggle to regrow in spring. After cutting, give your pruners a final wipe-down with rubbing alcohol to prevent any disease transfer to next year's growth.
Pro Tips for Deadheading Garden Phlox
- These simple strategies will help you maximize your phlox blooms with minimal effort—and avoid common mistakes that shorten the flowering season.
- Timing is Everything: In Step 1, when checking for fully faded blooms, look for a distinct color change to brownish-gray.
- The Precision Cut Technique: For Step 2, focus on making your cuts at a 45-degree angle just above a leaf node or side bud.
Frequently asked questions
When is the best time to deadhead garden phlox?
Deadhead phlox after the flowers fade but before seed pods form—typically late spring through early summer for most varieties. For late-blooming types (like 'David'), wait until after their peak in mid-to-late summer. Pro tip: Morning hours are ideal to avoid attracting pests to fresh cuts!
Do I need special shears for deadheading phlox?
Nope! Clean, sharp any pruners (bypass or anvil) work—even kitchen scissors in a pinch. Just ensure they’re sanitized with rubbing alcohol to prevent disease spread. Bonus: Use the same tool for light pruning to keep stems tidy.
What if my phlox blooms stop after deadheading?
Check these fixes:
- Light: Phlox needs 6+ hours of sun daily.
- Water: Keep soil consistently moist (not soggy).
- Fertilizer: Feed with a balanced 10-10-10 formula mid-spring.
- Pests: Inspect for aphids or Japanese beetles.
Can I deadhead phlox to encourage more flowers?
Removing spent blooms redirects energy to new growth and prevents seed production, which can shorten the blooming season. For phlox, aim to cut just above a set of leaves (not bare stems) to promote bushiness. Result: Longer, fuller blooms!
Should I deadhead phlox before rain?
Wait until 24 hours after rain—wet stems can harbor fungal diseases like powdery mildew. If you must prune before rain, sterilize tools and avoid cutting into humid air. Tip: Deadhead on dry, sunny days for best results.
Wrapping up and next steps
Deadheading garden phlox is a simple yet powerful way to keep your blooms thriving all season long! 🌸 With just a pair of clean shears and a little patience, you can encourage your phlox to produce vibrant, continuous flowers—no fancy tools or gardening degree required.
Whether you’re a seasoned green thumb or a beginner, this easy technique will help you maximize your garden’s beauty.
Now that you’re armed with the know-how, grab those shears and get pruning! 🌿 Next, check out our guide on fertilizing phlox to give your plants the extra boost they need for even more stunning blooms. Happy gardening!