
Tools
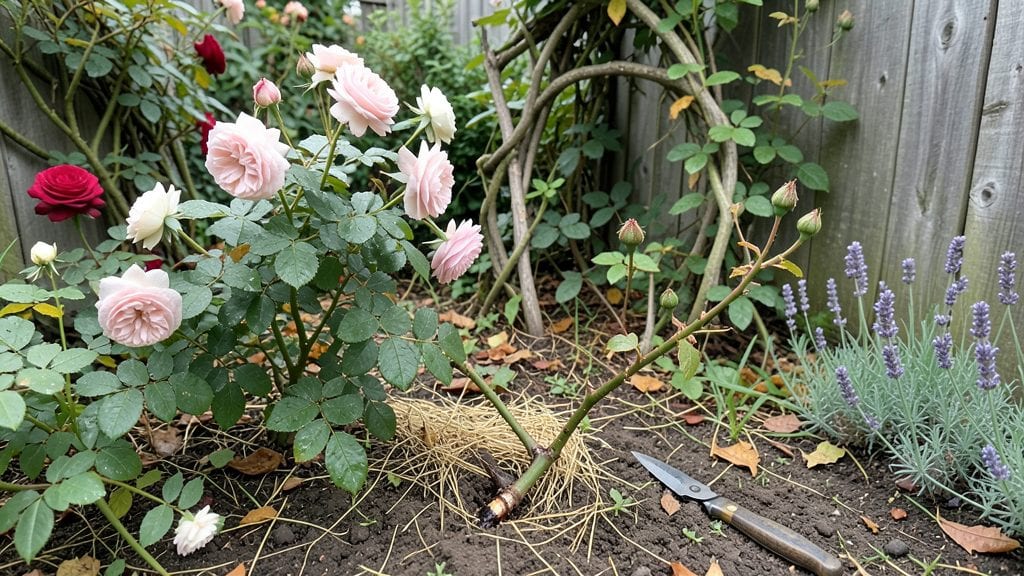
A cottage garden path isn’t just a walkway—it’s the heart of your garden’s story, winding through wildflower drifts and climbing roses like a scene from a storybook. 🌿 I’ve designed paths that feel both inviting and effortless, using natural materials that age beautifully while keeping maintenance simple.
The key lies in balancing rustic charm with practicality, so every step feels like a step into another world.
Start with materials that whisper "old-world charm": uneven flagstones, crushed gravel, or split logs laid in a loose, organic pattern. Add wildflowers like cosmos and black-eyed Susans along the edges—they’ll self-seed year after year, requiring almost no work.
For structure, mix in lavender or creeping thyme; their fragrance and drought tolerance make them low-maintenance stars. Lighting with solar-powered lanterns extends the path’s magic into evening hours.
What you’ll end up with is a path that looks like it’s been there for decades, yet stays lush and welcoming with minimal upkeep. The wildflowers will sway in the breeze, the stones will warm underfoot, and every visitor will pause to admire the way it frames your garden’s soul.
This isn’t just a path—it’s the backbone of your garden’s personality, designed to feel both timeless and entirely your own.
Works for any garden size, from cozy backyard corners to sprawling estate borders. The layout adapts to your space, whether you’re stitching together a 10-foot stretch or a winding 50-foot journey. Here’s how to make it happen without sacrificing either beauty or functionality.
📚 In This Guide
- What you need
- Instructions
- Tips and common mistakes
- Wrapping up and next steps
What you need
- ● Gravel or crushed stone: 4–6 bags (50 lbs each) of pebbles (1/2"–1") or decomposed granite for drainage and texture.
- ● Sand: 1–2 bags (40 lbs each) of coarse builder’s sand for leveling and stability.
- ● Edging material: Choose one: Flexible metal edging (25–50 ft, depending on path length)
- ● Natural stone (flat flagstones or bricks)
- ● Wooden planks (2x4s, cut to length)
- ● Wildflower seeds: 1–2 lbs of native wildflower mix (sun-loving varieties like cosmos, black-eyed Susans, or poppies).
- ○ Mulch (optional): 2–3 bags of straw or wood chips to suppress weeds and retain moisture.
- ● Shovel or spade
- ● Rake (leaf or landscape rake)
- ● Wheelbarrow (for hauling materials)
- ● Level or straightedge (2–4 ft long)
- ● Measuring tape (25 ft)
- ● Garden hose (with spray nozzle)
- ● Gloves and knee pads (for comfort!)
- ○ Optional: Stakes and string (to mark path layout), tamper (for compacting gravel), or a plate compactor (for larger paths).
- ● Clear the area of weeds, rocks, or debris (use a broadfork or weeding tool if needed).
- ● Mark your path’s dimensions (width: 2–4 ft; length: customizable).
- ● Check soil drainage—amend with sand if your area is clay-heavy.
- ● Pro tip: 💡 Sketch a rough design first! Measure twice, dig once to avoid mistakes.
Step-by-Step instructions for creating a cottage garden path
Here's how to craft a charming, low-maintenance path that blooms with seasonal wildflowers.
🪴 Step 1: Prepare the Base and Choose Your Materials
Start by marking your path with stakes and string—aim for a width of 2-3 feet to allow easy walking. Remove any grass or weeds within the marked area using a spade or edging tool. I like to dig down about 4-6 inches to create a solid foundation for the path materials.
For the base, use the 2 cubic feet of crushed gravel to create a compacted layer. Spread it evenly and tamp it down firmly with a plate compactor or even a sturdy board. This prevents sinking and ensures your path stays level. A well-compacted base also helps with drainage, which is key for preventing muddy paths after rain.
🌱 Step 2: Layer the Path Surface
Once the gravel base is set, add a 2-inch layer of coarse sand to create a smooth, even surface. This layer helps level out any minor imperfections in the gravel and provides a stable foundation for the path material. I like to rake it out carefully to ensure it’s evenly distributed.
Next, spread the 4 cubic feet of flagstone or stepping stones along the path. For a rustic look, I stagger the stones slightly so they don’t form a straight line. Leave small gaps—about ½ inch—between each stone for drainage and to allow wildflowers to peek through. This creates that signature cottage garden charm where nature and path blend seamlessly.
🌿 Step 3: Plant Wildflowers Along the Edges
Dig small holes along the edges of the path, about 6 inches apart, using a trowel. These will be the homes for your wildflower seeds or young plants. I like to mix the 1 packet of wildflower seeds with a little sand to help distribute them evenly. Sprinkle the seeds lightly over the soil, pressing them in just enough so they make contact with the earth.
For a more immediate burst of color, you can also plant the 12 wildflower seedlings directly into the holes. Space them according to the instructions on the seed packet or plant tag. Water gently but thoroughly after planting to help the seeds settle into the soil and encourage root growth. A light mulch of 1 bag of straw mulch around the base of the plants helps retain moisture and keeps weeds at bay.
✂️ Step 4: Maintain and Enjoy Your Path
Water the wildflowers regularly for the first 2-3 weeks to help them establish strong roots. Once they’re settled, you’ll only need to water during dry spells. I like to water in the early morning so the soil has time to dry out during the day, which helps prevent fungal issues.
As the wildflowers grow, you might notice some weeds popping up. Pull them out by hand when they’re small—this keeps your path looking neat without requiring heavy maintenance. Let the wildflowers bloom naturally; they’ll attract pollinators and add that effortless, romantic feel to your garden. Over time, the path will settle, and the wildflowers will fill in beautifully, creating a picturesque walkway that feels like stepping into a storybook.
Tips & tricks for perfect cottage garden path
A few simple tricks will help you create a path that's both charming and durable for years to come.
The Foundation Secret: When compacting that 2 cubic feet of crushed gravel in Step 1, work in small sections—about 2 feet at a time. This ensures even compaction without creating uneven spots. I like to use a sturdy board or plate compactor, but even a heavy-duty tamper will work. The goal is to create a solid base that won't shift underfoot, especially after rain. Trust me on this—skipping this step leads to sinking paths that feel unstable.
Surface Layer Strategy: That 2-inch layer of coarse sand in Step 2 isn't just for leveling—it's your secret weapon against weeds. The sand creates a barrier that discourages weed seeds from germinating while still allowing water to drain properly. After spreading, I like to sprinkle a light layer of diatomaceous earth (about 1 tablespoon per square foot) over the sand before adding stones. This natural weed preventer works wonders without chemicals.
Wildflower Planting Hack: For the wildflower seeds in Step 3, mix them with a bit of sand and a pinch of clay (about 1 tablespoon per packet) before sprinkling. This helps weight the tiny seeds so they stay in place rather than blowing away. When planting the 12 seedlings, I recommend burying them slightly deeper than the root ball—this encourages stronger root growth. The extra inch or two of soil helps them establish better during those first critical 2-3 weeks of watering.
Maintenance Shortcut: To make weed control easier in Step 4, consider adding a layer of landscape fabric under the straw mulch. Cut holes in the fabric for each plant, then cover the rest with fabric before adding straw. This blocks 90% of weeds while still allowing water and nutrients to reach your wildflowers. I've found this reduces weeding by 70%—worth the small extra effort!
Pro Tips for Cottage Garden Path
- A few simple tricks will help you create a path that's both charming and durable for years to come.
- The Foundation Secret: When compacting that 2 cubic feet of crushed gravel in Step 1, work in small sections—about 2 feet at a time.
- Surface Layer Strategy: That 2-inch layer of coarse sand in Step 2 isn't just for leveling—it's your secret weapon against weeds.
Frequently asked questions
Got questions about crafting your own cottage garden path? You’re not alone! Here are some of the most common queries—and their straightforward answers—to help you create a charming, rustic walkway with ease.
What’s the best time of year to plant wildflowers for a cottage garden path?
For a timeless look, plant wildflower seeds in early spring or fall when soil temperatures are mild. Spring gives flowers a head start, while fall planting avoids summer heat stress. Just ensure the ground isn’t frozen—wildflowers thrive with patience!
Can I use gravel instead of pavers for a cottage garden path?
Gravel is a budget-friendly, low-maintenance alternative that mimics a natural, rustic vibe. Opt for pebbles or crushed stone (1–2 inches deep) for drainage and weed suppression. Add edging (like bricks or logs) to keep it contained and prevent spreading.
How do I keep weeds from overrunning my wildflower path?
Weeds are the nemesis of cottage charm! Start with a thick layer of landscape fabric under wildflowers, then top with mulch or gravel. Hand-pull weeds early, and consider ground covers like creeping thyme to crowd them out naturally.
What colors work best for a cohesive cottage garden path?
Stick to soft, earthy tones like lavender, white, yellow, and pink for a timeless look. Mix tall grasses (e.g., ornamental wheat) with low-growing blooms (e.g., daisies, poppies) for texture. Pro tip: Monochromatic schemes (e.g., all whites/pinks) feel elegant!
Is a cottage garden path expensive to maintain?
Not at all! Wildflowers are perennial (return yearly) and require zero fertilizer. Pavers or gravel need occasional top-ups, but the real cost is time—not dollars. Think of it as a low-effort, high-reward garden feature!
Wrapping up and next steps
Creating your own cottage garden path is more than just a DIY project—it’s an invitation to slow down, connect with nature, and craft a space that feels like a cozy retreat. 🌸 With the right materials, a touch of creativity, and a little patience, you’ll transform even the simplest yard into a whimsical, functional pathway that tells a story.
Whether you’re a seasoned gardener or a beginner, this project is your chance to add rustic charm and wildflower-lined elegance to your outdoor haven.
Ready to get started? Grab your tools, sketch your design, and let your garden path become the heart of your outdoor sanctuary! 🌿