Tools
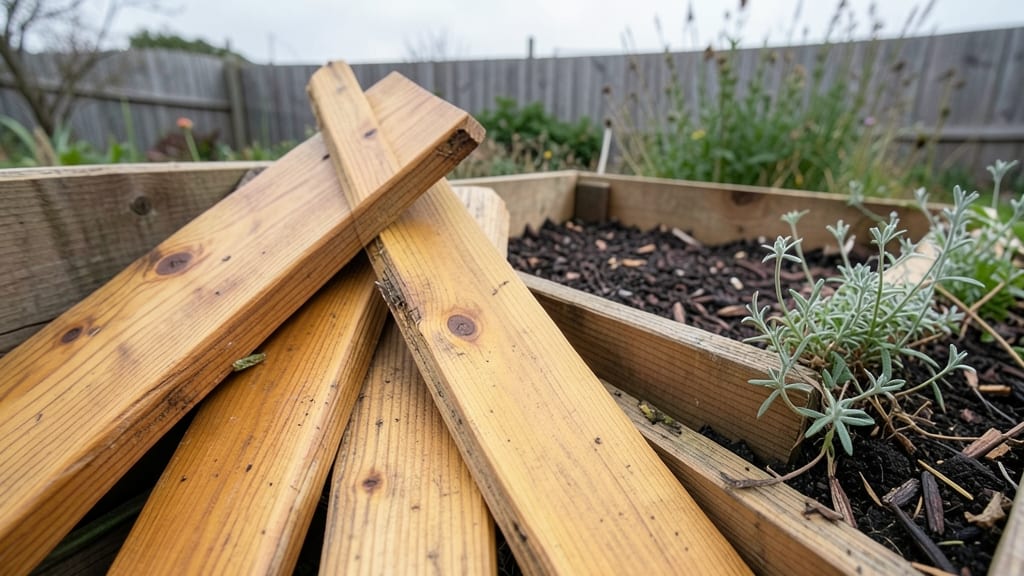
The natural beauty of cedar garden planters has transformed my outdoor spaces into timeless, low-maintenance retreats that still look fresh after years of use. Their rich, earthy aroma lingers when you first cut them, and that same scent repels pests while preserving the wood—something plastic or metal simply can’t match.
I’ve used them in everything from cottage gardens to modern patios, and their versatility never fails to impress.
What makes cedar planters truly special is their durability without the upkeep. Unlike treated lumber that fades or petrified wood that cracks, cedar ages gracefully, developing a silvery patina that adds character over time.
You’ll find them in sizes perfect for herbs, flowers, or even small vegetables, and their natural resistance to rot means they’ll outlast cheaper alternatives by decades. The best part? They pair beautifully with almost any plant—whether you’re going for lush cottage vibes or sleek minimalist lines.
Once you start using cedar planters, you’ll notice how effortlessly they elevate your garden’s aesthetic while requiring minimal care. A simple coat of food-grade mineral oil every few years keeps them looking their best, and their lightweight yet sturdy construction makes them easy to move or rearrange.
Imagine arranging them in a tiered display for herbs, lining a pathway with trailing flowers, or even using them indoors near a sunny window for houseplants.
For those who love blending function with rustic charm, cedar planters are a game-changer. They work equally well in raised beds, window boxes, or standalone containers, and their warm tones complement everything from wildflower meadows to structured modern gardens.
The key is choosing the right thickness—thicker boards hold up better in damp climates, while thinner slats offer a lighter, more delicate look for drier areas. Start with just one, and you’ll quickly see why they’re a staple in gardens that last.
📚 In This Guide
- What you need
- Instructions
- Tips and common mistakes
- Wrapping up and next steps
What you need
- ● Cedar wood: 1–2 boards (depending on planter size), preferably 1x12 or 2x6 inches, 8–12 feet long (or pre-cut lumber for smaller planters).
- ● Wood screws: 1.5–2 inches long, deck or exterior-grade, 10–15 screws (quantity depends on planter size).
- ● Wood glue: waterproof or exterior-grade, 1 small bottle.
- ● Drill/driver: cordless or corded, with drill bit set and screw attachment.
- ● Saw: circular saw, miter saw, or handsaw (for precise cuts).
- ● Sandpaper: 80–120 grit (for smoothing rough edges), 1 sheet.
- ● Measuring tape: 16-foot (for accurate dimensions).
- ● Pencil: (for marking cuts).
- ○ Wood stain or sealant: cedar-safe, exterior-grade (optional but recommended for longevity).
- ● Paintbrush or foam brush: (for applying stain/sealant).
- ● Level: (to ensure planters are straight and balanced).
- ○ Hinges (optional): 2–4 small hinges (if designing a lift-off lid).
- ○ Latch (optional): 1 small latch (for securing a lid).
- ● 🌡️ Work in a dry, well-ventilated area: Cedar dust can be irritating—wear a mask if sanding!
- ● ✨ Pre-stain the wood: Apply sealant before assembly to protect against weather.
- ● 🎯 Choose weather-resistant screws: Galvanized or stainless steel screws prevent rust.
Step-by-Step instructions for building cedar garden planters
Transform simple cedar planks into timeless planters that resist rot and weather beautifully.
Gather and Prepare Your Cedar Materials
Start with 4 untreated cedar planks, each 12 inches wide and 8 feet long. Cedar’s natural oils make it rot-resistant, but I still sand all surfaces with 80-grit sandpaper to smooth rough edges. This removes splinters and ensures clean corners for assembly. Work in a well-ventilated area—cedar dust can irritate lungs, so wear a mask if needed.
Measure and mark your planter dimensions on the planks. For a 12-inch deep planter, cut two 24-inch long sides and two 18-inch long ends using a circular saw. Double-check measurements before cutting—cedar warps over time, so precise starts matter. I like to clamp a straightedge guide to prevent uneven cuts.
Assemble the Planter Base and Sides
Lay two 24-inch side planks parallel, 12 inches apart, on a flat surface. Place the 18-inch end planks at each end, creating a rectangular frame. Pre-drill ½-inch pilot holes at the corners to prevent wood splitting when you drive in the 2-inch deck screws. I use a ¼-inch drill bit for pilot holes—just big enough to guide the screw without stripping the wood.
Attach the end planks first, then secure the opposite side. Use two screws per corner for stability. For extra strength, add a center support screw along each long side. Tap screws gently with a hammer to seat them flush—over-tightening can crack cedar. Now’s the time to check for square corners by measuring diagonals; they should be equal.
Reinforce and Add Drainage Holes
Flip the planter upside down and attach a third 18-inch plank across the bottom to create a solid base. Pre-drill holes for screws here too, but space them 3 inches apart along the edges. Next, use a ½-inch hole saw to cut drainage holes in the bottom corners—this prevents root rot. Cover them with landscape fabric later to keep soil from washing out.
For long-term durability, apply a water-based polyurethane finish to all interior surfaces. This seals the wood without trapping moisture. Let it dry completely—usually 4-6 hours—before adding soil. Skip the exterior finish if you love cedar’s natural silver-gray patina; it’ll darken slightly over time but stay weatherproof.
Line and Fill with Soil
Cut a piece of landscape fabric to fit the planter’s interior, leaving 2-inch overhangs on all sides. Fold the edges inward and secure them with staples to create a removable liner. This keeps soil from escaping through drainage holes while allowing excess water to drain. Fill the planter ¾ full with well-draining potting mix—cedar planters dry out faster than ground beds.
Plant your chosen herbs or flowers, leaving 2 inches of space between the soil line and the top edge. Water thoroughly until moisture runs out the drainage holes. Place your planter in a location with 6+ hours of sunlight daily. Cedar’s natural resistance to insects means you won’t need pesticides—just occasional watering to keep the soil evenly moist.
Tips & tricks for perfect cedar garden planters
Building cedar planters is all about precision and patience—here are my go-to tricks to ensure yours turn out sturdy and beautiful every time.
Precision Cutting Pays Off: In Step 1, when cutting your 24-inch sides and 18-inch ends, take an extra minute to verify measurements with a tape measure after marking. Cedar has a natural tendency to warp, so even a ¼-inch discrepancy can throw off your square corners. I like to use masking tape to mark the cut lines twice—once for the saw guide and once as a backup. This ensures you don't accidentally cut the wrong line when the saw kicks back.
Screw Placement Strategy: During Step 2, when attaching your planter frame, place your screws at least 1 inch away from the edges of the wood. This prevents splitting, especially when using cedar's softer end grain. For the center support screws along the long sides, space them every 12 inches to distribute weight evenly. I've learned the hard way that skipping this step can lead to wobbly planters that won't hold soil properly.
Polyurethane Application Wisdom: When applying the water-based polyurethane in Step 3, work in thin, even coats rather than trying to cover everything at once. Let each coat dry for 2-3 hours before adding another—this prevents drips and ensures full penetration. The 4-6 hour drying time mentioned is perfect for a single coat, but if you're doing two coats (which I recommend for extra durability), plan for at least 8 hours total drying time before adding soil.
Liner Installation Hack: For Step 4, when installing your landscape fabric liner, cut it 4 inches larger than your planter's interior dimensions. After stapling the edges, fold the extra fabric inward along the bottom corners to create a small reservoir. This catches any excess water that might seep through the drainage holes, keeping your plants' roots happier and your patio cleaner.
Pro Tips for Cedar Garden Planters
- Building cedar planters is all about precision and patience—here are my go-to tricks to ensure yours turn out sturdy and beautiful every time.
- Precision Cutting Pays Off: In Step 1, when cutting your 24-inch sides and 18-inch ends, take an extra minute to verify measurements with a tape measure after marking.
- Screw Placement Strategy: During Step 2, when attaching your planter frame, place your screws at least 1 inch away from the edges of the wood.
Frequently asked questions
Got questions about cedar garden planters?
You’re not alone! Here are answers to the most common queries—from care tips to creative uses—so you can make the most of your rustic planters.
How do I prepare cedar planters for the first time?
Start by soaking the planters in water for 24–48 hours to prevent cracking. Sand any rough edges with 120-grit sandpaper, then apply a food-safe mineral oil or beeswax to seal the wood. This protects against moisture and extends longevity. Avoid pressure-treated cedar—opt for untreated, rot-resistant varieties like Western Red Cedar.
How often should I reapply sealant to cedar planters?
Reapply sealant once a year (or every 6–12 months) for outdoor planters, especially before winter. Check for dryness or cracks—if the wood feels rough, it’s time to treat it. Use a natural oil-based sealer (like tung oil) for edible gardens to keep plants safe. Pro tip: Store planters in a dry place during off-seasons to minimize wear!
Can I use cedar planters for vegetables or herbs?
Cedar is naturally pest-repellent (thanks to its aromatic oils), making it ideal for herbs like basil, thyme, and rosemary. For veggies, ensure the planter is well-sealed and lined with landscape fabric to prevent root rot. Avoid planting acid-loving crops (like blueberries) long-term—cedar’s pH can shift over time.
What’s the best way to clean cedar planters between seasons?
Scrub with a mild soap and water solution, then rinse thoroughly. For stubborn grime, use a 50/50 vinegar-water mix (avoid bleach—it weakens wood). Let them dry in the sun, then store in a covered, ventilated area. Skip harsh chemicals to preserve the wood’s integrity. Need a deep clean? A stiff brush and warm water work wonders!
Are there alternatives if cedar planters are too expensive?
Yes! Consider redwood, cypress, or black locust for similar durability. For budget-friendly options, try plastic planters with cedar-like textures or upcycle old wooden crates (treat with sealant). DIY cedar planters from scrap wood are another great way to save money while keeping that rustic charm.
Wrapping up and next steps
Transforming your outdoor space with cedar garden planters is more than just a DIY project—it’s a timeless investment in rustic charm and durability.
Whether you’re a seasoned crafter or a beginner, these planters bring natural beauty while standing strong against the elements for decades. Ready to elevate your garden? Grab your tools, pick your favorite cedar design, and start building—your future garden oasis awaits!
Next step: Sketch your planter design, gather supplies, and dive in! 🌿✨