
Tools
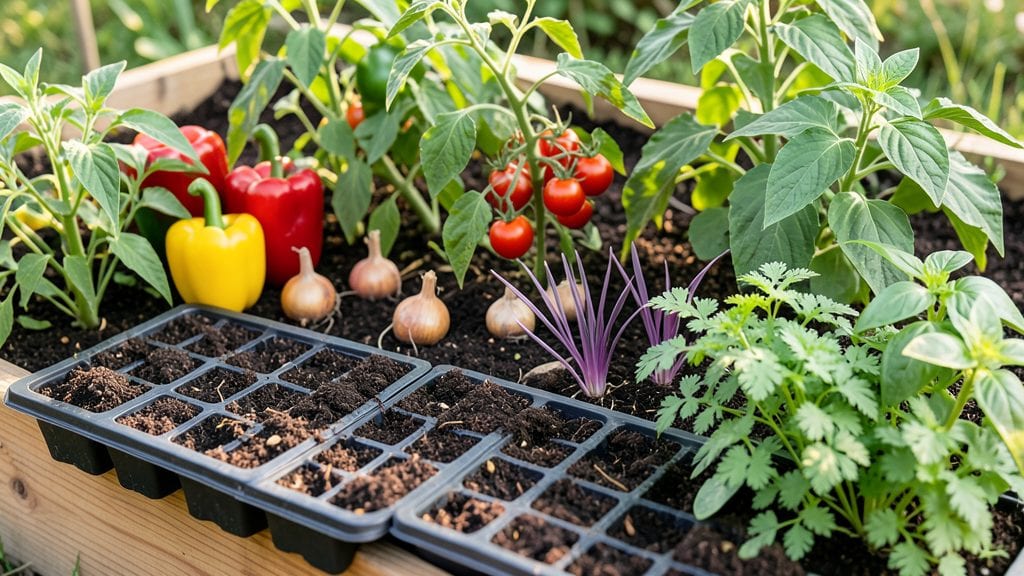
My salsa garden plan starts with a 4x8-foot bed packed with tomatoes, peppers, and herbs arranged in flavor layers—where every bite of your homemade salsa tells the story of how you grew it. 🌿 The secret isn’t just planting the right ingredients; it’s placing them so their flavors peak at the same time, and their growth habits complement each other.
I learned this the hard way after my first garden left me with too many green tomatoes and wilted cilantro by harvest time.
You’ll need five key plants—roma tomatoes (for sauce), jalapeños (for heat), cilantro (for freshness), onions (for depth), and basil (for aroma)—plus a few supporting players like marigolds to keep pests away.
The layout stacks tall plants (tomatoes) at the back, medium-height peppers in the middle, and low-growing herbs up front, creating a natural harvest sequence. Even in small spaces, containers work—just use 5-gallon pots for tomatoes and 1-gallon pots for herbs.
By midsummer, you’ll be harvesting pounds of ripe tomatoes and peppers that burst with flavor, while the cilantro and basil stay fresh for weeks. The onions add sharpness that balances everything, and the basil’s aroma lingers in the air as you chop.
This isn’t just a garden; it’s a flavor factory where every ingredient plays its part in the perfect salsa.
Works for any climate—just adjust planting times (start seeds indoors 6-8 weeks before last frost) and choose heat-tolerant varieties if you’re in a hot zone. The real magic happens when you taste the first batch of salsa made from your own harvest. Here’s how to make it happen!
📚 In This Guide
- What you need
- Instructions
- Tips and common mistakes
- Wrapping up and next steps
What you need
- ● Garden Space: Raised beds (2–3, 2 ft x 4 ft each) or in-ground plots with 6+ inches of soil depth.
- ● Drip irrigation system or soaker hoses (with timer, 10–15 ft rolls).
- ● Soil & Amendments: High-quality potting mix or garden soil (sterilized, 50 lbs per bed).
- ● Compost (well-aged, 2–3 gallons per bed).
- ● Balanced fertilizer (10-10-10, 1 lb per bed).
- ● Plants: Tomatoes (3–4 plants, e.g., Roma or San Marzano).
- ● Peppers (2–3 plants, e.g., jalapeño, serrano, or poblano).
- ● Onions (1–2 plants, e.g., red or yellow).
- ● Cilantro (2–3 bunches, for fresh flavor).
- ● Garlic (1 head, planted early in the season).
- ● Garden trowel (for planting).
- ● Pruners (sharp, for harvesting).
- ● Gloves (gardening-specific).
- ● Measuring tape (for spacing).
- ● Mulch (straw or shredded leaves, 2–3 bags).
- ● Trellis system (for tomatoes, if vertical growth is desired).
- ● Shade cloth (for hot climates, 30% coverage).
- ● Garden journal (to track plant progress).
- ● Pest control (neem oil or companion plants like basil).
Step-by-Step instructions for designing your salsa garden layout
Here's how to organize your garden for bold, balanced flavors—no guesswork involved.
🌱 Step 1: Plan Your Plant Spacing and Layout
Start by sketching your garden bed on paper, marking a 4-foot by 4-foot square for each of your 4 servings. This gives each plant enough room to thrive without competing for nutrients. I like to divide the space into quadrants—each quadrant gets a different flavor profile: heat, brightness, depth, and freshness.
Place your tallest plants, like tomatoes, along the north side of the bed to avoid shading smaller plants. Jalapeños and serranos go in the center, where they’ll get consistent sun without fighting for space. Leave 12-18 inches between each plant—crowding leads to weak stems and poor airflow, which invites disease.
☀️ Step 2: Position for Sun and Wind Protection
Your salsa garden needs 6-8 hours of direct sun daily. Face the longest side of your bed toward the south for maximum exposure. If you’re in a windy area, add a row of bush beans or basil along the north edge as a natural windbreak—they’ll also complement your salsa flavors.
Watch for afternoon shade from nearby trees or structures. If part of your bed gets shaded after 2 PM, move those plants to a sunnier spot or add a dwarf tomato variety that tolerates partial shade. You’ll know your layout is right when all plants stand upright and leaves stay vibrant, not wilting by midday.
💧 Step 3: Layer Soil Amendments for Rich Flavor
Before planting, loosen the top 12 inches of soil with a garden fork. Mix in 2 inches of compost into the top 6 inches—this feeds roots without overwhelming them. For each quadrant, add a 1-inch layer of organic matter tailored to its role: aged manure for tomatoes, worm castings for peppers, and kelp meal for onions and cilantro.
Level the soil so water drains evenly. Press down lightly with your hands—it should feel firm but not compacted. If you press and see footprints, add a thin layer of sand or perlite to improve drainage. The goal is soil that holds moisture but doesn’t stay soggy, because soggy soil dulls flavor.
🌿 Step 4: Plant in Flavor Zones for Balance
Divide your quadrants like this:
- Heat Zone (Northwest): Jalapeños and serranos—plant 18 inches apart in well-draining soil.
- Brightness Zone (Northeast): Cherry tomatoes and cilantro—tomatoes get 24 inches apart, cilantro 12 inches apart.
- Depth Zone (Southeast): Onions and garlic—space 6 inches apart for easy harvesting.
- Freshness Zone (Southwest): Lime or lemon tree (if space allows) or basil—plant basil 12 inches apart near tomatoes to repel pests.
Plant at the same depth they grew in their pots. Water deeply right after planting to settle the soil around roots. You’ll see new growth within 7-10 days—that’s your sign everything’s off to a great start.
✂️ Step 5: Maintain for Continuous Harvest
Water at the base of plants in the morning to avoid fungal issues. Aim for 1 inch of water per week, adjusting for rain. Mulch with 2 inches of straw to retain moisture and suppress weeds—this keeps soil cool and flavorful.
Harvest peppers when they’re firm and bright, tomatoes when they’re fully colored, and herbs just before flowering. Pinch back leggy basil stems to encourage bushier growth. You’ll know your garden’s thriving when you can harvest every 2-3 days without the plants struggling to recover.
Tips & tricks for perfect salsa garden layout
A few clever strategies that'll transform your garden into a flavor powerhouse without the guesswork.
The Quadrant Strategy: The four-zone layout in Step 1 isn't just about aesthetics—it's about flavor chemistry. The Heat Zone with jalapeños and serranos should get the most afternoon sun (6-8 hours), while the Freshness Zone with basil can handle slightly less direct light. I've found that placing tomatoes along the north side prevents them from shading the peppers in the center, which is where they need consistent warmth to develop their signature heat.
Sunlight Secret: Pay special attention to Step 2's afternoon shade warning. If your garden gets shaded after 2 PM, move your Brightness Zone (tomatoes and cilantro) to the southernmost edge where they'll still catch those golden afternoon rays. I once had my cherry tomatoes in the wrong spot and noticed they never fully ripened—moving them made all the difference. A simple sun gauge (just stick a ruler in the soil) can help you track light exposure throughout the day.
Soil Science: When you're layering those soil amendments in Step 3, don't just mix them in—stratify them. Place the compost at the bottom (6 inches down) as the base nutrition, then add your quadrant-specific amendments (aged manure, worm castings, kelp meal) in 1-inch layers on top. This creates a flavor gradient that mirrors your plant needs. And remember: that 12-inch soil loosening? Use a broadfork, not a shovel—it aerates without compacting, which is crucial for root development.
Harvest Hack: The continuous harvest tip in Step 5 is gold, but here's how to make it work: Harvest peppers in the morning when their caps are still firm, and tomatoes when they've just started to blush. For basil, I pinch off the top sets of leaves just as they start to flower—this forces the plant to put energy into leaf production rather than seed-making. You'll notice a dramatic increase in harvest frequency within just 2-3 days of consistent pinching.
Pro Tips for Salsa Garden Plan
- A few clever strategies that'll transform your garden into a flavor powerhouse without the guesswork.
- The Quadrant Strategy: The four-zone layout in Step 1 isn't just about aesthetics—it's about flavor chemistry.
- Sunlight Secret: Pay special attention to Step 2's afternoon shade warning.
Frequently asked questions
Got questions about growing a salsa garden? You’re not alone! Here are some of the most common queries—and their answers—to help you crush your harvest.
What’s the best time of year to plant a salsa garden?
For most climates, start seeds indoors 6–8 weeks before the last frost, then transplant seedlings after the soil warms to at least 60°F (15°C). If you’re in a warmer zone (zones 8–11), plant in early spring or late summer to avoid peak heat. Pro tip: Use a soil thermometer to check—cool soil slows germination!
Can I grow all salsa ingredients in one garden bed, or should I separate them?
You can plant everything together (like a traditional milpa system), but spacing matters! Keep tomatoes, peppers, and onions in close proximity for easy harvesting, but give tomatoes extra room (18–24 inches apart) to prevent disease. Onions and cilantro can be interplanted—they’re happy together!
Why are my pepper plants turning yellow or dropping leaves?
Yellowing leaves often signal overwatering or nutrient deficiencies. Check the soil—it should be moist but not soggy. Peppers hate “wet feet,” so ensure pots/containers have drainage holes. For a quick fix, feed with compost tea or a balanced fertilizer (like 5-5-5). Bonus: Yellow lower leaves? It’s normal as they age!
What’s the fastest way to get a salsa harvest?
For speed, choose bush varieties (like ‘Early Girl’ tomatoes or ‘Jalapeño M’ peppers) and start seeds indoors. With proper care, you can harvest tomatoes in 60–70 days and peppers in 70–90 days. Hot tip: Prune suckers from tomatoes to redirect energy to fruit production—more salsa, faster!
What can I substitute if I can’t grow cilantro or green onions?
No cilantro? Swap in parsley (similar flavor, slower growth) or basil for a fresh twist. For green onions, try chives or scallions—they’re milder but add a zing. Dill also works in a pinch (though it’s stronger). Remember: Adjust seasoning to taste!
Wrapping up and next steps
Creating your own salsa garden plan is a rewarding journey that brings bold flavors straight to your kitchen—without the store-bought shortcuts! 🌶️ By layering plants strategically, you’ll maximize space, yield, and taste while keeping pests at bay.
Whether you’re a seasoned gardener or a curious beginner, this plan makes it simple to grow vibrant, high-quality ingredients for homemade salsa.
Now that you’re armed with the perfect layout, soil prep tips, and answers to common questions, it’s time to roll up your sleeves!
Start by sketching your garden beds or marking spots in containers—then plant those seeds or seedlings with confidence. Happy gardening, and may your harvest be as fiery as your passion!