
Tools
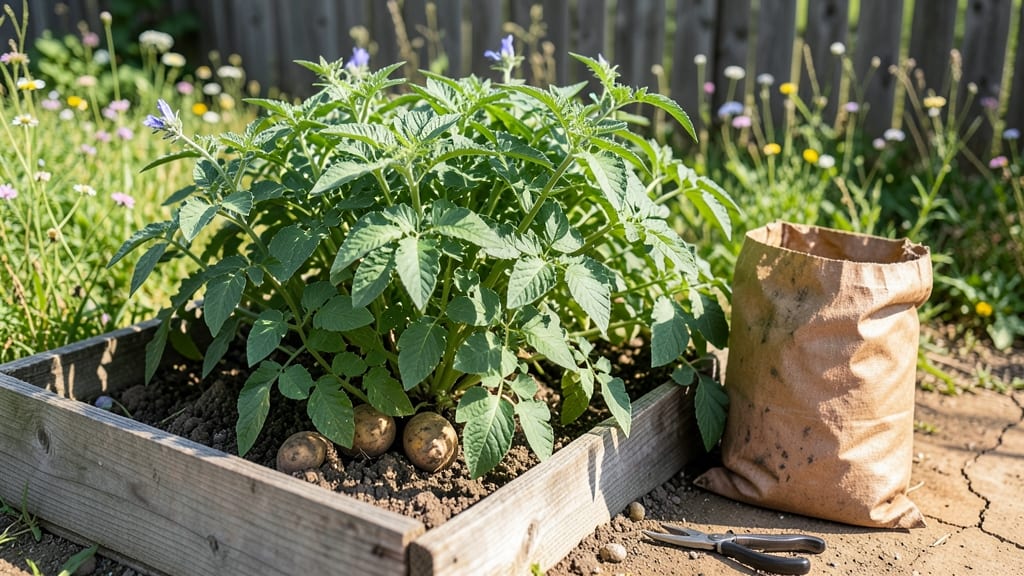
A potato vertical garden turns a 3-foot square into more harvest than you’d get from a full row. 🌱 I built mine last spring after realizing my backyard plot was too small for all the varieties I wanted to try—and now I’m hooked on the space savings and the way the plants cascade like little green waterfalls.
The secret isn’t fancy equipment—just sturdy containers, mesh bags, or even repurposed wire cages to hold the plants upright. You’ll need disease-resistant varieties like ‘Yukon Gold’ or ‘Red Pontiac,’ which thrive when their foliage gets good airflow.
Start with seed potatoes in early spring, and by midsummer, you’ll be harvesting baby potatoes right from the sides of your tower.
This setup cuts down on bending, maximizes sunlight exposure, and keeps pests at bay by lifting the plants off the ground. My first vertical harvest gave me three times the yield from the same footprint as traditional rows.
The best part? You can tuck it into corners, along fences, or even on a balcony.
Fair warning: watering takes a little more attention—drip systems or self-watering bags help—but the trade-off is worth it. Once you try it, you’ll never go back to sprawling hills. Here’s how to get started without the guesswork.
📚 In This Guide
- What you need
- Instructions
- Tips and common mistakes
- Wrapping up and next steps
What you need
- ● Growing Container: Fabric grow bag (5–10 gallons, minimum 12–18 inches deep)
- ● OR a repurposed tote, bucket, or wooden crate (drill drainage holes!)
- ● Growing Medium: High-quality potting mix (sterile, well-draining, 2–3 cubic feet)
- ○ Compost or worm castings (optional but recommended for nutrients)
- ● Potatoes: Seed potatoes (organic, certified disease-free; 3–5 per container)
- ● Pro tip: Choose varieties like Yukon Gold or Red Pontiac for vertical growth!
- ● Tools: Scissors or pruners (for cutting seed potatoes)
- ● Spray bottle (for misting soil)
- ● Measuring cup (for soil amendments)
- ● Drip irrigation kit or watering can with a long spout
- ● Plant labels (to track varieties)
- ● Fertilizer (balanced organic, low in nitrogen)
- ● Pest deterrents (neem oil, row covers, or copper tape)
- ● Support stakes or twine (if using a tall container)
Step-by-step instructions for building a potato vertical garden
Here’s how to grow a bountiful potato harvest in minimal space using this clever vertical system.
🪴 Step 1: Assemble the Grow Tower
Start by stacking the 5-tier potato grow bags (or repurposed fabric pots with cut-out holes) into a pyramid shape. Secure each tier with the zip ties or burlap strips—I like to loop the ties around the sides and pull snug to keep them stable. The top tier should be slightly narrower than the bottom to create a cascading effect for easy harvesting.
Place the entire structure in a location with at least 6 hours of direct sunlight daily. If you’re using the 5-gallon fabric grow bags, position them vertically against a fence or wall. The key is keeping the bags upright so the potato plants can grow straight up through the tiers.
🌱 Step 2: Plant Seed Potatoes and Add Soil
Cut the 5 seed potatoes into smaller chunks, ensuring each piece has at least 2-3 eyes (the little dimples where sprouts grow). Let them dry for 24 hours to prevent rot. Plant one piece in each tier, 4 inches deep, placing them near the edge of the top tier so they grow upward.
Fill the top tier with 3 gallons of potting mix, leaving 1 inch of space at the top. Water lightly until the soil is moist but not soggy. The goal is to keep the soil loose and airy—potatoes need room to expand, and compacted soil will stunt their growth.
💧 Step 3: Water and Maintain Moisture
Water the potatoes deeply every 2-3 days, checking the soil by sticking your finger 2 inches down. If it feels dry, it’s time to water. Avoid overhead watering—direct moisture on the leaves can spread disease. Instead, water at the base or use a drip irrigation kit if you have one.
When the sprouts reach 6 inches tall, add 2 more gallons of potting mix to the next tier, burying the stems up to the leaves. This encourages more tubers to form along the buried stem. Repeat this process every 2-3 weeks as the plant grows, filling each tier until all 5 are used.
☀️ Step 4: Fertilize and Support Growth
After the plants reach 12 inches tall, mix 1 tablespoon of 10-10-10 fertilizer into the top 2 gallons of potting mix before adding it to the next tier. This gives the potatoes a steady nutrient boost without overloading them. Avoid high-nitrogen fertilizers—they’ll produce leafy growth at the expense of tubers.
Watch for yellowing leaves or wilting, which can signal overwatering or nutrient deficiency. If leaves turn yellow, reduce watering slightly and add a half-strength balanced fertilizer to the next layer of soil. Healthy plants should have deep green leaves and strong stems.
✂️ Step 5: Harvest and Store Your Potatoes
When the top tier’s flowers fade and the foliage yellows, it’s time to harvest. Gently remove the entire grow tower and empty each tier into a large bucket or tarp. Brush off excess soil and let the potatoes cure in a dark, dry place for 24 hours before storing.
Store the potatoes in a paper bag or mesh sack in a cool (50-60°F), dark space like a basement or pantry. Check them monthly and remove any that sprout to prevent waste. With this method, you’ll harvest 4-5 pounds of potatoes from just a few square feet of space!
Tips & tricks for perfect potato vertical garden
Here's what I've learned from growing potatoes vertically that'll make all the difference in your harvest.
The Sunlight Factor: That 6 hours of direct sunlight is non-negotiable for your vertical garden. If your location gets less light, consider supplementing with a grow light for 2-3 hours in the evening. I've seen plants struggle when sunlight drops below 5 hours—leaves turn pale and tubers stay small. Position your grow tower where it gets morning sun and afternoon light for best results.
Seed Potato Prep: When cutting those 5 seed potatoes, use a clean, sharp knife and let the pieces dry for the full 24 hours as directed. This drying step prevents rot by allowing the cut surfaces to form a protective callus. I've made the mistake of skipping this step and ended up with moldy potatoes—don't make my mistake! Place the cut pieces on a paper towel in a single layer to dry.
Soil Strategy: Don't skimp on that 3 gallons of potting mix in the top tier. A quality, well-draining mix is crucial for potato growth. I recommend adding 1 cup of perlite to the potting mix to improve aeration. This helps prevent waterlogging which can cause rot. When adding the 2 more gallons to subsequent tiers, mix in a handful of compost for extra nutrients.
Harvest Timing: The 24-hour curing period before storing is essential for developing the potato's natural protective skin. If you're impatient and skip this step, your potatoes will bruise easily and store poorly. I cure mine in a dark closet with good airflow. Also, harvest when the top tier's flowers fade—this is your clearest sign that the potatoes are ready, not just based on time.
Pro Tips for Potato Vertical Garden
- Here's what I've learned from growing potatoes vertically that'll make all the difference in your harvest.
- The Sunlight Factor: That 6 hours of direct sunlight is non-negotiable for your vertical garden.
- Seed Potato Prep: When cutting those 5 seed potatoes, use a clean, sharp knife and let the pieces dry for the full 24 hours as directed.
Frequently asked questions
Got questions about growing potatoes vertically? You’re not alone!
Here are some of the most common queries—and their answers—to help you get started with confidence.
1. How long does it take for potatoes to grow in a vertical garden?
Most potato varieties take 90–120 days from planting to harvest, depending on the type. Early varieties (like ‘Yukon Gold’) may be ready in as little as 70–80 days, while late varieties (like ‘Russet’) can take up to 150 days. Check your seed packet for exact timelines!
2. Can I grow any potato variety in a vertical garden?
Not all potatoes thrive vertically! Opt for bush or determinate varieties like ‘Red Pontiac,’ ‘Fingerling,’ or ‘Sweet Potato’ (yes, they work too!). Avoid sprawling types like ‘Idaho Russet,’ which need more space. Pro tip: Look for labels like “compact” or “bush-type” for best results.
3. What do I do if my vertical potatoes aren’t growing?
Check these first:
- Light: Ensure your garden gets 6+ hours of sunlight daily—potatoes are sun-worshippers!
- Water: Keep soil consistently moist (not soggy). Vertical gardens dry out faster.
- Pests: Watch for colorado potato beetles or aphids. Use neem oil or row covers if needed.
- Harvest too soon: Wait until foliage yellows before digging.
4. Can I use a vertical garden indoors?
Place your vertical potato garden near a south-facing window or under grow lights (12–16 hours/day). Use a self-watering system to maintain moisture, and opt for smaller varieties like ‘Red Norland’ for better indoor success. Just avoid drafty spots—potatoes hate cold feet!
5. What’s the best alternative if I don’t have space for a vertical garden?
No problem! Try these space-saving hacks:
- Hanging baskets: Use fabric grow bags with drainage holes.
- Straw bale gardens: Plant potatoes in a bale (no soil needed!).
- Container growing: Deep pots (12+ inches) work for 1–2 plants.
- Trench planting: Dig a shallow trench in a small yard and cover with soil as vines grow.
Wrapping up and next steps
A potato vertical garden isn’t just a clever way to grow more food in less space—it’s a game-changer for urban gardeners, small-space lovers, and anyone eager to harvest fresh, homegrown potatoes with minimal effort. 🌱 Whether you’re a beginner or a seasoned green thumb, this method proves that big yields don’t need big yards.
Ready to dig in? Start small with one vertical garden, experiment with your favorite potato varieties, and watch your confidence (and harvest!) grow.
🚀 Your Next Step:
- Grab your supplies and build your first vertical garden today!
- Share your progress or ask questions in the comments—we’re here to cheer you on!
- Once you’ve mastered potatoes, explore other vertical gardening hacks for herbs, greens, or even strawberries!