
Tools
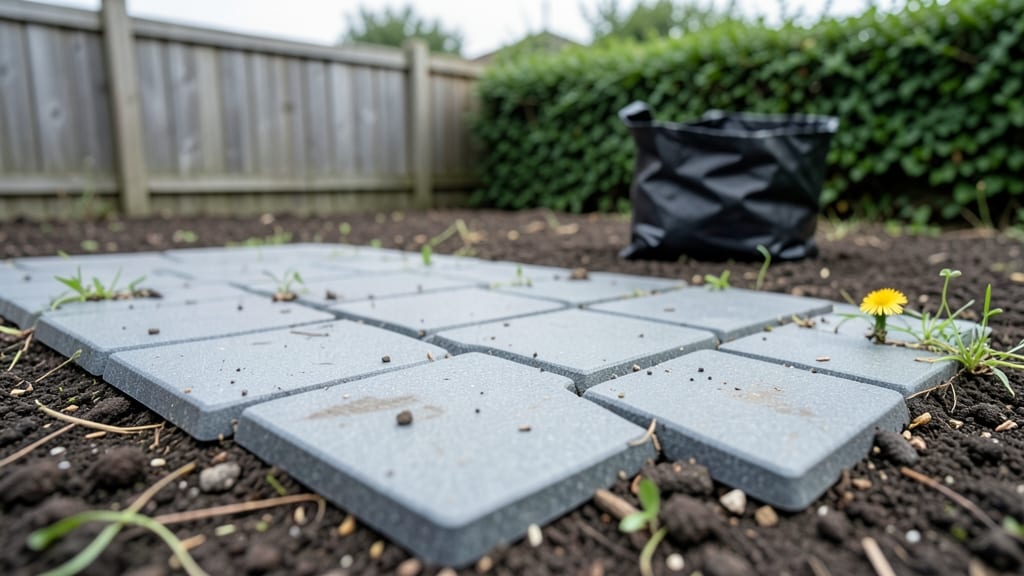
Plastic garden paving transformed my backyard from a muddy mess to a clean, functional space that actually looks intentional. 🌿 The first time I stepped on it after heavy rain, I knew I’d made the right call—no more sinking boots or weeds popping up between stones.
It’s not just about durability; it’s about reclaiming your garden without the constant upkeep of gravel or the cracks that plague concrete.
Unlike traditional paving, plastic garden pathways are lightweight, interlocking, and designed to handle foot traffic without shifting. You can choose from wood-look, stone, or even brick patterns, so they blend seamlessly with your landscape. Installation is simpler than you’d think—just lay the planks over a compacted base, and you’re done.
No mortar, no heavy equipment, and no waiting weeks for curing. My favorite part? The built-in drainage that keeps water flowing instead of pooling.
What you’ll end up with is a pathway that stays put through every season, resists weeds, and won’t fade or crack like other materials. The color options are surprisingly realistic, too—no cheap plastic vibes here.
Plus, you can mix and match designs to create curves, borders, or even small patios. It’s the kind of upgrade that makes your garden feel polished without the headache of maintenance.
Whether you’re connecting raised beds, framing a flower garden, or just needing a clean walkway, plastic paving adapts effortlessly. And since it’s recyclable, you can feel good about the choice too. Ready to see how it can work in your space?
📚 In This Guide
- What you need
- Instructions
- Tips and common mistakes
- Wrapping up and next steps
What you need
- ● Plastic paving slabs: 10–20 slabs (depending on path size; 2’x4’ or 2’x2’ standard sizes). Opt for UV-stabilized, interlocking designs for durability.
- ● Base material: Crushed gravel (¾" minus, 2–3 inches deep)
- ● Landscape fabric (to prevent weed growth)
- ● Edging: Plastic or metal edging strips (cut to fit path length + corners).
- ● Sand: Polymeric or sharp sand (½ inch layer for leveling and locking slabs).
- ○ Optional: Outdoor adhesive (for extra stability on slopes)
- ● Decorative border stones or pavers (for a polished look)
- ● Rubber mallet (for tapping slabs into place)
- ● Wheelbarrow (for hauling gravel/sand)
- ● Shovel and rake (for leveling base)
- ● String line + stakes (to mark path layout)
- ● Measuring tape + speed square (for precise cuts)
- ● Saw (circular or handsaw with a metal blade for cutting plastic)
- ● Knee pads (because comfort matters!)
- ○ Optional: Plate compactor (for high-traffic areas)
- ● Level (to ensure a perfectly flat finish)
- ● Clear the area: Remove grass, weeds, or debris from your path’s future home.
- ● Check ground slope: Ensure a max 5% grade (steeper slopes may need retaining walls or steps).
- ● Weather window: Plan for dry, sunny days (avoid rain or extreme heat).
- ● Safety first: Wear gloves and eye protection when handling tools.
Step-by-Step guide to installing plastic garden paving
Here’s how to create clean, long-lasting pathways that require zero weeding and minimal upkeep.
🪴 Step 1: Measure and Mark Your Pathway Layout
Use a tape measure to determine the length and width of your desired path. Plastic paving typically comes in 4-foot-wide rolls, so plan your layout to minimize cuts—wasted material adds cost. Mark the edges with spray paint or a garden hose, then use stakes and string to outline the area for precision.
For curves, bend the string gently to follow your design, but avoid sharp angles that will require awkward cuts. Double-check measurements before digging—once you start, adjusting the layout will waste time and materials. I always add 2 inches to each side for a slight overhang that hides uneven edges later.
💧 Step 2: Prepare the Base with Gravel and Compact
Excavate the marked area to a depth of 4-6 inches, removing grass, roots, and rocks. The base must be level—use a 2x4 board as a straightedge to check for high spots. For drainage, add a 2-inch layer of coarse gravel (like #57 stone) and spread it evenly with a rake.
Compact the gravel with a hand tamper or rented plate compactor until it’s firm to the touch. You’ll know it’s ready when the surface resists your boot prints. Skipping this step leads to sinking pavers over time—trust me, I’ve seen it happen. For extra stability, lay down a geotextile fabric before adding the final gravel layer.
☀️ Step 3: Lay the Plastic Paving Rolls
Unroll the plastic paving starting at one end of your path, aligning the edges with your marked layout. Overlap seams by 2-3 inches for a seamless look, then use a utility knife to trim excess material. For curves, cut the plastic in 12-inch increments, then bend the sections gently to follow the shape.
Press the edges firmly into the gravel base so they don’t shift later. If the plastic feels loose, add small rocks along the edges to weigh it down. Avoid stretching the material—plastic paving shouldn’t sag or pull apart underfoot. For wider paths, butt the edges tightly together and secure with landscape staples every 12 inches.
✂️ Step 4: Secure Edges and Add Final Touches
Cut 1-inch-wide strips of plastic along the perimeter of your path to create a clean border. Bend these strips upward at a 45-degree angle and secure them with landscape staples or plastic paving clips. This keeps the edges crisp and prevents shifting over time.
For extra durability, add a 1-inch layer of fine gravel over the plastic paving, then sweep it into the surface for traction. This also helps hide minor imperfections. Walk over the entire path to test stability—if any section feels soft, add more gravel and compact again. A well-installed plastic pathway should feel firm and even underfoot.
⏰ Step 5: Maintain for Long-Term Performance
Plastic paving needs almost no upkeep, but remove leaves and debris weekly to prevent water pooling. If weeds poke through, spot-treat with a vinegar spray (no digging required). For heavy foot traffic, refresh the gravel top layer every 2-3 years to restore traction.
Watch for shifting edges—if you notice gaps after heavy rain, secure them with more staples or clips. Avoid dragging heavy objects across the surface, as this can tear the plastic. With proper installation, your pathways will last 10+ years with minimal effort. That’s the beauty of plastic paving!
Tips & tricks for perfect plastic garden paving
Here's what I learned after installing pathways that lasted for years without a single weed—plus how to avoid the mistakes I made on my first try.
Precision in Step 1 Pays Off: Take an extra 10 minutes to mark your layout with stakes and string before digging. I used to eyeball it, and my first pathway had uneven edges that looked messy. The 2-inch overhang I add now hides any minor imperfections in the digging, and the string creates perfectly straight lines for curves. Pro tip: Snap a chalk line along the string for crisp edges that look professional.
Base Compaction is Non-Negotiable: In Step 2, when compacting that 2-inch gravel layer, work in small sections—about 2 feet by 2 feet at a time. I learned this after my first attempt where the center stayed soft because I rushed the compaction. The gravel should feel like concrete when you press down. Renting a plate compactor for this step makes all the difference—your hands will thank you later when you're not constantly adjusting sinking sections.
Seam Strategy for Step 3: Those 2-3 inch overlaps between plastic paving rolls are crucial for durability. Cut the excess with a utility knife, but leave the overlap slightly longer than needed. After laying, press down firmly with a 2x4 board to create a strong bond between seams. For wider paths, stagger the seams like brickwork—this distributes weight better and prevents shifting over time. I've seen pathways fail when seams weren't properly overlapped.
Edge Security Matters: When creating those 1-inch-wide border strips in Step 4, bend them at a 45-degree angle and secure with landscape staples every 12 inches. This prevents the edges from curling up after rain. I used plastic paving clips on my last project, and they held up perfectly—just make sure to space them evenly. The final 1-inch gravel layer you add isn't just for traction; it also helps weigh down these edges and hide any minor imperfections in the plastic.
Pro Tips for Plastic Garden Paving
- Here's what I learned after installing pathways that lasted for years without a single weed—plus how to avoid the mistakes I made on my first try.
- Precision in Step 1 Pays Off: Take an extra 10 minutes to mark your layout with stakes and string before digging.
- Base Compaction is Non-Negotiable: In Step 2, when compacting that 2-inch gravel layer, work in small sections—about 2 feet by 2 feet at a time.
Frequently asked questions
Got questions about plastic garden paving? You’re not alone! Here are some of the most common concerns—and straightforward answers—to help you make the best choice for your outdoor space.
Is plastic garden paving really low-maintenance?
Unlike concrete or natural stone, plastic paving won’t crack, fade, or require sealing. It resists weeds, stains, and moisture, and a quick sweep or hose-down keeps it looking fresh. Plus, no harsh chemicals or heavy tools needed—just easy upkeep. Pro tip: Use a non-abrasive cleaner for stubborn dirt.
How long does installation take?
Installation speed depends on your project size, but most homeowners complete a small to medium path in 1-3 days. Plastic paving interlocks quickly (like puzzle pieces), cutting labor time by up to 50% compared to concrete. For DIYers, a weekend project is totally doable with basic tools. Time-saver: Pre-cut pieces for corners or curves to avoid awkward fits.
Is it more expensive than gravel or concrete?
Upfront costs may be slightly higher than gravel, but plastic paving saves money long-term. No need for costly repairs, resurfacing, or weed treatments. Compared to concrete, it’s often 20-30% cheaper over 10+ years. Think of it as an investment in durability and ease. Budget hack: Buy in bulk or during seasonal sales for discounts.
Can plastic paving handle freezing temperatures?
Yes! High-quality plastic paving is designed to resist cracking in freeze-thaw cycles. Look for products rated for temperatures down to -40°F (-40°C). Just ensure proper drainage beneath the pavers to prevent water pooling. Snow and ice melt easily, so no shoveling headaches! Winter prep: Add a thin layer of sand for extra stability in icy climates.
What if I want to remove or replace sections later?
One of plastic paving’s biggest perks is flexibility! Unlike poured concrete, you can easily lift and replace individual tiles without damaging the rest. Just remove the surrounding pavers, adjust the base if needed, and pop in a new piece. Perfect for updating designs or fixing minor damage. Troubleshooting: Use a pry bar gently to avoid scratching the plastic.
Are there eco-friendly options?
Many plastic paving brands use recycled materials (like post-consumer plastic bottles) and are 100% recyclable themselves. Some even offer permeable designs to reduce runoff. Look for certifications like Cradle to Cradle or Greenguard Gold for eco-conscious choices. Green tip: Pair with native plants to boost sustainability!
Wrapping up and next steps
Plastic garden paving offers a durable, low-maintenance, and eco-friendly solution for transforming your outdoor space without the hassle of traditional materials. Whether you're looking to enhance aesthetics, improve drainage, or reduce upkeep, these pathways deliver long-lasting performance with minimal effort. 🌿
Ready to elevate your garden? Start by measuring your space, choosing the right plastic pavers, and gathering your tools. With the right approach, you’ll create a stunning, functional pathway that stands the test of time—and weather! Take the first step today!