
Tools
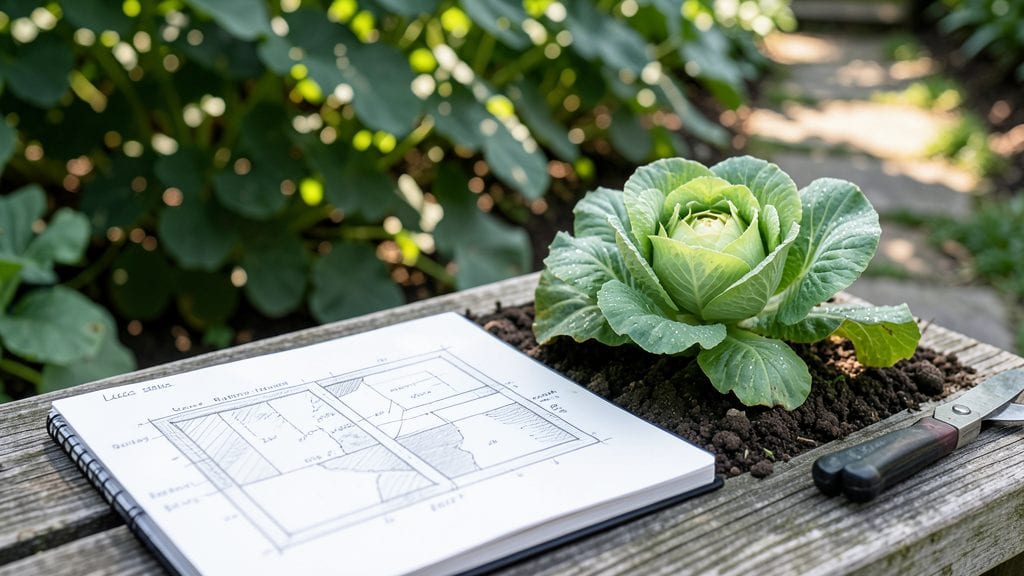
Planning my garden starts with a blank slate and a few key questions that turn chaos into a thriving layout. ✨ I’ve spent years sketching designs that either flopped or flourished, and the difference always came down to measuring sunlight, matching plants to spaces, and leaving room for paths you’ll actually walk.
The best plans account for what you’ll really eat, not just what looks pretty in seed catalogs.
You don’t need fancy software—just a notebook, a tape measure, and a sunny afternoon to map your space. Start by walking your yard (or balcony) and marking where light hits hardest.
Group plants by their needs: leafy greens in partial shade, tomatoes in full sun, and herbs near the kitchen door. I learned the hard way that squishing everything together leads to overcrowding and pests—so plan for airflow, even if it means sacrificing a few extra flowers.
By the time you’re done, you’ll have a layout that works year-round, not just in peak summer. Imagine crisp lettuce in spring, zucchini spilling over borders in July, and late-season kale holding strong through frost.
The secret? Layering plants so something’s always ready to harvest, and designing paths that lead you through the garden without trampling your veggies. This isn’t just a spring project—it’s the foundation for every season’s success.
Whether you’ve got a postage-stamp urban plot or a sprawling rural acreage, the principles stay the same. We’ll tackle how to adapt these basics to your space, from container gardens on patios to raised beds in small yards.
The goal? A garden that feels like an extension of your home—not a never-ending to-do list. Let’s get those pencils moving.
📚 In This Guide
- What you need
- Instructions
- Tips and common mistakes
- Wrapping up and next steps
What you need
- ● Measuring tape (25 ft or longer) – For precise spacing and layout.
- ● Graph paper or garden planning software (e.g., Garden Planner, SketchUp) – To sketch your design.
- ● Stakes or flags (wooden or metal, 6–12 inches tall) – Mark planting spots.
- ● String or twine – For outlining beds or rows.
- ● Shovel or spade – For digging and soil prep.
- ● Garden fork – Loosens compacted soil.
- ● Wheelbarrow or buckets – For hauling soil, compost, or mulch.
- ● Gloves (heavy-duty) – Protect your hands from thorns and dirt.
- ● Watering can or hose with nozzle – For hydration (add a soaker hose for efficiency!).
- ● Compost or organic fertilizer (5–10 lbs per 100 sq ft) – Boosts soil health.
- ● Mulch (straw, wood chips, or shredded leaves) – Retains moisture and suppresses weeds.
- ● Garden kneeler or pad – Saves your knees during planting.
- ● Pruners or shears – For trimming plants or clearing debris.
- ● pH testing kit – Ensures your soil is optimal for your plants.
- ● Drip irrigation system – Automates watering for busy gardeners.
- ● Trellises or cages – Supports climbing plants like beans or cucumbers.
- ● Plant labels or markers – Keeps track of what’s growing where.
- ● Solar-powered lights – Adds ambiance and extends gardening time.
Step-by-Step instructions for designing a season-long garden layout
Here's my foolproof method for mapping out a thriving garden that adapts with the seasons.
🌱 Step 1: Sketch Your Base Garden Shape and Sun Exposure
Grab a pencil and graph paper (or use a free garden planning app if you prefer digital). Draw your garden's footprint to scale, noting any permanent features like fences, patios, or mature trees that cast shade. I always start by marking the sunniest spots first—these will determine where your heat-loving plants like tomatoes and peppers go.
Use a compass or sun path app to map where sunlight hits throughout the day. Label areas with full sun (6+ hours), partial shade (3-6 hours), and full shade (under 3 hours). This ensures you'll place sun-worshippers where they'll thrive and avoid struggling plants later. Pro tip: Take photos of your garden at different times of day to catch shifting shadows.
🪴 Step 2: Plan Your Planting Zones by Season
Divide your garden into three seasonal zones: spring, summer, and fall. I like to use colored pencils—green for spring, red for summer, and yellow for fall—to visualize how plants will rotate. Start with cool-season crops like lettuce and peas in early spring areas, then mark where you'll transition to heat-loving plants like cucumbers and basil as temperatures rise.
Leave space between zones for paths (at least 18-24 inches wide) so you can move around without compacting soil. This also prevents soil-borne diseases from spreading. For a 4-season garden, plan a small winter zone with cold-hardy greens or garlic near the house where it's sheltered from winds.
☀️ Step 3: Map Companion Planting Pairs and Successions
Now's the time to get creative with plant pairings. Draw circles around your main crops (like tomatoes or zucchini) and note which companions thrive nearby—basil with tomatoes, marigolds with almost everything, or carrots with onions. I sketch these directly on my plan so I can visualize how plants will interact as they grow.
Next, plan your succession plantings by marking smaller areas where you'll replant fast-growing crops like radishes or bush beans after harvesting earlier crops. This keeps your garden productive all season. For example, after pulling out spring peas, I'll plant summer squash in the same spot—just make sure the new crop has similar sunlight needs.
✂️ Step 4: Add Hardscape and Maintenance Accessories
Now include non-plant elements like trellises, raised beds, or irrigation lines. I always draw my water source (hose bib or drip system) and mark where I'll run soaker hoses or place watering cans. Place trellises near vining plants like cucumbers or pole beans, and note their width when mature to avoid crowding.
Add paths made from mulch or stepping stones, and mark where you'll store tools or a wheelbarrow. I like to include a small "work zone" near the garden entrance where I can wash hands or store pruners. This keeps your space organized and makes gardening more enjoyable. Don't forget to leave room for a compost bin—place it near the kitchen or garden edge for easy access.
⏰ Step 5: Create Your Planting Timeline and Calendar
Finally, assign planting dates to each section using your local frost dates. I create a simple chart with columns for each month and rows for each garden zone. Mark when to sow seeds, transplant seedlings, and harvest. For example, in Zone 5, I'll plant peas in early April, tomatoes in late May, and kale in early September.
Add reminders for seasonal tasks like mulching in spring, pruning in summer, and covering crops before the first frost. This timeline becomes your garden's roadmap. Keep it visible in your planning space so you can check it weekly. Real talk: I've learned the hard way that forgetting to rotate crops leads to pest problems—this system prevents that.
Tips & tricks for perfect season-long garden planning
A well-thought-out garden layout saves you headaches later. Here's what I've learned after years of trial and error in the dirt.
Sun Mapping Secret: In Step 1, when you're mapping sunlight, take it a step further by observing your garden at solar noon (around 1 PM local time) on a clear day. Shadows will be shortest then, giving you the most accurate full sun/partial shade boundaries. I've caught myself underestimating shade from walls or fences this way—don't make my mistake! The 6+ hours of full sun mark is non-negotiable for tomatoes and peppers, so get this right from the start.
Color Coding System: The colored pencil approach in Step 2 works wonders for visualizing seasonal transitions, but here's my upgrade: Use different shades within each color family. Light green for early spring crops, medium for mid-season, and dark for late fall. This helps you spot gaps where you might have bare soil or could squeeze in extra plantings. I keep my color key written down so I can reference it later when making planting decisions.
Companion Planting Shortcut: When mapping companion plants in Step 3, I keep a cheat sheet of the top pairings handy: basil with tomatoes, marigolds with everything, and onions with carrots. Draw these as symbols on your plan to save time—little circles with "+" signs work great. For succession planting areas, I mark them with question marks to remind myself which fast growers could fit there later. This visual cue has saved me from planting the same space twice!
Hardscape Placement Pro: In Step 4, when adding trellises and paths, think about your future self. Place trellises where they won't block future plantings—leave at least 12 inches of clearance on all sides. For paths, I always add a 6-inch buffer zone around the edges to prevent soil compaction. This small detail makes a huge difference when your garden matures. And that compost bin? Place it where you'll actually use it—near the kitchen entrance is my go-to spot.
Pro Tips for Planning My Garden
- A well-thought-out garden layout saves you headaches later.
- Sun Mapping Secret: In Step 1, when you're mapping sunlight, take it a step further by observing your garden at solar noon (around 1 PM local time) on a clear day.
- Color Coding System: The colored pencil approach in Step 2 works wonders for visualizing seasonal transitions, but here's my upgrade: Use different shades within each color family.
Frequently asked questions
Got questions about planning your dream garden? You’re not alone! Here are answers to the most common queries to help you get started with confidence.
What’s the best time of year to start planning my garden?
For most regions, late winter to early spring (February–March) is ideal—soil thaws, seed catalogs arrive, and you can map out your layout before planting season. If you’re in a warmer climate, start in fall to avoid summer heat. Pro tip: Check your USDA Plant Hardiness Zone to align timing with your local frost dates!
How do I figure out the best layout for my garden?
Start by sketching your space on paper or digitally. Group plants by sunlight needs (e.g., tomatoes in full sun, lettuce in partial shade) and height (tall plants like corn at the north edge to avoid shading shorter crops). Use raised beds or containers if your soil is poor or space is limited. Try the square foot gardening method for small areas—it’s beginner-friendly!
Is it expensive to start a garden? What’s the most budget-friendly approach?
Not at all! Skip pricey starter plants—seeds are cheaper (and fun to grow!). Use free/composted materials (grass clippings, leaves) for mulch, and repurpose containers (buckets, pallets) for growing. Swap seeds or cuttings with neighbors to save even more. Prioritize perennials (like herbs or asparagus) for long-term savings—they return yearly!
How can I keep pests away without chemicals?
Prevention is key! Rotate crops yearly to disrupt pest life cycles, and plant companion plants (e.g., marigolds repel nematodes, basil deters flies). Use row covers for early-season protection, and handpick pests like tomato hornworms. Encourage beneficial insects (ladybugs, lacewings) with native flowers—they’re nature’s pest control!
What if my garden fails? How do I troubleshoot common issues?
Even experts face setbacks! Wilted plants? Check soil moisture (overwatering is a top killer). Yellow leaves? Could be nutrient deficiency—try compost or a balanced fertilizer. No flowers? Some veggies (like zucchini) need more sun or male/female flowers. Keep a garden journal to track patterns. Remember: Failure is feedback—adjust and try again!
Wrapping up and next steps
Planning your garden is an exciting journey that blends creativity with practicality—and you’re already off to a great start! 🌱 Whether you’re sketching layouts, selecting seasonal plants, or gathering tools, every step brings you closer to a thriving, beautiful space. Remember: progress over perfection! Start small, stay organized, and don’t hesitate to adjust as you go.
Your next step? Take action! Grab those notes, break your blueprint into manageable tasks, and begin prepping your soil or ordering seeds. Before you know it, you’ll be harvesting fresh flavors or admiring blooms you grew yourself. Happy gardening—your future garden awaits! 🌿✨