
Tools
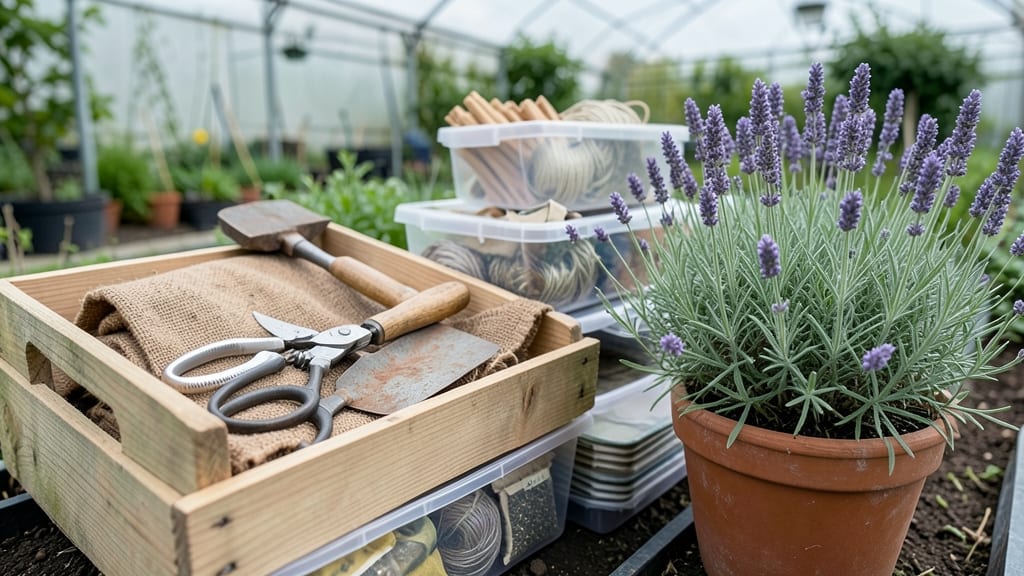
Organizing garden supplies isn't just about finding space—it's about reclaiming time in the garden. 🌱 Last spring, I spent 20 minutes digging through a cluttered shed just to find my pruners, and that's when I knew my system needed an overhaul.
The right storage keeps tools sharp, seeds viable, and your workflow smooth, whether you're prepping for spring planting or winterizing equipment.
Zone-specific storage means grouping supplies by where and when you use them. Heavy tools like shovels and hoes stay near the garden beds, while lightweight items—gloves, trowels, and seed packets—live in a portable bin you can wheel around.
I use clear bins with labels for seeds and small parts, so I can see what I've got without rummaging. For larger tools, a simple pegboard with hooks keeps everything visible and within reach.
By the end of the season, you'll save hours of frustration and extend the life of your supplies. No more rusted shears or sprouted seed packets—just a system that works year-round.
The best part? You'll actually enjoy spending time in your garden instead of fighting it. Let's get your supplies in order so you can focus on what matters: growing.
This approach works for small urban plots or sprawling backyard gardens. Whether you're working with a shed, garage, or even a corner of your patio, the principles stay the same. Ready to transform chaos into a functional space? Here's how to start.
📚 In This Guide
- What you need
- Instructions
- Tips and common mistakes
- Wrapping up and next steps
What you need
- ● Storage Containers: 1–2 plastic bins (18–24 gallons, stackable, with lids) for tools and small supplies
- ● 1–3 wooden crates or metal bins (for heavy items like pots or mulch)
- ● 1 pegboard (2’x3’ or larger) for hanging tools (screwdrivers, pruners, etc.)
- ● Organization Tools: 1 label maker or waterproof labels (for clear categorization)
- ● 1–2 clear shoeboxes or small drawers (for seeds, gloves, or tiny hardware)
- ● 1 hook strip or over-the-door organizer (for hoses, pruners, or extension cords)
- ● Safety & Maintenance: 1 tool sharpening kit (for pruners, shears, and trowels)
- ● 1 rust inhibitor spray (for metal tools)
- ● 1 damp cloth or silicone tool covers (to protect wooden handles)
- ● 1 garden-specific app (like Gardenate) to track tool locations and seasonal needs
- ● 1 portable caddy (wheeled or backpack-style) for mobile access to frequently used tools
- ● 1 humidity pack (for storing seeds in airtight containers)
- ● 1 LED strip lights (for illuminating shadowy storage areas)
- ● A designated storage space (shed, garage, or covered porch—dry and pest-proof!)
- ● Basic measuring tape and level (if mounting shelves or pegboards)
- ● 1–2 helping hands (because lifting heavy bins is easier with a buddy!)
Step-by-Step guide to organizing garden supplies by zone
Here's my foolproof system for keeping tools and materials accessible year-round without the clutter.
🪴 Step 1: Identify Your Garden Zones and Storage Needs
Start by dividing your garden into four key zones: tool storage, plant materials, seasonal gear, and workspace essentials. I like to use a simple color-coded approach—red bins for tools, green for plants, blue for seasonal items, and clear containers for workspace supplies. This visual system saves time when you're in a hurry to grab what you need.
Walk through your garden and note where you spend the most time. The tool zone should be closest to your main work area, while plant materials (like seeds, soil, and mulch) need shade protection. Seasonal gear (like frost cloths or snow shovels) can live in a less accessible spot since you won’t need it daily.
💧 Step 2: Sort and Categorize Supplies by Frequency of Use
Grab every garden supply you own and sort them into three piles: daily use, seasonal use, and storage-only. Daily items (like pruners, gloves, and watering cans) go in easily accessible bins near your workspace. Seasonal items (like trowels for spring planting or rakes for fall leaf cleanup) get labeled bins in a shed or garage.
I keep a small clear plastic bin for daily-use items I use most often—like my pruners, gloves, and a small hand trowel—so I can see everything at a glance. For seasonal supplies, I use stackable labeled bins with a simple checklist on the lid so I know exactly what’s inside without digging through everything.
✂️ Step 3: Assign Storage Locations Based on Zone Needs
Place tool storage in a covered, dry area like a shed or garage. I hang my pruners and shears from a pegboard to keep them organized and rust-free. For plant materials, use a shaded, elevated shelf to protect seeds and soil from moisture damage. Seasonal gear (like frost cloths or snow shovels) goes in a separate bin labeled clearly so you can find it quickly when needed.
Your workspace essentials (like a small watering can, hand pruners, and a notebook for planting logs) should live in a portable caddy you can wheel around the garden. This keeps everything within reach while you work, so you’re not constantly running back and forth.
🌿 Step 4: Label and Maintain Your System for Long-Term Success
Use waterproof labels on every bin and container so you can read them even in rainy conditions. I like to include a quick-reference guide on the back of each bin—like "Spring Planting" or "Fall Cleanup"—so I know exactly what’s inside without opening it. This saves time and keeps your system running smoothly.
Once a season, do a quick audit of your supplies. Toss anything damaged, expired, or no longer needed. I set a reminder on my phone for early spring and late fall to go through everything and make adjustments. This keeps your garden supplies organized and ready for whatever the next season brings.
⏰ Step 5: Keep It Simple and Adjust as Needed
Start with the basics and expand as you grow. If you find yourself struggling to keep up, simplify further—maybe just focus on tools and daily essentials first. Over time, you’ll figure out what works best for your garden and your workflow. The key is to make it work for you, not the other way around.
I know it can feel overwhelming at first, but once you get the system in place, you’ll wonder how you ever managed without it. A little organization now means less stress and more time enjoying your garden later.
Tips & tricks for perfect garden supply organization
A few simple strategies will help you create a system that lasts all season long.
Visual Cues Save Time: In Step 1, when you're assigning colors to zones, go beyond just red for tools and green for plants. Add symbols on your bins—like a tiny shovel icon for tools or a seedling for plant materials. These visual cues make identification instant, even when you're in a hurry or wearing gloves. I've found that symbols work better than words for gardeners who might be covered in dirt!
Pegboard Magic for Tools: For Step 3's tool storage, invest in a quality pegboard and organize tools by handle length. Long-handled tools like pruners go on the top, while shorter items like trowels hang below. This creates an instant visual inventory—you can tell at a glance if anything's missing. I also recommend adding hooks for hoses near the pegboard to keep them off the ground and prevent kinks.
Seasonal Rotation Strategy: When you're categorizing in Step 2, think about seasonal rotation for your bins. Use the same bins year-round but simply swap their contents. Label the bins with both seasons they're used for—like "Spring Planting/Fall Cleanup"—so you know exactly what goes where when the seasons change. This saves you from buying new bins and keeps your system consistent.
Workspace Caddy Upgrade: For the portable caddy in Step 3, add small pockets or compartments for your most frequently used items. I keep my gloves, small trowel, and planting log notebook in designated spots so I never have to dig through everything. You can also add a small tool roll for your hand pruners and shears to keep them organized while you work.
Pro Tips for Organize Garden Supplies
- A few simple strategies will help you create a system that lasts all season long.
- Visual Cues Save Time: In Step 1, when you're assigning colors to zones, go beyond just red for tools and green for plants.
- Pegboard Magic for Tools: For Step 3's tool storage, invest in a quality pegboard and organize tools by handle length.
Frequently asked questions
Got questions about keeping your garden supplies tidy and accessible? Here are some of the most common ones—and their solutions!
How do I decide which garden supplies to store together?
Group supplies by their function and seasonal use. For example, store pruners, shears, and gloves near your shrubs and roses. Keep fertilizers, mulch, and soil amendments in a separate area with easy access for planting seasons. Pro tip: Label bins or shelves with icons (like a for plants or for winter tools) for a visual cue!
When is the best time to organize my garden supplies?
The ideal time is late fall or early spring, when gardening season is winding down or just starting. This prevents clutter buildup and ensures everything is ready for the next phase. Bonus: Organize during a dry day to avoid muddy tools or damp storage spaces!
What if I don’t have a shed or garage for storage?
No problem! Use vertical space with wall-mounted racks, pegboards, or over-the-door organizers. For smaller tools, repurpose hanging baskets or under-bed storage. Keep frequently used items (like watering cans or trowels) in a covered porch or patio cabinet for easy access.
How can I keep rust from ruining metal tools?
Prevent rust by cleaning and drying tools after each use, then applying a light coat of mineral oil to blades and joints. Store them in a dry, well-ventilated area (like a ventilated bin or tool bag with silica gel packets). Pro tip: Hang tools with hooks and rubber sleeves to protect them from moisture!
Should I store garden supplies in plastic bins or open shelves?
It depends on the item! Use plastic bins with lids for small parts (like seeds, nails, or bulb starter kits) to protect them from pests and moisture. Open shelves work well for larger, low-maintenance items (like wheelbarrows or watering cans). Hybrid solution: Use clear bins on open shelving for visibility and protection!
Wrapping up and next steps
Organizing your garden supplies doesn’t have to be overwhelming—just a little planning and creativity can transform chaos into a functional, year-round system! By zoning your tools, labeling clearly, and maximizing vertical space, you’ll save time, protect your investments, and make gardening even more enjoyable. 🌱
Now that you’re ready to tackle the task, start small: pick one area (like your shed or garage) and apply these tips today. Before you know it, your garden supplies will be easy to find, ready to use, and lasting for seasons to come!