Tools
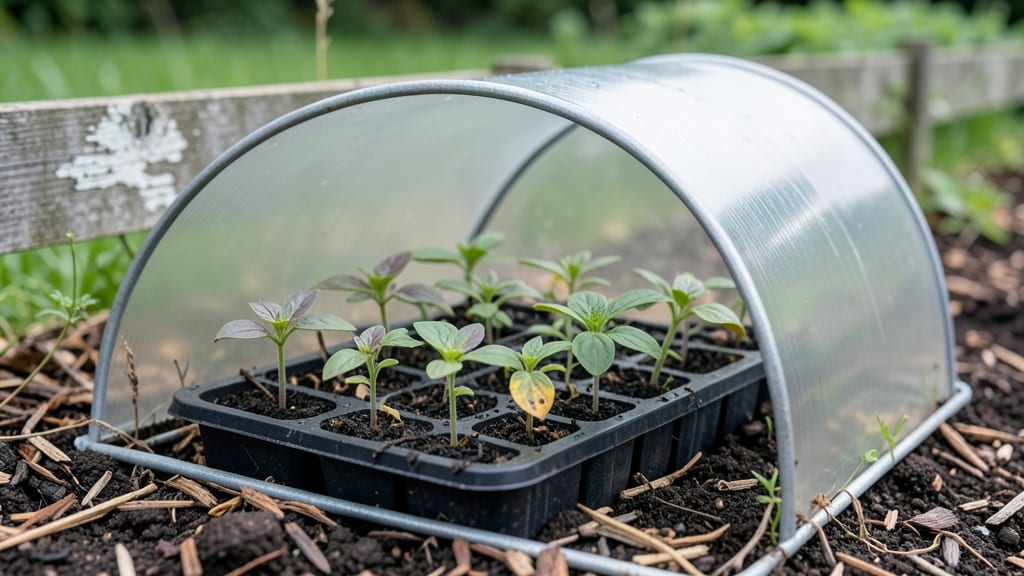
A mini garden greenhouse lets you grow tomatoes in winter and herbs year-round without taking over your backyard. 🌱 I kept killing seedlings until I realized the real problem wasn't my brown thumb—it was the drafty windowsill.
This compact glass box changed everything, giving me control over temperature and humidity in just 3 square feet.
You don't need a sprawling property to make it work—these greenhouses come in sizes from 1x2 feet up to 4x6 feet, perfect for patios, balconies, or even sunny kitchen counters.
The key is matching the size to what you grow: a 2x3-foot model handles salad greens and herbs beautifully, while a 4x4-foot version can support small tomato plants through early spring or late fall.
Imagine snipping fresh basil in December or harvesting cherry tomatoes in October, all while your neighbors are still buying wilting store-bought produce. The clear walls let sunlight flood in while trapping heat, and the ventilation flaps keep things from overheating on sunny days.
My winter spinach now thrives where it once bolted within weeks.
Whether you're working with a city balcony or a cramped suburban yard, these greenhouses turn dead space into a high-productivity growing zone. The best part?
You can move them to follow the sun or protect them from harsh winds. Let's get yours set up for a harvest that lasts all year.
📚 In This Guide
- What you need
- Instructions
- Tips and common mistakes
- Wrapping up and next steps
What you need
- ● Greenhouse Kit or Frame: 1x Mini greenhouse frame (12"–36" tall, 18"–30" wide, depending on your needs; polycarbonate or acrylic panels are ideal).
- ● OR DIY alternative: Wooden or PVC pipes (½"–1" diameter), screws, and clear plastic sheeting (6 mil thickness).
- ● Base: 1x Sturdy tray or container (12"–24" x 18"–36", with drainage holes if repurposing a pot).
- ○ Optional: Gravel or landscape fabric (for drainage and pest control).
- ● Ventilation: 1–2x Small vents or mesh screens (for airflow; 2"–4" diameter).
- ○ 1x Mini fan or solar-powered vent (optional but helpful for humidity control).
- ● Insulation & Climate Control: 1 roll Thermal bubble wrap or insulating foam (to line the interior for temperature regulation).
- ● 1x Digital thermometer/hygrometer (to monitor conditions).
- ● Soil & Planting Supplies: High-quality potting mix (2–5 lbs, depending on container size).
- ○ Slow-release fertilizer pellets (optional but recommended for long-term growth).
- ● LED grow lights (full-spectrum, 5W–10W, for low-light conditions).
- ● Self-watering wicking system (to reduce maintenance).
- ● Decorative pebbles or moss (for aesthetics and moisture retention).
- ● Portable heating mat (for cold climates, 3’x6’ size).
- ● Mini roller or casters (to make your greenhouse mobile).
Step-by-Step instructions for building a mini garden greenhouse
Here’s how to create a climate-controlled micro-environment that extends your growing season—no fancy tools required.
🪴 Step 1: Choose and Assemble the Greenhouse Structure
Select a 4-foot-tall greenhouse kit designed for small spaces—look for one with a clear polycarbonate roof (it diffuses light better than glass) and a ventilation system to prevent overheating. I like models with removable side panels for easy access and airflow control. Assemble the frame according to the manufacturer’s instructions, ensuring all joints are snug but not overly tight—you’ll want flexibility for seasonal adjustments.
Position the greenhouse on a level surface (uneven ground will cause stress on the structure). If your space has partial shade, orient the transparent panels to face south for maximum winter sunlight. Avoid placing it directly under trees or structures that could cast moving shadows—consistent light is key for even growth.
💧 Step 2: Prepare the Base and Add Insulation
Lay down 2 inches of gravel at the base to improve drainage and prevent soil erosion during watering. This also creates a thermal break between the greenhouse floor and the ground, helping maintain stable internal temperatures. If your greenhouse includes a removable floor tray, fill it with 1 inch of perlite before adding potting mix—this extra layer insulates roots from cold ground temperatures.
For extra warmth in Zone 5 or colder climates, add a heating mat (set to 65°F) underneath the tray. I’ve found that even a low-wattage mat (like a 10-watt LED strip) prevents root shock in early spring. Test the setup by running the mat for 24 hours before planting—this ensures it’s functioning properly and won’t overheat your plants.
☀️ Step 3: Set Up Climate Control Systems
Install a small fan (like a 4-inch clip-on oscillating fan) near the highest ventilation point to circulate air and prevent stagnation. Run it for 10 minutes every 2 hours during the day—this mimics natural breezes and strengthens plant stems. For humidity control, place a shallow water tray with pebbles (partially submerged) on the greenhouse floor. The evaporating water adds 5-10% humidity without creating soggy conditions.
Monitor internal temperatures with a digital thermometer/hygrometer (place it at plant height, not near the roof). Ideal daytime temps hover around 70-75°F, while nights should stay above 50°F. If temps climb above 85°F, crack the top vents and use a shade cloth (even a lightweight white sheet) to filter direct sunlight. I’ve seen seedlings bolt in 3 days when overheated—prevention is easier than recovery.
🌱 Step 4: Plant and Maintain Year-Round Crops
Start with cold-hardy greens like spinach or kale in early spring, then transition to warm-season crops (like basil or peppers) once internal temps stabilize above 60°F. Use 2-inch pots for seedlings to maximize space—you’ll fit 4 plants per square foot this way. Water deeply every 2-3 days, checking the top inch of soil for dryness. Overhead watering can create humidity spikes, so I use a drip irrigation line instead.
Rotate crops every 6-8 weeks to prevent soil depletion. For example, grow microgreens in winter, herbs in spring, and tomatoes in summer. Prune leggy growth immediately—this encourages bushier plants and better air circulation. If you notice condensation on the walls, increase ventilation; if soil feels damp but plants wilt, you’re overwatering. Both are quick fixes but can kill plants if ignored.
⏰ Step 5: Seasonal Adjustments for Long-Term Success
In winter, add a clear plastic sheet over the sides to trap heat (remove it during the day if temps rise above 60°F). For summer, switch to a reflective shade cloth (30% block) to prevent scorching. I’ve kept basil producing for 5 months straight in my greenhouse by adjusting shade and ventilation weekly. Every 3 months, sterilize the interior with a 1:10 bleach-water mix (rinse thoroughly) to prevent fungal buildup.
Finally, harvest strategically: Pick leaves or fruits in the morning when moisture levels are highest, and always use clean, sharp scissors to avoid damaging stems. You’ll see 30-50% more yield than open-air gardening—just by controlling the environment. The key is consistent monitoring, not perfection.
Tips & tricks for perfect mini garden greenhouse setup
A few key strategies will help you maximize your greenhouse's potential and avoid common pitfalls that can stifle plant growth.
Location and Orientation: In Step 1, when positioning your greenhouse, pay special attention to morning sunlight patterns. The south-facing orientation mentioned is ideal, but if you're in the northern hemisphere, ensure the transparent panels receive at least 6 hours of direct sunlight daily. I've found that placing the greenhouse near a south-facing wall can provide additional winter warmth while still allowing sunlight penetration. For urban gardeners with limited space, consider using a small greenhouse on a balcony with adjustable legs to optimize sunlight exposure throughout the day.
Thermal Management: The 24-hour test run for your heating mat in Step 2 is crucial, especially in colder climates. I recommend using a thermostat-controlled mat set to 65°F during the day and allowing it to drop to 50°F at night to prevent root stress. For extra insulation, add a clear plastic bubble wrap layer on the interior walls during winter—this adds an R-value of about 1.5 without blocking light. Just remember to remove it in warmer months to prevent overheating.
Ventilation Strategy: In Step 3, the 10-minute ventilation cycle every 2 hours is perfect for maintaining airflow, but you can optimize this further. Install a small solar-powered vent opener that automatically adjusts based on internal temperature. This ensures consistent ventilation even when you're not monitoring the greenhouse. I've also found that placing the 4-inch fan at a slight angle creates better air circulation patterns throughout the space.
Crop Rotation Insight: The 6-8 week rotation in Step 4 works wonders for soil health, but you can take it a step further by implementing a three-tier system: heavy feeders (like tomatoes) in the first cycle, medium feeders (like peppers) in the second, and light feeders (like lettuce) in the third. This prevents nutrient depletion more effectively than random rotation. For even better results, add a compost tea drench every 4 weeks to boost microbial activity in the soil.
Pro Tips for Mini Garden Greenhouse
- A few key strategies will help you maximize your greenhouse's potential and avoid common pitfalls that can stifle plant growth.
- Location and Orientation: In Step 1, when positioning your greenhouse, pay special attention to morning sunlight patterns.
- Thermal Management: The 24-hour test run for your heating mat in Step 2 is crucial, especially in colder climates.
Frequently asked questions
Got questions about your mini garden greenhouse?
You’re not alone! Here are answers to the most common concerns to help you grow with confidence.
What’s the best time of year to set up a mini greenhouse?
A mini greenhouse works year-round, but the best time to set it up is early spring (March–April) or late summer (August–September). This gives plants a head start before extreme heat or cold hits. For winter use, position it in a sheltered spot and add insulation if needed. Pro tip: Start with cold-hardy crops like kale or spinach in cooler months!
How often should I water plants in a mini greenhouse?
Watering depends on humidity and temperature, but check soil moisture daily. Mini greenhouses trap moisture, so overwatering is a risk—aim for 1–2 times per week unless it’s scorching hot. Use a moisture meter or stick your finger 1 inch deep; if dry, water thoroughly. Ventilation is key! Crack the door or use a small fan to prevent mold. Warning: Avoid wetting leaves to reduce fungal growth.
Can I use a mini greenhouse in winter? Yes—but how do I protect it from frost?
For winter use, insulate your greenhouse with bubble wrap, a thermal blanket, or even a thick tarp. Place it near a sunny wall or use a small heat mat (like those for seedlings) to keep roots warm. Hardy plants like herbs, lettuce, and broccoli thrive in 40–50°F temps. Pro tip: Add a thermometer to monitor conditions—aim for 50–75°F for optimal growth.
What’s a good budget-friendly alternative if I don’t want to buy a full greenhouse?
No problem! Try these DIY or low-cost options:
- Plastic cloche or tunnel: Use clear plastic domes or low tunnels (even repurposed PVC pipes) over plants for $10–$30.
- Upcycled containers: Turn a large plastic tote or glass jar into a mini greenhouse with a lid.
- Row covers: Lightweight fabric (like frost cloth) extends the season for $15–$25.
For year-round use, a window box greenhouse (attached to a sunny window) is another clever hack!
Why are my plants wilting or turning yellow inside the greenhouse?
Wilting or yellowing usually signals overheating, poor airflow, or overwatering. Start by ventilating daily—crack the door or add a small fan. Check for pests (like spider mites) on the undersides of leaves. If soil is soggy, reduce watering and ensure the container has drainage holes. Too much sun? Move it to partial shade or add shade cloth. Pro tip: Rotate plants weekly for even light exposure!
Wrapping up and next steps
Creating your own mini garden greenhouse is a rewarding project that opens the door to year-round gardening—no matter your climate! 🌱 With the right materials and a little creativity, you can extend your growing season, protect delicate plants, and even experiment with microgreens or herbs indoors.
Whether you're a seasoned gardener or just starting out, this climate-controlled haven is your ticket to fresh, homegrown goodness anytime.
Ready to get started? Sketch your design, gather supplies, and watch your green thumb thrive! 💡 Need inspiration? Browse DIY plans, join gardening forums, or visit local nurseries for expert tips. Your perfect mini greenhouse is just a few steps away!