
Container Gardens
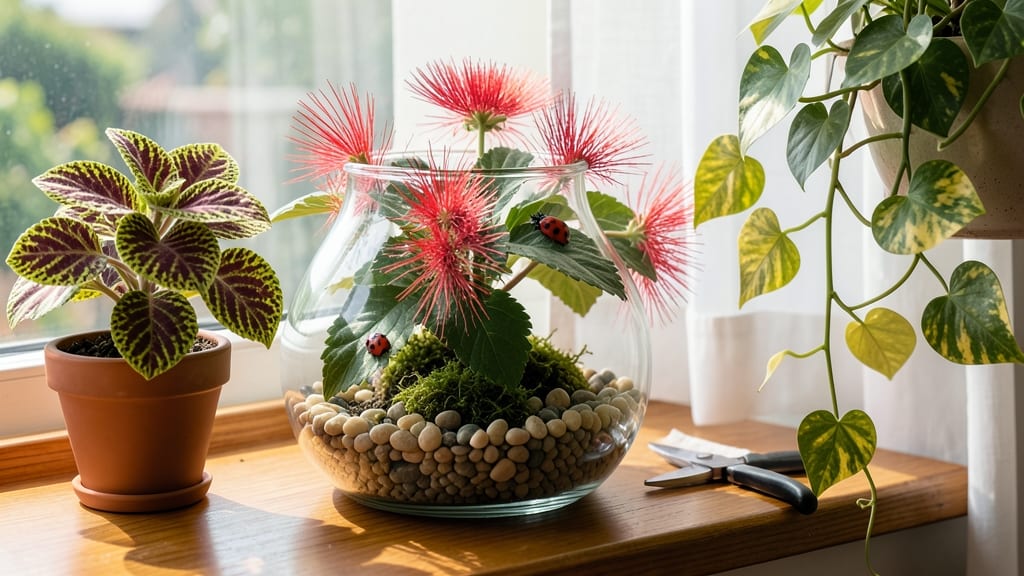
Creating ladybug indoor gardens turns your home into a whimsical pollinator paradise. ✨ I stumbled onto this idea after watching my kids giggle at tiny ladybug sculptures in a nursery display—suddenly, I realized how much fun these little red dots could bring to indoor plants.
The best part? They’re not just cute; they’re functional too, attracting real ladybugs if you set up a habitat.
You’ll need just a few things: small containers (think teacups or shallow bowls), ladybug-themed decor like painted rocks or ceramic bugs, and ladybug-friendly plants like marigolds or dill.
The setup takes less than an hour, and the results are instantly charming—whether you’re styling a child’s room or adding a playful touch to your herb garden. Real ladybugs might even visit if you include a water source like a tiny dish of damp moss.
Imagine tiny red spots dotting your windowsill greenery, or a mini terrarium where ladybugs seem to scurry across mossy paths. The aesthetic is cheerful and nostalgic, while the ecological twist makes it feel meaningful.
Plus, it’s a great way to teach kids about pollinators without leaving your living room. Ready to bring this vibrant idea to life?
Works for any space—balconies, shelves, or even a sunny windowsill. The key is keeping it simple: let the ladybug theme inspire you, not complicate it. Here’s how to start with what you already have at home.
📚 In This Guide
- What you need
- Instructions
- Tips and common mistakes
- Wrapping up and next steps
What you need
- ● Container: A shallow, well-draining pot (6–12 inches wide) with drainage holes. Options: Terracotta, ceramic, or plastic (avoid metal).
- ● Potting Soil: 2–3 gallons of lightweight, organic potting mix (avoid garden soil—it compacts). Pro tip: Mix in 10–20% perlite or vermiculite for aeration! 💡
- ● Ladybugs: 10–20 live ladybugs (adults or larvae). Where to buy: Local nurseries, online suppliers, or DIY releases (see tips below).
- ● Food Source: Fresh aphids: Grow aphid-friendly plants (e.g., dandelions, nasturtiums) or purchase aphid cultures.
- ● Alternative: Aphid-infested leaves or a commercial ladybug food (like Biobest or Growers Supply products).
- ● Misting Bottle: For keeping the soil lightly moist (not soggy!).
- ○ Fine Mesh: A small piece of window screen or breathable fabric to cover the pot (optional but helps retain ladybugs).
- ● Companion Plants: Tiny, ladybug-friendly herbs like basil, thyme, or marigolds (adds beauty + food!).
- ● Humidity Tray: A pebble tray with water to increase moisture (great for dry climates).
- ● LED Grow Light: A low-wattage (5–10W) full-spectrum bulb for 6–8 hours/day if natural light is limited.
- ● Predator Deterrents: A few citrus peels or neem oil spray (sparingly!) to keep ants and spiders away.
- ● Journal: A notebook to track ladybug activity, egg-laying, and plant growth! 📝
- ● A sunny windowsill or grow light setup (4–6 hours of indirect light daily).
- ● Space for the container (6+ inches of clearance for ladybugs to fly).
- ● Patience! Ladybugs multiply slowly—give them 2–4 weeks to establish.
Step-by-step instructions for creating ladybug indoor gardens
Here's how to set up thriving ladybug habitats that bring pollinators indoors and keep pests at bay.
🪴 Step 1: Choose and Prepare Containers
Select 4 shallow containers (like terracotta pots or repurposed food containers) with drainage holes. Ladybugs need room to fly and explore, so aim for at least 6 inches in diameter—smaller than you might think. I like to use 4 containers total: two for ladybugs, one for nectar plants, and one for shelter.
Rinse containers thoroughly with soapy water to remove any pesticide residue, then dry completely. Place a 2-inch layer of potting mix in the bottom of each container. This provides stability and mimics natural soil conditions. Avoid garden soil—it can contain harmful chemicals that harm ladybugs.
🌱 Step 2: Add Ladybug-Friendly Plants
Plant fast-growing nectar-rich herbs like dwarf basil or thyme in one container. These provide food for adult ladybugs. Use the remaining potting mix to fill the containers to 1 inch below the rim, leaving space for watering. Gently press the soil around the plants to secure them without compacting.
For shelter, add small pebbles or bark chips to another container. Ladybugs hide in these during the day and need shady spots to rest. Place a third container with moistened sphagnum moss—this mimics their natural habitat and helps maintain humidity. The fourth container can hold a small water dish with pebbles (to prevent drowning).
💧 Step 3: Introduce Ladybugs and Maintain Conditions
Purchase live ladybugs from a reputable supplier and release them into the containers. Do this in the early morning when they’re most active. Start with 5-10 ladybugs per container—they multiply quickly! Keep the setup in a sunny spot (but not direct afternoon sun) with temperatures between 65-75°F.
Mist the plants lightly every 2-3 days to keep the environment humid. Avoid overwatering—the soil should stay moist but not soggy. You’ll know it’s right when water drips through the drainage holes but doesn’t pool. Watch for new eggs (tiny yellow dots) on leaves—these hatch in 5-7 days into larvae, which love aphids.
☀️ Step 4: Monitor and Expand the Habitat
Check the containers weekly for signs of activity. Ladybugs thrive when they have both food and shelter. If you notice fewer ladybugs, introduce a few more—they’re natural pest controllers and won’t overpopulate. Over time, you’ll see more larvae and pupae, which means your garden is working!
To expand, add more nectar plants or tiny aphid-infested leaves (from outdoor plants) for the larvae to feed on. Avoid pesticides—even residual ones can kill ladybugs. With care, your indoor ladybug garden will become a self-sustaining ecosystem that keeps pests away naturally.
Tips & tricks for perfect ladybug indoor gardens
Creating a thriving ladybug habitat indoors is easier than you think—these simple tricks will help you avoid common pitfalls and set up a successful ecosystem.
The Container Setup: Don't underestimate the importance of drainage! While the instructions call for containers with drainage holes, I recommend adding a small layer of pebbles or broken terracotta pieces at the bottom of each container before adding the 2-inch layer of potting mix. This extra step prevents clogging and ensures water flows freely, which is crucial for ladybug health.
Plant Selection: When choosing your fast-growing nectar-rich herbs like dwarf basil or thyme, pick plants that are already established rather than seedlings. Mature plants provide immediate food sources for your ladybugs, giving them a head start. If you can't find these, try other aphid-resistant herbs like parsley or cilantro—they work just as well!
Temperature Matters: The instructions mention keeping your setup between 65-75°F, but here's what nobody tells you—consistency is key. Avoid placing your ladybug garden near drafty windows or heating vents, as sudden temperature swings can stress the ladybugs. If your home tends to get too warm, move the containers to a slightly cooler spot during afternoon heat. A small fan on low setting can help maintain airflow without disturbing the ladybugs.
Monitoring Made Easy: In Step 4, you'll want to check weekly for activity, but here's how to make it even simpler: Place a small piece of white paper under each container. Ladybugs leave tiny black droppings (called frass) that show up clearly on light backgrounds. This visual cue helps you track their activity without disturbing them. You'll notice more activity after the 5-7 day egg hatching period!
Pro Tips for Ladybug Indoor Gardens
- Creating a thriving ladybug habitat indoors is easier than you think—these simple tricks will help you avoid common pitfalls and set up a successful ecosystem.
- The Container Setup: Don't underestimate the importance of drainage!
- Plant Selection: When choosing your fast-growing nectar-rich herbs like dwarf basil or thyme, pick plants that are already established rather than seedlings.
Frequently asked questions
Got questions about creating your own ladybug indoor garden?
You’re not alone! Here are some of the most common queries—and their answers—to help you get started with confidence.
Can I keep ladybugs indoors year-round?
Yes, but with care! Ladybugs thrive in temperatures between 50–85°F and need humidity (like a terrarium or mesh cage). Avoid extreme cold or heat, and provide aphids or pollen as food. Release them outdoors in spring if you want them to establish wild populations.
How long do ladybugs live in an indoor setup?
Adult ladybugs typically live 4–6 weeks, while larvae may survive 2–3 weeks. Indoor conditions (food, shelter, and temperature) can extend their lifespan slightly. If they’re sluggish or not feeding, check for low humidity or pesticide residue.
What plants attract ladybugs indoors?
Ladybugs love aphid-rich plants like marigolds, dill, basil, or nasturtiums. For a low-maintenance setup, grow aphids on milkweed or use commercial aphid colonies (available online). Avoid pesticides—they’ll repel your tiny helpers!
What should I do if my ladybugs disappear?
Don’t panic! They may have escaped (check windows and doors), pupped (a dormant state), or died naturally. To prevent escapes, use a fine mesh cage or vented lid. If they’re gone, order more—many online suppliers sell live ladybugs by mail!
Are there alternatives to live ladybugs for indoor gardens?
Yes! Try ladybug eggs (easier to control) or beneficial nematodes for soil-dwelling pests. For a hands-off approach, neem oil or insecticidal soap can deter pests without harming plants (just avoid direct contact with ladybugs).
Still curious? Drop your questions in the comments—we’re happy to help your tiny garden thrive!
Wrapping up and next steps
Bringing a ladybug indoor garden into your home isn’t just about aesthetics—it’s a delightful way to support pollinators and add life to small spaces! 🌿 With the right setup, you can create a thriving ecosystem that’s both functional and charming.
Whether you’re a seasoned gardener or a beginner, these tiny havens prove that big impact comes in small packages.
Ready to take the next step? Start by gathering your materials, then plant, observe, and enjoy the buzz of your new ladybug garden. Share your progress with fellow plant lovers—your green thumb might inspire someone else to grow their own tiny paradise! 🌟