
Tools
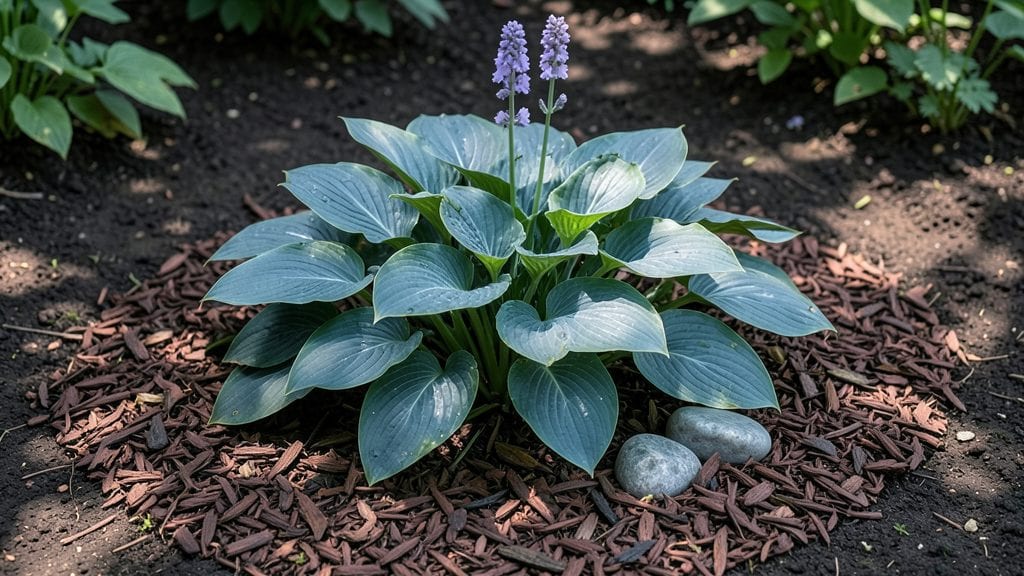
A hosta garden plan starts with a vision of lush, layered shade that thrives when you group plants by size and color—like a living tapestry that changes with the seasons.
I designed my first hosta garden after struggling with bare spots under my maple trees, and now it’s the most vibrant corner of my yard, even in winter when other plants fade.
The key is treating hostas like a painter’s palette: dark blues next to chartreuse create drama, while silvery centers add subtle texture that catches the light.
You’ll need about 15-20 plants to create a cohesive look, mixing small varieties like ‘Blue Angel’ (12 inches) with mid-sized ‘Halcyon’ (24 inches) and statement-makers like ‘Guacamole’ (36 inches) for height.
Pair them with ferns, astilbes, and hellebores for year-round interest—hostas stay evergreen, but their neighbors provide winter structure and spring blooms. The layout should follow a simple rule: taller hostas at the back, medium in the middle, and low-growing types spilling over edges like ‘Patriot’ or ‘Francee.’
By summer, you’ll have a garden that feels like a secret retreat—cool underfoot, fragrant with crushed leaves, and alive with texture even when nothing else blooms. The mature foliage blocks weeds naturally, and deer usually leave them alone (a rare win).
Start with just a few varieties to test what thrives in your shade, then expand as you fall in love with the combinations. The best part? This garden does most of the work for you.
Works in partial shade to full shade, from woodland edges to city courtyards. Once established, hostas need almost no care—just consistent moisture and an occasional trim to keep them tidy. Let’s make your shady spots the envy of the neighborhood.
📚 In This Guide
- What you need
- Instructions
- Tips and common mistakes
- Wrapping up and next steps
What you need
- ● Hosta plants: Choose 10–15 varieties (e.g., Hosta 'Blue Angel', Hosta 'Francee', Hosta 'Guacamole') based on size, color, and texture preferences. Plan for 3–5 plants per square foot for dense coverage.
- ● High-quality garden soil: 2–3 cubic yards (or amend existing soil with 2–3 inches of compost). Hostas love rich, well-draining soil with a pH of 6.5–7.5.
- ● Mulch: 2–3 bags of organic mulch (e.g., shredded bark or pine needles) to retain moisture and suppress weeds.
- ● Garden gloves: A pair of durable, breathable gloves to protect your hands.
- ● Hand trowel or transplant spade: For digging holes (6-inch diameter, 12-inch depth for most hostas).
- ● Watering can or hose with a gentle spray nozzle: Hostas need consistent moisture, especially during establishment.
- ● Measuring tape or ruler: To space plants correctly (typically 12–36 inches apart, depending on mature size).
- ● Slow-release fertilizer: A balanced 10-10-10 or organic option (e.g., fish emulsion) to boost growth.
- ● Edging tools: For clean borders if defining your hosta garden’s shape.
- ● Garden stakes or labels: To track varieties and support taller hostas.
- ● Drip irrigation system: For automated watering (ideal for large gardens).
- ● Fungicide (e.g., copper-based): Proactive measure against slugs and fungal diseases.
Step-by-Step instructions for designing a layered hosta garden
Here's how to create a lush, low-maintenance shade garden that thrives year-round.
Choose and Prepare Your Planting Site
Hostas thrive in partial to full shade, but the key is consistent moisture and well-draining soil. Scout your garden for areas with 4-6 hours of dappled sunlight—this is ideal for most varieties. Avoid spots where water pools after rain, as soggy roots invite rot. If your soil is heavy clay, amend it with 2-3 inches of compost mixed into the top 12 inches of soil to improve drainage.
I always test soil moisture by digging a 6-inch hole and filling it with water. If it drains within 30 minutes, your soil is ready. If not, add more organic matter. Mark your planting area with stakes to visualize the layout before digging.
Select Hostas for Height and Foliage Variety
For a layered look, group hostas by height and leaf texture. Start with tall varieties (24-36 inches) like 'Blue Angel' or 'Halcyon' at the back. Add medium-height (12-24 inches) like 'Francee' or 'Guacamole' in the middle layer, and low-growing (6-12 inches) like 'Pandora' or 'Patriot' in the front. Space plants 18-24 inches apart to allow foliage to fill in over time.
I like to mix blue-green, gold, and variegated hostas for contrast. Place darker varieties near the edges to create depth, while lighter ones draw the eye toward the center. Sketch a rough map to visualize how colors will blend in different light conditions.
Dig and Plant for Long-Term Stability
Dig holes twice as wide as the root ball but no deeper—hostas hate being buried too deeply, which can cause rot. Gently loosen the roots if they’re circling in the container, then place the plant in the hole so the crown sits just below soil level. Fill the hole with a mix of native soil and compost, tamping lightly to remove air pockets.
Water deeply after planting to settle the soil and encourage root spread. I mulch with 2-3 inches of shredded bark to retain moisture and suppress weeds. Avoid piling mulch against stems—keep it 2 inches away to prevent rot. Plant in early spring or fall when temperatures are mild.
Maintain for Year-Round Interest
Hostas need consistent moisture but hate soggy feet. Water 1-2 times per week in dry spells, aiming for 1 inch of water per week. You’ll know they’re thirsty when the leaf edges crisp slightly. Fertilize in early spring with a balanced, slow-release fertilizer (10-10-10) to encourage lush growth.
Deadhead spent flower stalks in late summer to redirect energy into foliage. In fall, cut back yellowed leaves but leave old foliage over winter—it protects crowns from freezing and adds texture. Divide clumps every 3-5 years in early spring by digging up the plant and separating the roots with a sharp knife.
Add Companion Plants for Texture and Pollinators
Pair hostas with ferns, astilbes, or heucheras for layered shade. I plant Japanese forest grass at the edges for movement, while bleeding hearts add spring blooms. Avoid competitive plants like rhododendrons—hostas need space to thrive. Add a small water feature nearby if possible; the sound of running water enhances the tranquil vibe of a hosta garden.
Watch for slugs in humid climates—handpick them at dawn when they’re most active. A diatomaceous earth barrier around plants deters pests without chemicals. With the right layers, your hosta garden will stay vibrant from spring’s new growth to fall’s golden hues.
Tips & tricks for perfect shade garden design
A few simple tricks can transform your hosta garden from ordinary to extraordinary—here's what I've learned after years of trial and error.
Layering Secret: In Step 2, when arranging your hostas by height, consider the mature size of each variety—not just their current height. A 12-inch hosta can easily reach 24 inches with proper care, so leave extra space between plants. I always sketch a rough layout on graph paper first, using different colored pencils to represent each height range. This visual guide helps prevent overcrowding as the plants grow.
Soil Test Hack: The 30-minute soil drainage test in Step 1 is crucial, but here's a pro tip: if your soil drains too quickly (water disappears in under 10 minutes), mix in some peat moss along with the compost. This helps retain moisture while still allowing proper drainage. For clay-heavy soil that drains too slowly, add perlite or coarse sand to improve aeration without compromising moisture retention.
Planting Depth Caution: When planting in Step 3, pay special attention to the crown position—it should sit just below soil level, not buried. I've seen many gardeners accidentally plant too deeply, which can cause crown rot. If you're unsure, use a small stick to mark the original soil level on the root ball before planting. This visual reference makes it easy to position correctly every time.
Mulching Strategy: The 2-3 inches of mulch in Step 3 is perfect for moisture retention, but here's what nobody tells you: refresh your mulch every spring by spreading a new 1-inch layer over the existing mulch. This prevents compaction and keeps weeds at bay without smothering your hostas. Just remember to keep it 2 inches away from stems to prevent rot.
Pro Tips for Hosta Garden Plan
- A few simple tricks can transform your hosta garden from ordinary to extraordinary—here's what I've learned after years of trial and error.
- Layering Secret: In Step 2, when arranging your hostas by height, consider the mature size of each variety—not just their current height.
- Soil Test Hack: The 30-minute soil drainage test in Step 1 is crucial, but here's a pro tip: if your soil drains too quickly (water disappears in under 10 minutes), mix in some peat moss along with the compost.
Frequently asked questions
Got questions about creating a stunning hosta garden plan? You’re not alone!
Here are answers to the most common queries—from timing to troubleshooting—to help you design a thriving, low-maintenance shade garden with confidence.
When is the best time to plant hostas for a full, lush look?
Plant hostas in early spring or early fall when soil is workable but not freezing. This gives roots time to establish before extreme heat or cold. Avoid planting in mid-summer—the stress can stunt growth. For container hostas, you can plant anytime the ground isn’t frozen!
Are hostas deer-proof? What’s the best way to protect them?
Hostas are deer magnets—they’ll munch them like salad! To deter deer:
- Apply deer repellent sprays (like Liquid Fence) every 4-6 weeks.
- Surround plants with physical barriers (chicken wire or fencing).
- Plant deer-resistant companions nearby, like ferns, astilbes, or hellebores.
- Try homemade remedies like garlic or hot pepper spray (reapply after rain).
How often should I water hostas, especially in hot summers?
Hostas thrive on consistent moisture—water 1-2 inches per week, more in extreme heat or sandy soil. Mulch heavily (3-4 inches of shredded bark or leaves) to retain moisture and protect roots. Signs of underwatering? Crispy edges on leaves or wilting foliage. Overwatering? Yellowing leaves or mushy stems.
Can I mix hostas with other shade plants? What are the best companions?
Hostas pair beautifully with:
- Ferns (e.g., Japanese painted fern, maidenhair fern)
- Hellebores (Lenten roses) for early spring blooms
- Astilbes for feathery plumes and texture
- Carex grasses for movement and contrast
- Bleeding heart (Dicentra) for delicate foliage
Why are my hosta leaves turning yellow or brown? How do I fix it?
Yellow/brown leaves usually signal one of these issues:
Problem
Solution
Overwatering or poor drainage
Check soil moisture; amend with compost or perlite. Ensure pots have drainage holes.
Underwatering or drought stress
Water deeply 1-2x/week and mulch heavily. Group hostas together to retain humidity.
Fungal diseases (e.g., leaf spot)
Remove affected leaves; space plants for airflow. Apply copper fungicide if severe.
Slug/snail damage
Set out beer traps or use iron phosphate bait (pet-safe!).
Pro tip: If leaves yellow in spring, it might be normal as new growth emerges—just trim the old ones!
Wrapping up and next steps
Creating a stunning hosta garden plan is all about embracing shade with confidence and creativity! 🌿 By layering textures, colors, and heights—plus adding complementary plants—you’ll craft a lush, low-maintenance retreat that thrives year-round. Whether you’re a beginner or a seasoned gardener, the key is patience and experimentation.
Ready to dive in? Start small—pick one section of your garden to transform, gather your supplies, and let your hosta collection grow over time. Happy planting! 🌱