
Tools
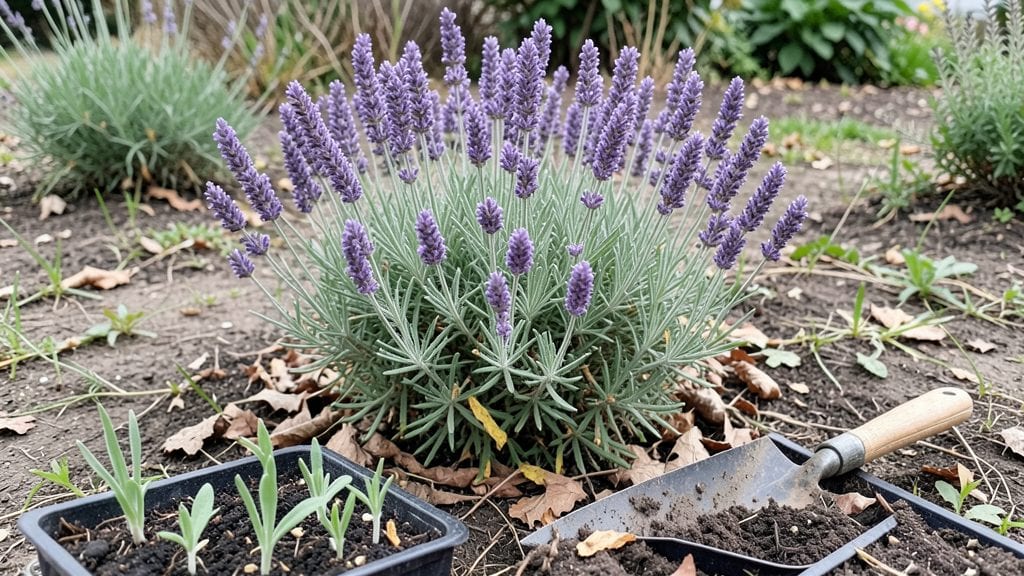
This guide to gardening for beginners starts with the right foundation—because lush harvests don't happen by accident. 🌱 I remember my first attempt with store-bought soil and a single tomato plant that lasted three days.
Now, I know the simple steps that turn first-time gardeners into confident growers, whether you're working with a windowsill or a backyard plot.
The secret isn't complicated: good soil, proper spacing, and consistent watering—no fancy tools required. You'll start with basic tools like gloves, a trowel, and a watering can, then move to soil prep, planting, and a watering schedule that keeps roots happy without drowning them.
Even small mistakes become easy to spot once you understand what plants actually need.
By the end, you'll be harvesting crisp lettuce, sweet radishes, and plump tomatoes that put store-bought produce to shame. The key is starting small—maybe just three plants—and building confidence with each season. You'll learn when to plant, how to troubleshoot wilting leaves, and which plants grow best together.
This works for indoor herbs, container veggies, or a full garden bed—adjust the space, not the principles. Let's get those seeds in the ground the right way from day one.
📚 In This Guide
- What you need
- Instructions
- Tips and common mistakes
- Wrapping up and next steps
What you need
- ● Garden Soil: 1–2 bags (or 5–10 cubic feet) of high-quality potting mix or compost-enriched soil. Look for labels like "organic" or "all-purpose."
- ● Seeds or Seedlings: Choose 3–5 easy-to-grow plants (e.g., lettuce, tomatoes, or marigolds). Start with 1–2 packets of seeds or 3–6 young plants.
- ● Containers or Garden Bed: Option 1: 3–5 pots (5–10 inches deep) with drainage holes.
- ● Option 2: A raised bed (at least 4’ x 8’) or a small in-ground plot (2’ x 2’).
- ● Watering Can or Hose: A 1–2 gallon can or a lightweight hose with a gentle spray nozzle.
- ● Gloves: 1 pair of durable gardening gloves to protect your hands.
- ● Sunlight: A spot that gets 6+ hours of sunlight daily (check your plants’ specific needs!).
- ● Hand Trowel: 1 small trowel (6–8 inches) for planting and weeding.
- ● Pruners: 1 pair of bypass pruners for trimming plants.
- ● Rake or Hoe: 1 small rake (for soil prep) or a hoe (for weed control).
- ● Spray Bottle: 1 for misting seedlings or applying diluted fertilizer.
- ● Fertilizer: Organic options like compost tea or slow-release granules (follow package instructions).
- ● Mulch: Straw or shredded leaves to retain moisture and suppress weeds.
- ● Plant Labels: Small stakes or tags to track what you’ve planted.
- ● Knee Pads: For comfort during long gardening sessions.
- ● Lunar Calendar (App or Printed): For planting based on moon phases (fun for beginners!).
Instructions: cultivate a thriving garden from scratch
Let’s break this down into simple, actionable steps that build confidence and skill.
🌱 Step 1: Plan Your Garden Layout and Select Plant Locations
Start by sketching a rough layout of your garden space, noting sun exposure patterns throughout the day. Most vegetables and herbs need 6+ hours of direct sunlight, while leafy greens tolerate partial shade. I divide my garden into sun-loving, partial-shade, and shade-tolerant zones—this prevents overcrowding and ensures each plant thrives where it’s happiest.
Consider companion planting early. For example, basil near tomatoes repels pests, while marigolds deter nematodes. Draw your zones on paper first—this saves time and prevents costly mistakes later. If you’re working with containers, group plants with similar water needs together to simplify maintenance.
💧 Step 2: Prepare the Soil for Optimal Growth
Loosen the top 6-8 inches of soil with a garden fork or tiller to improve drainage and root penetration. Break up any compacted areas—roots need room to spread. I mix in 2-3 inches of compost (homemade or store-bought) to enrich the soil naturally, boosting microbial activity that helps plants absorb nutrients.
Test your soil’s pH if possible—most vegetables prefer a neutral 6.0-7.0 range. You’ll see this in how easily water drains (too sandy) or pools (too clay-heavy). Amend with sand for clay soil or peat moss for sandy soil to balance texture. Avoid tilling when soil is wet—it creates clumps that hinder root growth.
☀️ Step 3: Choose and Plant Your Starter Plants or Seeds
For beginners, I recommend starting with transplants rather than seeds—this skips the germination waiting game and gives you a head start. When planting, dig holes twice as wide as the root ball but no deeper. Gently tease apart roots if they’re circling tightly, then place the plant in and backfill with soil, pressing lightly to eliminate air pockets.
If sowing seeds, follow packet instructions for depth—most need ¼ to ½ inch of coverage. Water gently after planting to settle soil around seeds without displacing them. Keep the soil consistently moist (not soggy) until seedlings emerge. You’ll notice true leaves (the second set after cotyledons) in 1-3 weeks, signaling it’s time to thin or transplant.
✂️ Step 4: Implement a Watering and Maintenance Routine
Water deeply 1-2 times per week, aiming for 1 inch of water per week (more in extreme heat). I water in the early morning to reduce evaporation and fungal risks. Use a soaker hose or drip irrigation to deliver water at the soil level—this prevents foliar diseases that spread through overhead watering.
Mulch with 2-3 inches of organic mulch (like straw or shredded leaves) to retain moisture, suppress weeds, and regulate soil temperature. Check soil moisture by sticking your finger 1-2 inches deep—if it feels dry, it’s time to water. Avoid wetting leaves when possible, especially in humid climates where fungal spores thrive.
🌿 Step 5: Monitor Growth and Address Issues Early
Inspect plants weekly for pests, diseases, or nutrient deficiencies. Yellowing leaves often signal overwatering or nitrogen deficiency, while brown edges point to underwatering or salt buildup. I keep a small notebook to track plant progress—note when flowers appear, fruits set, or leaves yellow. This helps identify patterns and adjust care as needed.
Prune regularly to encourage bushier growth and better air circulation. Pinch back leggy stems on herbs like basil to promote branching. Harvest frequently—this stimulates more production. If you spot aphids or powdery mildew early, treat with neem oil or insecticidal soap before the problem spreads. Prevention is easier than cure in gardening.
Tips & tricks for cultivating a thriving garden
Here's what I've learned from years of gardening mistakes—and how to avoid them.
Sun Exposure Strategy: In Step 1, when sketching your garden layout, mark sun exposure with a pencil at different times of day. Use a whiteboard or even a chalkboard on your fence to track sunlight patterns for at least 24 hours before planting. This helps you visualize how shadows shift throughout the day, ensuring your sun-loving plants get their required 6+ hours of direct light. I've seen beginners place tomatoes in shady spots because they assumed morning sun was enough—it's not.
Soil Preparation Secret: When preparing your soil in Step 2, don't just loosen the top 6-8 inches—also break up any hardpan layers you might find deeper. I use a digging bar for this, and it makes all the difference for root growth. For clay soil, mix in 1 part sand to 3 parts soil—this improves drainage without overwhelming the soil's natural structure. The key is to create a crumbly texture that holds moisture but doesn't become waterlogged.
Planting Technique Upgrade: In Step 3, when planting transplants, make a small mound of soil in the planting hole instead of filling it completely. This creates space for roots to settle naturally as you backfill. For seeds, consider using a seed starter mix in your containers—it's lighter and drains better than regular garden soil. I've found that seedlings in starter mix emerge 2-3 days faster than those in regular soil, giving you that crucial head start.
Watering Wisdom: The 1 inch per week guideline in Step 4 is perfect, but here's the trick: water deeply but less frequently. Instead of daily shallow watering, give your plants a thorough soaking 1-2 times per week that penetrates 6 inches deep. This encourages roots to grow deeper, creating more resilient plants. I use a rain gauge to measure exactly 1 inch of water—it's amazing how much difference precise measurement makes in plant health.
Pro Tips for Guide To Gardening
- Here's what I've learned from years of gardening mistakes—and how to avoid them.
- Sun Exposure Strategy: In Step 1, when sketching your garden layout, mark sun exposure with a pencil at different times of day.
- Soil Preparation Secret: When preparing your soil in Step 2, don't just loosen the top 6-8 inches—also break up any hardpan layers you might find deeper.
Frequently asked questions
Got questions? You’re not alone—gardening can feel overwhelming at first! Here are answers to some of the most common queries to help you grow with confidence.
What’s the best time to start a garden?
For most plants, spring (after the last frost) is ideal, but timing depends on your climate and crops. Cool-season veggies (like lettuce or peas) can go in early spring or fall, while warm-season plants (tomatoes, peppers) thrive in late spring/summer. Check your local frost dates for a head start!
How often should I water my plants?
Watering depends on your plants and weather—1–1.5 inches per week is a general rule, but young seedlings need daily moisture. Morning watering is best to reduce evaporation and fungal risks. Stick your finger in the soil: if the top inch is dry, it’s time to water. Mulch helps retain moisture!
What do I do if pests attack my garden?
Don’t panic! Start with prevention: healthy soil, companion planting (e.g., marigolds repel pests), and regular checks. For mild infestations, try neem oil or insecticidal soap. Severe cases may need row covers or natural predators like ladybugs. Remove pests by hand when possible!
Can I garden in containers if I don’t have a yard?
Containers are perfect for balconies, patios, or small spaces. Use well-draining pots (at least 12 inches deep for veggies) and lightweight soil. Herbs, lettuce, and dwarf tomatoes thrive in containers. Just ensure they get 6+ hours of sunlight daily and water frequently.
How do I know if my plants are getting too much or too little sun?
Watch for clues: Leggy, pale plants need more light, while wilting, crispy leaves signal too much sun. Most veggies need 6–8 hours of sunlight, but leafy greens tolerate partial shade. Rotate pots or move plants gradually to adjust their light exposure.
Wrapping up and next steps
Gardening is a rewarding journey that starts with small, confident steps—whether you’re nurturing herbs on a windowsill or dreaming of a full vegetable patch. Remember, every expert gardener began exactly where you are now: with curiosity, a little soil, and the willingness to learn. 🌱
Your next step? Start small, stay consistent, and celebrate every tiny victory. Pick one plant from this guide, gather your tools, and let the magic of growth inspire you. Before you know it, you’ll be sharing homegrown goodness with friends—or even expanding your garden with new favorites!
Happy planting! 🌿