
Tools
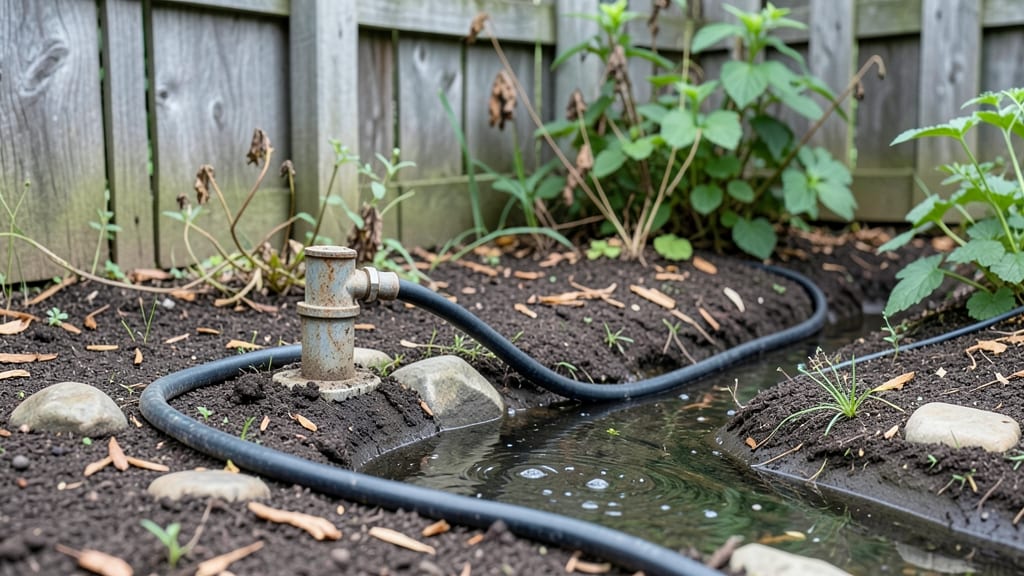
A garden stream kit turns your backyard into a tranquil escape without needing a full pond. I installed mine last summer after hearing the steady trickle of water became my favorite part of unwinding at night.
The right kit matches your space and style—whether you want a sleek modern look or a natural stone waterfall.
Most kits include everything you need: a pump, tubing, rocks, and sometimes preformed streams. You can run it off a garden hose or connect it to a larger water source if you have one.
The installation takes 2-3 hours for beginners, and the results are instantly soothing—like adding a spa to your garden without the price tag.
Once set up, you’ll love how the sound masks city noise and attracts hummingbirds. Pair it with moisture-loving plants like ferns or hostas for extra beauty. Maintenance is minimal—just check the pump monthly and top off water as needed. It’s the kind of project that makes your garden feel complete.
Works for any yard size or design style, from tiny patios to sprawling landscapes. Here’s how to pick the perfect one for your space and vision.
📚 In This Guide
- What you need
- Instructions
- Tips and common mistakes
- Wrapping up and next steps
What you need
- ● Garden stream kit (includes tubing, pump, and fittings—check for ½” to ¾” flexible tubing for best flow).
- ● Water pump (120–1,100 GPH, submersible or external, depending on stream size).
- ● Flexible tubing (½” to ¾” diameter, 50–100 ft, PVC or vinyl for durability).
- ● Stream rocks or pebbles (smooth, rounded stones, 1–3” in diameter, 5–10 lbs per sq. ft. of stream bed).
- ● Waterproof liner (10–20 mil thickness, enough to cover your stream bed area).
- ● Gravel or sand (½”–1” crushed stone or play sand, 2–3” deep layer for drainage).
- ● Basin or reservoir (plastic or galvanized steel, 5–20 gallons, depending on pump size).
- ● Tools: Measuring tape
- ● Utility knife or scissors (for cutting tubing)
- ● Drill (for securing pump or fittings)
- ● Pliers (for tightening fittings)
- ● Level (to ensure even water flow)
- ● LED waterproof lights (for ambient evening glow).
- ● Decorative plants (moss, water lilies, or aquatic grasses for a natural look).
- ● Water filter or clarifier (to keep water crystal clear).
- ● Timed pump controller (for energy efficiency and customizable flow).
- ● Waterproof sealant (to prevent leaks around fittings).
Step-by-Step instructions for building your garden stream kit
Here’s how to assemble a tranquil water feature that’ll transform your backyard into a peaceful retreat.
Plan and Prepare the Layout
Start by sketching your stream’s path on paper, keeping it simple with gentle curves and a slight downward slope for natural water flow. A 4-foot-wide stream works beautifully for a serene vibe, and you’ll want it to run about 10-15 feet long—long enough to create a focal point but not so long it feels overwhelming. Mark the start and end points with stakes, then use a level to ensure the ground slopes 1-2 inches per 10 feet for smooth water movement.
Clear the area of debris and level the ground with a shovel, removing rocks or roots that could disrupt the flow. If your yard isn’t perfectly sloped, dig a shallow trench along the marked path to guide the stream’s direction. This step is all about setting a solid foundation—skip it, and you’ll fight uneven water or leaks later.
Install the Stream Base and Liner
Lay down the heavy-duty pond liner along your marked path, extending it 6-12 inches beyond the edges to prevent water from seeping into the soil. Smooth out wrinkles as you go, using rocks or a board to weigh down the edges temporarily. For a natural look, add a 2-inch layer of small, smooth river rocks along the bottom of the trench—these will anchor the liner and create a textured base for the water.
Double-check that the liner sits flat and doesn’t sag in the middle. If it does, add more rocks underneath to create a stable foundation. Leave the liner loose at the ends for now—you’ll secure it once the stream is fully assembled. This is where patience pays off; rushing here leads to uneven water flow or liner damage down the road.
Assemble the Pump and Plumbing
Place the submersible water pump at the lowest point of your stream, partially buried in the rocks so it’s hidden but accessible for maintenance. Connect the pump’s outlet tube to the flexible PVC tubing, routing it along the stream’s path. Secure the tubing with landscape staples every 2-3 feet to keep it in place and prevent kinks. The tubing should follow the gentle slope you created earlier—water will flow best if it moves naturally, not forced.
Test the pump by filling the stream with 2-3 gallons of water (enough to cover the tubing) and turning it on. Watch the water flow; if it pools or sputters, adjust the tubing’s position or check for blockages. You’ll know it’s working right when water moves steadily without splashing or gurgling loudly. This is the heart of your stream—get it right now, and your feature will run smoothly for years.
Add Water and Final Touches
Fill the stream with water, starting at the lowest point and working your way up to avoid air pockets in the tubing. Use a hose to top it off gradually, letting the water settle before adding more. Once full, place decorative rocks and boulders along the edges and inside the stream to break up the flow and create a natural, organic look. Arrange them so some are partially submerged—this adds texture and hides the pump and tubing for a seamless finish.
Turn on the pump and let the water circulate for a few hours to ensure everything is stable. Adjust the pump’s flow rate if needed—too fast, and the water will look chaotic; too slow, and it may not reach the end. Once satisfied, add a few water plants or floating lilies (if using) to enhance the serene atmosphere. This final step is about refining the look and feel—take your time to make it feel like a natural part of your garden.
Maintain for Long-Term Serenity
Check the water level weekly and top off as needed, especially during hot weather when evaporation speeds up. Every 2-3 months, drain a portion of the water and refill with fresh water to prevent algae buildup—this keeps your stream clear and healthy. Trim any overgrown plants near the edges to maintain a clean, uncluttered look, and inspect the pump and tubing annually for wear or leaks.
If you notice slow flow or unusual noises, turn off the pump and check for debris or blockages in the tubing. A little maintenance now saves big headaches later. With this routine, your garden stream will stay a calming centerpiece for seasons to come—no guesswork, just tranquil water flowing effortlessly.
Tips & tricks for building your garden stream kit
A few simple tricks will help you create a seamless, natural-looking water feature that runs smoothly for years. Here's what I've learned from building my own garden streams.
Slope is Everything: The 1-2 inches per 10 feet slope mentioned in Step 1 is non-negotiable for proper water flow. I recommend using a laser level or a long board with a bubble level to verify your slope before installing the liner. If your yard isn't naturally sloped, create a subtle trench that gradually descends—this subtle approach prevents water from pooling at the start. Trust me on this: uneven slopes cause all kinds of problems later, from stagnant water to pump strain.
Liner Secrets: When working with the heavy-duty pond liner in Step 2, overlap seams by at least 6 inches and seal them with pond sealant. I've found that using a heavy rock or board to weigh down the edges as you work prevents wrinkles from forming. Pro tip: Lay the liner out completely first to check for any holes or defects—this saves headaches when you're halfway through installation. The extra 6-12 inches beyond the edges isn't just extra material; it's your insurance against leaks.
Pump Placement Matters: In Step 3, burying the submersible water pump partially in rocks isn't just for aesthetics—it helps dissipate heat and prevents the pump from overheating during hot summer months. Position the pump at the absolute lowest point of your stream, even if it means adjusting your original layout slightly. I've seen too many streams where the pump was placed too high, causing water to struggle to reach the end. Also, leave yourself access to unplug the pump if needed for maintenance.
Water Flow Troubleshooting: If your water flow seems inconsistent after testing in Step 3, check for three common issues: kinked tubing, partial blockages from debris, or an undersized pump for your stream's length. I recommend using slightly larger tubing than specified if your stream is on the longer side of the 10-15 foot range. The 2-3 gallons of water used for testing should be enough to cover the tubing completely—if you see air bubbles, you'll need to adjust the water level or tubing position. This testing phase is where most problems get caught before they become permanent issues.
Pro Tips for Garden Stream Kit
- A few simple tricks will help you create a seamless, natural-looking water feature that runs smoothly for years.
- Slope is Everything: The 1-2 inches per 10 feet slope mentioned in Step 1 is non-negotiable for proper water flow.
- Liner Secrets: When working with the heavy-duty pond liner in Step 2, overlap seams by at least 6 inches and seal them with pond sealant.
Frequently asked questions
What’s the easiest way to install a garden stream kit?
A garden stream kit is designed for simplicity! Most kits include clear instructions, but the basics are: level your pump, secure the tubing, and adjust the flow rate. Start small—test your setup with just a few streams before expanding. Pro tip: Use a garden hose to pre-wet the tubing for easier assembly!
How long does it take to assemble a garden stream kit?
Assembly time varies by kit size, but most DIYers finish in 1–3 hours. Smaller kits (like tabletop features) take 30 minutes, while larger backyard setups may require a weekend. Plan for extra time if you’re customizing the layout or adding rocks/pebbles for aesthetics.
Can I use a garden stream kit in cold climates?
Yes, but with precautions! Drain the pump and tubing before freezing temps hit (below 32°F/0°C). Opt for submersible pumps or insulated kits if you want year-round use. In extreme cold, consider a solar-powered pump to avoid power issues.
What if my stream kit leaks or bubbles?
Leaks usually mean loose connections or damaged tubing. Tighten fittings and check for kinks in the hose. Bubbles? Your pump might be air-bound—submerge it fully or add a de-aerator. For stubborn issues, consult your kit’s manual or contact the manufacturer. Troubleshooting tip: Use plumber’s tape on threaded connections for extra security!
Are there alternatives to a garden stream kit?
For a low-cost option, repurpose a pond pump with PVC pipes and rocks. Pre-made fountain kits or even a DIY bamboo water spout (using a bucket and bamboo shoots) can mimic the effect. If you want zero maintenance, consider a solar-powered bubbler.
Will a garden stream kit attract mosquitoes?
Not if maintained properly! Stagnant water is the issue—ensure your pump circulates water continuously. Add a floating fountain or mosquito dunks (beneficial bacteria) to prevent standing water. Bonus: The moving water also deters pests like snakes and rodents!
Wrapping up and next steps
Transforming your backyard into a tranquil oasis with a garden stream kit is easier—and more rewarding—than you think! Whether you’re a DIY novice or a seasoned pro, this project adds natural beauty and soothing ambiance to your space.
Start small, gather your supplies, and let the gentle sound of flowing water elevate your outdoor experience.
Ready to dive in? Pick a kit that fits your space, follow the steps with confidence, and enjoy the peaceful results! 🌿✨
Next steps:
- Sketch your design on paper first.
- Visit a garden center for missing supplies.
- Invite friends over to admire your new serene retreat!