
Blooming
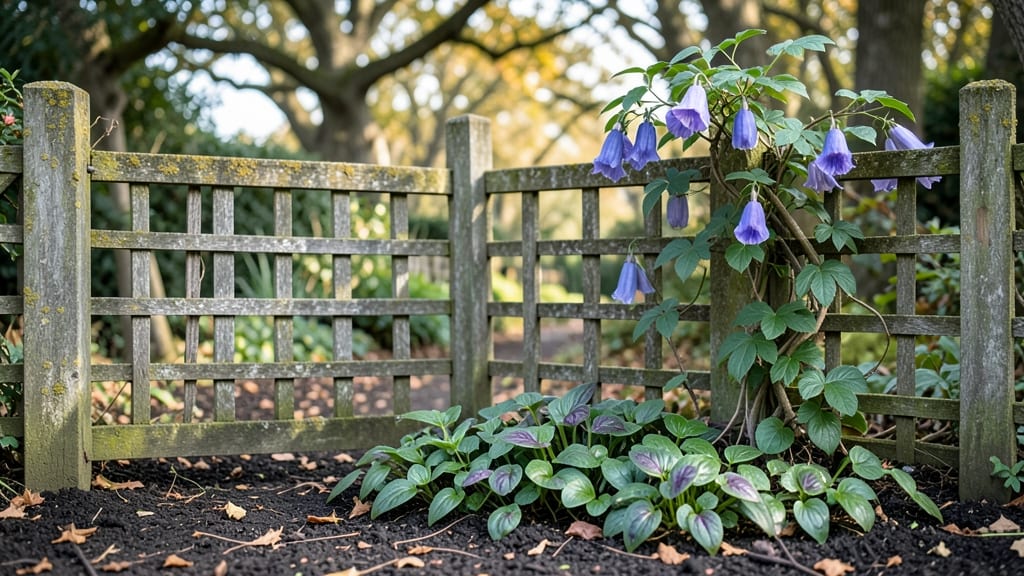
Your garden gate blooms should be the first thing visitors notice—and the last thing they forget. 🌸 I transformed my weathered gate into a cottage-style showstopper by layering seasonal blooms that spill over the frame, creating a welcoming tunnel of color.
The secret isn't just picking pretty flowers; it's choosing plants that bloom from spring through frost with minimal fuss.
Start with a sturdy base of evergreen shrubs like boxwood or dwarf lilacs for structure, then add climbers like clematis or roses to soften the edges.
Mix in perennial workhorses like peonies, black-eyed Susans, and coneflowers for year-after-year color, and tuck in annuals like sweet alyssum or petunias for instant pops. The key is 3-4 hours of sunlight and well-draining soil—nothing fancy, just reliable.
By summer, your gate will be a riot of lavender, pink, and gold, with fragrant blooms that draw in butterflies and bees. The best part? These plants thrive with one deep watering a week and occasional deadheading.
Even if you forget to tend them, the charm stays intact—just like a well-loved cottage garden should.
Works for any gate size, from rustic wood to wrought iron, and adapts to partial shade if needed. Here's how to make it happen without the overwhelm of a high-maintenance border.
📚 In This Guide
- What you need
- Instructions
- Tips and common mistakes
- Wrapping up and next steps
What you need
- ● Flowering plants (seasonal mix): 10–15 clematis vines (for vertical drama)
- ● 5–8 roses (climbing or shrub varieties like ‘David Austin’)
- ● 3–5 peony bushes (fragrant & lush)
- ● 6–10 lavender plants (for texture & scent)
- ● 10–12 pansies or violas (for early/late-season color)
- ● 3–5 foxgloves (tall, whimsical spikes)
- ● Support structures: 1–2 rustic wooden trellises (4’–6’ tall)
- ○ 1 wrought-iron arch (optional, for a grand entrance)
- ● 2–3 bamboo stakes or obelisks (for climbing plants)
- ● Soil & amendments: 50 lbs well-draining potting mix (for containers)
- ● 10 lbs compost (to enrich garden beds)
- ● 1 bag slow-release fertilizer (10-10-10 ratio)
- ● 1 garden trowel (for planting)
- ● 1 pruners (sharp & clean)
- ● 1 wheelbarrow (for hauling soil)
- ● 1 measuring tape (to plan spacing)
- ● 1 spray bottle (for watering seedlings)
- ● Gloves (gardening & work gloves)
- ● Decorative terracotta pots (for trailing flowers)
- ● Fairy lights or solar-powered string lights (for evening magic)
- ● Weather-resistant paint or stain (to refresh wooden structures)
- ● Mulch (straw or shredded bark) to suppress weeds & retain moisture
How to create a season-long cottage garden border
Here's the method I've perfected for a lush, low-maintenance border that blooms from spring to frost.
🌱 Step 1: Design Your Planting Plan With Layered Heights
Sketch a rough layout using the 4-foot wide border you've created, dividing it into three height zones. Tall perennials like delphiniums and hollyhocks (3-6 feet) go at the back, mid-height flowers such as peony and lupine (2-3 feet) fill the middle, and low-growing annuals like pansies and sweet alyssum (6-12 inches) spill over the front edge. I always stagger plants in odd-numbered groupings—three, five, or seven—to create natural movement.
For your 4-foot border, I recommend spacing plants 12-18 inches apart to allow airflow and prevent disease. Use a 10-foot tape measure to mark planting positions along the border's length, then transfer those marks to the soil with wooden stakes and garden twine. This ensures even spacing before you start digging.
🌿 Step 2: Prepare the Soil for Long-Lasting Blooms
Loosen the soil to a depth of 12 inches using a border spade, breaking up any compacted layers. Amend the native soil with 2 gallons of compost and 1 pound of 5-10-5 fertilizer per 4-foot section, working it in thoroughly. The goal is a crumbly, well-draining mix that holds moisture without becoming soggy.
Test the soil's moisture level by squeezing a handful—it should hold together but not drip water. If your soil feels too dense, mix in 1 gallon of perlite to improve aeration. I like to add a thin layer of mulch (about 2 inches) after planting to suppress weeds and retain moisture, but hold off until after the first watering.
✂️ Step 3: Plant for Continuous Color and Seasonal Interest
Start with spring-blooming bulbs like daffodils and tulips, planting them 6 inches deep in clusters of 5-7 bulbs along the border's front edge. These will naturalize over time and return year after year. Next, add perennial plants like peony and black-eyed Susan, spacing them according to their mature widths (check the plant tags for guidance).
Fill gaps with annuals that bridge seasonal transitions—pansies for early spring color, sweet alyssum for summer, and mums for fall. I always plant 10-12 annuals per 4-foot section to ensure dense coverage. Water deeply after planting to settle the soil and encourage root growth, but avoid oversaturating the area.
💧 Step 4: Establish a Watering Routine for Healthy Growth
Water newly planted borders once daily for the first week, then taper to every other day once the soil feels 2 inches dry at the surface. Use a soaker hose or drip irrigation to deliver moisture directly to the root zone without wetting the foliage, which reduces disease risk. Early morning watering (between 6-9 AM) minimizes evaporation and fungal issues.
After the first month, reduce watering to twice weekly during dry spells, checking the soil's moisture level with your fingers. Mature perennials are drought-tolerant once established, but annuals will need consistent moisture to thrive. I always mulch again in late summer with 1 inch of shredded bark to protect roots during winter.
☀️ Step 5: Maintain Through the Seasons for Year-Round Beauty
Deadhead spent blooms weekly to encourage continuous flowering, especially with perennials like delphinium and lupine. Cut back tall, leggy stems in early summer to promote bushier growth. I also fertilize mid-summer with a balanced 10-10-10 fertilizer to support fall blooms, applying ½ pound per 4-foot section.
In late fall, remove any annuals that have died back and add a 3-inch layer of compost to the soil. Prune perennials like peony and black-eyed Susan back to 2 inches above the ground in early spring before new growth appears. This keeps the border tidy and encourages vigorous regrowth for the next season.
Tips & tricks for perfect season-long cottage garden borders
Creating a cottage garden border that thrives all season takes thoughtful planning—and these are the secrets I've learned after years of trial and error. The difference between a border that fades by summer and one that bursts with color from spring to frost often comes down to these key details.
The Layering Secret: In Step 1, when you're designing your height zones, think vertically like a painter with foreground, midground, and background. The tallest plants (delphiniums and hollyhocks) should be spaced 18 inches apart at the back to prevent them from shading out the middle layer. I've found that placing peonies 12-15 inches from the back edge creates that perfect cascading effect where their blooms spill over the mid-height zone. This visual trick makes your border look fuller immediately.
Soil Preparation Pro Tip: When you're amending your soil in Step 2, don't just mix in compost—create a "soil cocktail" that includes 1 part compost, 1 part native soil, and ½ part perlite. The perlite isn't just for aeration; it also helps prevent compaction from foot traffic. I like to work in the amendments when the soil is slightly damp (like a wrung-out sponge) because it mixes more evenly. This creates that ideal crumbly texture that roots love.
Planting Precision: The 12-18 inch spacing in Step 1 might seem flexible, but there's actually a science to it. For perennials like peony and black-eyed Susan, aim for the upper end of the range (16-18 inches)—they'll spread over time. Annuals like pansies can go on the closer side (12-14 inches) since they won't live as long. I use a stake-and-string method for marking positions: drive a stake every 3 feet, then use twine to create a grid. This ensures perfectly straight rows before you even start digging.
Watering Wisdom: That first week of daily watering in Step 4 is critical, but timing matters just as much as frequency. Water in the early morning (6-8 AM) when temperatures are coolest—this gives plants time to absorb moisture before the heat of the day. I've noticed that watering at this time also reduces fungal issues, especially with moisture-loving plants like hollyhocks. And here's a trick: water the soil, not the leaves. Use a soaker hose or drip irrigation positioned at the base of plants to deliver water directly to the roots where it's needed most.
Pro Tips for Garden Gate Blooms
- Creating a cottage garden border that thrives all season takes thoughtful planning—and these are the secrets I've learned after years of trial and error.
- The Layering Secret: In Step 1, when you're designing your height zones, think vertically like a painter with foreground, midground, and background.
- Soil Preparation Pro Tip: When you're amending your soil in Step 2, don't just mix in compost—create a "soil cocktail" that includes 1 part compost, 1 part native soil, and ½ part perlite.
Frequently asked questions
What’s the best time of year to plant garden gate blooms?
For most blooms, spring or early fall are ideal—when soil is warm but not scorching. Cool-season flowers (like pansies or sweet alyssum) thrive in early spring or late summer, while heat-lovers (e.g., zinnias or marigolds) do best after the last frost. Pro tip: Check seed packets for specific timing—some varieties are finicky!
Can I use annuals, perennials, or a mix for garden gate blooms?
Annuals
(like impatiens or petunias) offer instant color but fade yearly, while perennials (e.g., lavender or coneflowers) return season after season with less upkeep. Mix both for year-round interest: Use annuals for bold pops and perennials as sturdy anchors. Herbs like rosemary or thyme also add texture and fragrance!
How do I keep my garden gate blooms looking fresh all season?
Deadhead spent blooms regularly to encourage new growth, and trim leggy stems to maintain shape. Water deeply but infrequently (early morning is best) to prevent fungal issues, and mulch around plants to retain moisture. Fertilize lightly every 4–6 weeks with a balanced formula—overdoing it can lead to lush foliage but fewer flowers!
What’s a budget-friendly way to start garden gate blooms?
Skip pricey nursery plants and opt for seed packets or cuttings from friends’ gardens! Many blooms (like nasturtiums or cosmos) self-seed easily, so you’ll have freebies next year. Dollar stores often carry affordable pots, and repurposed containers (like teacups or tin cans) add whimsical charm. Divide mature perennials to expand your collection without spending a dime!
Are garden gate blooms pest-prone? How do I protect them?
Some blooms (like roses or hydrangeas) attract aphids or Japanese beetles, but natural remedies help! Spray plants with soapy water or introduce beneficial insects (like ladybugs). Neem oil or garlic spray deters pests without harsh chemicals. Interplanting (e.g., marigolds with tomatoes) confuses pests—it’s like a garden game of hide-and-seek!
How can I add height and texture to my garden gate blooms?
Layer plants by height: Tall stalwarts (like delphiniums or sunflowers) go at the back, mid-height blooms (e.g., salvia or snapdragons) in the middle, and trailing or bushy plants (like sweet potato vine or lobelia) spill over edges. Add ornamental grasses (like fountain grass) or bamboo stakes for vertical interest. Don’t forget foliage! Plants like heuchera or hostas add lush contrast.
Wrapping up and next steps
Transforming your garden into a whimsical cottage haven with season-long blooms is simpler than you think—and oh-so rewarding! 🌸 From rustic gates to vibrant flowers, every choice adds charm and life to your outdoor space.
Whether you’re a seasoned gardener or just starting, these ideas will inspire you to create a garden that feels like a storybook.
Ready to dive in? Start small—pick one corner, gather a few materials, and let your creativity bloom! 🌿 Plan your first project today and watch your garden gate become the heart of your cottage-style retreat.