
Tools
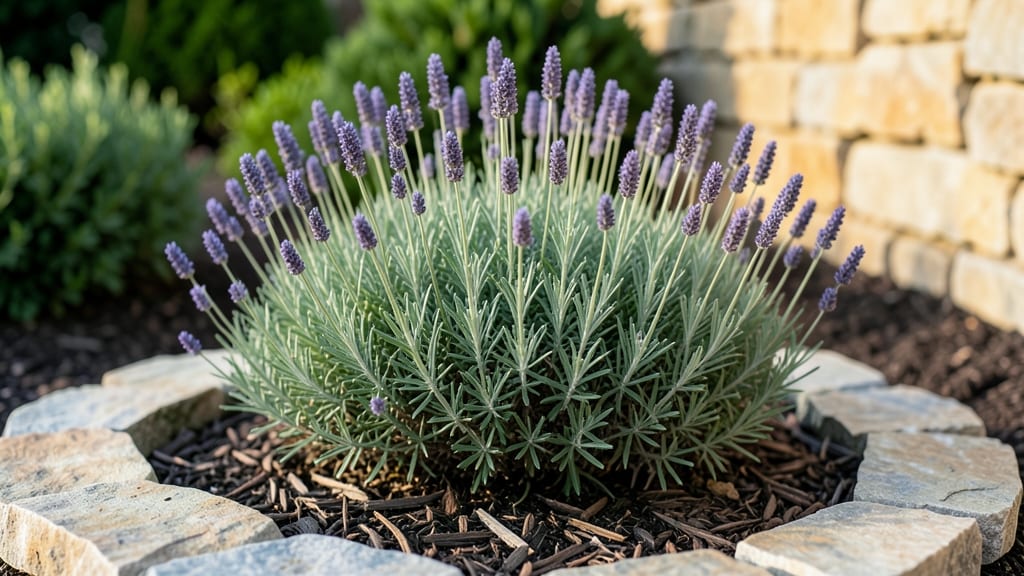
Creating a garden border design that feels like a private retreat starts with layering plants and materials the right way. 🌿 I designed my own border after years of struggling with patchy, boring edges—now it’s a lush, ever-changing screen that blocks neighbors’ views while attracting butterflies all season.
The secret lies in balancing height, texture, and seasonal interest so no month looks bare.
You’ll need a mix of evergreen shrubs for structure, flowering perennials for color, and climbers to soften any hard edges. Think boxwood for foundation, coneflowers for mid-height blooms, and clematis to spill over trellises.
Add gravel or stepping stones for paths, and you’ve got a border that’s both functional and stunning—no more weedy gaps or sad winter months.
By summer, your border will be a vibrant wall of color and fragrance, with layers that shift from spring’s delicate blooms to autumn’s fiery foliage. The best part?
It grows more beautiful each year with minimal upkeep. We’ll cover how to arrange plants for maximum impact while keeping maintenance simple—no overgrown messes here.
Whether you’re going for cottage charm, modern minimalism, or a wildflower meadow look, the principles stay the same. Start small with one section, then expand as you see what works. Your garden’s new favorite feature is just a few strategic cuts and plantings away.
📚 In This Guide
- What you need
- Instructions
- Tips and common mistakes
- Wrapping up and next steps
What you need
- ● Measuring tape (25 ft or longer) – for precise layout planning.
- ● String line & stakes (10–20 stakes, ¼-inch diameter) – to mark border lines.
- ● Shovel & spade – for digging trenches (12–18 inches deep).
- ● Garden gloves (heavy-duty) – protect your hands from thorns or rough edges.
- ● Landscape fabric (3–4 ft wide, 30–50 ft length) – suppresses weeds and retains moisture.
- ● Mulch (3–4 cubic yards, pine bark or shredded wood) – for a polished finish.
- ● Plants for layers (quantities vary by design): Tall privacy screen: 5–10 evergreens (e.g., arborvitae, holly) or 3–5 shrubs (e.g., hydrangeas, boxwoods).
- ● Mid-height fillers: 10–15 perennials (e.g., coneflowers, salvia) or ornamental grasses.
- ● Ground cover: 20–30 plants (e.g., creeping thyme, ajuga, or ivy).
- ○ Gravel or edging stones (1–2 bags, ½–1 inch size) – optional but adds structure.
- ● Trellis or lattice panels – for climbing plants (e.g., roses, clematis) or added texture.
- ● Solar-powered path lights – illuminates your border after dark for ambiance.
- ● Decorative borders (e.g., metal edging, brick, or stone) – defines edges elegantly.
- ● Drip irrigation system – automates watering for low-maintenance beauty.
- ● Seasonal accents (e.g., potted annuals, holiday greenery) – keeps it fresh year-round.
Step-by-Step guide to designing a privacy-packed garden border
Let’s craft a layered border that delivers year-round privacy and visual appeal.
🌿 Step 1: Define Your Border’s Purpose and Scale
Measure the length of your border and note any existing structures—fences, walls, or slopes—that will anchor your design. I like to sketch a rough outline on graph paper, marking where I’ll place taller plants along the back and shorter ones toward the front. For 4 feet of width, aim for 3-4 layers of plants to create depth and gradual privacy.
Consider your climate’s growing zones—this determines which plants will thrive year-round. In colder regions, evergreens like Arborvitae or Boxwood form the backbone, while warmer zones might rely on Oleander or Lantana for dense foliage. You’ll want a mix of textures: broadleaf, needle-like, and fine foliage to break up light and create visual interest.
🪴 Step 2: Select Plants for Height and Seasonal Interest
Start with the tallest plants at the back—these should reach 6-8 feet tall to block views immediately. I often use Bamboo or Hydrangeas for their rapid growth and lush canopies. Next, layer medium-height plants like Holly or Camellia at 3-5 feet to fill gaps and add structure.
For the front layer, choose plants that stay low but dense, such as Dwarf Mondo Grass or Creeping Juniper. These should spread 1-2 feet wide to soften the border’s edge. Don’t forget seasonal blooms—add Spring Bulbs like Daffodils or Fall Perennials like Mums to keep color cycling through the year.
☀️ Step 3: Plan for Light and Maintenance Needs
Assess sunlight exposure along your border—full sun, partial shade, or full shade will dictate plant placement. I group sun-loving plants like Lavender or Russian Sage together and shade-tolerant options like Fern or Hostas in cooler spots. This ensures each plant thrives without competing for resources.
Think about maintenance too. If you’re short on time, opt for low-maintenance plants like Boxwood or Yew Shrubs, which need minimal pruning. For a more hands-on look, add climbers like Clematis or Jasmine to train along trellises or fences, but budget 10-15 minutes weekly to trim and guide them.
✂️ Step 4: Install and Layer for Immediate Impact
Dig holes twice as wide as the root ball but no deeper—this prevents root rot and encourages outward growth. Place each plant at the same depth it was in its container, then backfill with native soil mixed with compost for nutrients. Water deeply to settle the soil and remove air pockets.
Arrange plants in odd-numbered groups (3, 5, or 7) for a natural, balanced look. Space taller plants 3-4 feet apart and shorter ones 1-2 feet apart to allow airflow and prevent disease. Mulch with 2-3 inches of shredded bark to retain moisture and suppress weeds—this is the final touch that ties everything together.
🌱 Step 5: Add Finishing Touches for Long-Term Beauty
Incorporate hardscape elements like stone edging or wood chips to define the border’s shape and reduce maintenance. I often add a 1-inch layer of gravel along the front edge to deter weeds and create a clean transition to lawn or pathways.
Finally, consider adding seasonal accents like Ornamental Grasses or Winter Berries to keep the border dynamic. Step back and adjust spacing if needed—you’re aiming for a look that feels intentional but not overly manicured. With this setup, your border will mature into a lush, private retreat within 2-3 years.
Tips & tricks for perfect garden border design
Creating a stunning privacy border takes thoughtful planning—here’s how to elevate your design from good to breathtaking.
Layering Strategy: For that coveted 4-foot width, I recommend staggering plant heights by at least 2 feet between layers. Start with your 6-8 foot evergreens at the back, then place 3-5 foot shrubs like Holly midway, and finish with 1-2 foot ground covers. This creates visual depth while ensuring no gaps appear as plants mature. Think of it like a living curtain—each layer should gradually obscure the one behind it.
Seasonal Interest Planning: Don’t just focus on summer blooms! In Step 2, when selecting your plants, allocate 20% of your front layer to seasonal accents like Daffodils for spring and Mums for fall. I like to map out a color wheel—plant cool tones (blues/purples) in shady spots and warm tones (reds/oranges) where they’ll get afternoon sun. This creates a dynamic show that changes with each season without requiring major redesigns.
Maintenance Realism: The 10-15 minutes weekly you budget for climbers like Clematis is actually a conservative estimate. I’ve found that dedicating just 5 minutes daily to quick trims prevents the "wild vine" look that can ruin an otherwise polished border. Set a phone reminder for your weekly maintenance window—consistency is key to keeping your border looking intentional rather than overgrown.
Hardscape Integration: When adding that 1-inch gravel layer in Step 5, consider using it strategically to create subtle pathways between plant groups. I often run it in 1-foot-wide strips along the front edge, which not only deters weeds but also defines visual sections. For a more polished look, pair it with stone edging that matches your home’s exterior palette—this creates a cohesive transition between garden and landscape.
Pro Tips for Garden Border Design
- Creating a stunning privacy border takes thoughtful planning—here’s how to elevate your design from good to breathtaking.
- Layering Strategy: For that coveted 4-foot width, I recommend staggering plant heights by at least 2 feet between layers.
- Seasonal Interest Planning: Don’t just focus on summer blooms!
Frequently asked questions
Got questions about creating a stunning, functional garden border? You’re not alone! Here are some of the most common concerns—and their solutions—to help you design with confidence.
What’s the best time of year to plant a garden border for long-term success?
The ideal time depends on your climate, but spring (after the last frost) or early fall are the sweet spots. Planting in cooler months gives roots time to establish before summer heat. For perennials, early spring is best—just avoid planting when the ground is frozen or waterlogged.
How can I create a privacy border on a budget without sacrificing style?
Start with fast-growing, affordable plants like bamboo (for height), evergreen shrubs (e.g., boxwood or holly), or native plants that thrive in your zone. Use mulch or gravel to suppress weeds and reduce watering costs. Thrift stores or online plant swaps can also score discounted perennials!
Will a garden border block too much sunlight for my lawn or garden?
Not if you plan wisely! Opt for semi-transparent plants like ornamental grasses, deciduous shrubs (they lose leaves in winter), or climbing vines on trellises. Space taller plants strategically to allow light to filter through. A 3–4 foot border usually strikes the right balance for airflow and sunlight.
How do I keep pests (like rabbits or deer) from destroying my new border?
Use natural deterrents like deer-resistant plants (e.g., lavender, Russian sage, or barberry) and rabbit-proof fencing (bury it 12 inches deep!). Sprinkle hot pepper spray or plant marigolds nearby—they’re pest-repellent powerhouses. Physical barriers (like chicken wire) also work wonders!
Can I mix evergreens and seasonal plants in one border for year-round interest?
Evergreens (like boxwood or juniper) provide structure, while seasonal bloomers (e.g., hydrangeas, coneflowers) add color. Layer them by height—tall evergreens at the back, medium shrubs in the middle, and perennials/annuals in front. Just ensure each plant has enough space to grow!
What’s the easiest way to protect a new border from winter damage?
Mulch heavily (3–4 inches) with shredded bark or straw to insulate roots. Wrap young trees/shrubs with burlap or frost cloth, and avoid heavy pruning in late fall. Water deeply before the first freeze to help plants withstand cold. Most borders bounce back beautifully with minimal winter prep!
Wrapping up and next steps
Designing a garden border with privacy-packed layers isn’t just about aesthetics—it’s about creating a serene, functional space that thrives year-round! 🌿 Whether you’re blending evergreens, seasonal blooms, or structural plants, the key is balance: height, texture, and color harmony.
Start small, experiment with what works, and don’t forget to enjoy the process!
Ready to transform your outdoor space? Sketch your vision, gather your materials, and dive in—your future garden oasis awaits! 🌟 Need inspiration? Browse our plant pairing guides or seasonal tips next to bring your design to life.