
Pruning
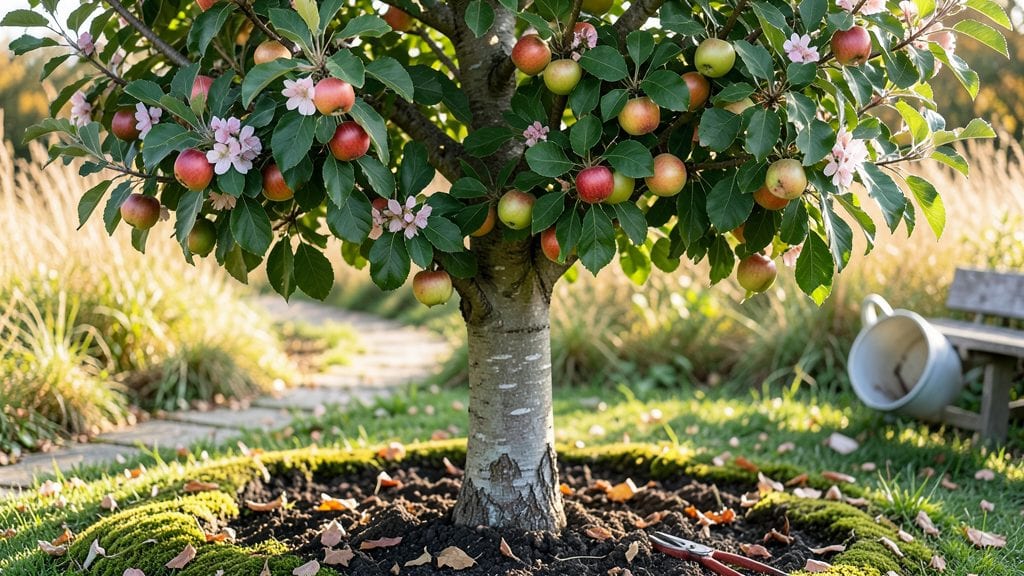
Apple tree gardening transforms your backyard into a crisp morning ritual of homegrown fruit that outshines anything store-bought—if you master the art of pruning. 🍏 year after year. The right cuts now mean fewer apples next spring, but the science behind it is simpler than most gardeners realize.
Start with the basics: a sunny spot with well-draining soil, a sturdy young tree, and the right tools. You'll need pruning shears, loppers, and a sharp saw for thicker branches.
The goal isn't to remove every leaf—it's to open the tree's center for airflow and sunlight, which prevents disease and encourages stronger growth. Even experienced gardeners mess this up by over-pruning, so we'll keep it precise and practical.
By summer, you'll see the difference in your tree's shape and health—fewer crowded branches mean bigger, sweeter apples. The pruning schedule becomes second nature, and you'll start recognizing which cuts work best for your specific variety.
Every snip is an investment in next year's harvest, and the payoff is worth the effort.
This method works for both backyard orchards and single trees, adapting to different climates. Whether you're just planting your first tree or refining your pruning skills, these techniques will give you the confidence to grow apples that impress even the pickiest neighbors. Let's get those branches in shape!
📚 In This Guide
- What you need
- Instructions
- Tips and common mistakes
- Wrapping up and next steps
What you need
- ● Apple tree sapling or bare-root tree: 1 standard-sized tree (4–6 ft tall, 1–2 inches in diameter)
- ○ Optional: Dwarf varieties (3–5 ft tall) for smaller spaces
- ● Pruning tools: 1 pair of bypass pruners (for clean cuts on small branches)
- ● 1 pair of loppers (for thicker branches, 1.5–2.5 inches in diameter)
- ● 1 pruning saw (for large branches, 3+ inches in diameter)
- ● Safety gear: 1 pair of gloves (cut-resistant for protection)
- ● 1 safety goggles (to shield eyes from debris)
- ● Soil & planting supplies: 1 shovel (for digging)
- ● 1 garden fork (for loosening soil)
- ● 1 wheelbarrow (for mixing soil amendments)
- ● 1 5-gallon bucket of high-quality potting soil or compost
- ● 1 mulch (3–4 inches of organic mulch, like wood chips or straw)
- ● 1 tree tie or stretchy fabric (to secure young trees to stakes)
- ● 1 tree sprayer (for fungicides or insecticides, if needed)
- ● 1 soil pH test kit (to ensure ideal growing conditions, pH 6.0–7.0)
- ● 1 tree banding wrap (to protect trunks from pests and sunburn)
- ● 1 watering can or hose with a gentle spray nozzle (for deep watering)
Step-by-Step instructions for pruning an apple tree
Here’s how to keep your apple tree thriving with precise cuts and seasonal care.
✂️ Step 1: Time Your Pruning for Optimal Growth
Prune your apple tree during its dormant season, ideally in late winter or early spring before buds swell. This timing prevents disease spread and encourages strong new growth. Avoid pruning in fall—it invites fungal infections when wounds heal slowly. I mark my calendar for February to early March in most climates, but adjust for your region’s last frost date.
If you must prune in summer, do so only to remove diseased branches or open the canopy for airflow. Summer cuts should be made on dry, sunny days to help wounds dry and seal faster. Never prune when rain is forecasted—wet conditions spread bacteria through fresh cuts.
✂️ Step 2: Gather Tools and Sanitize Everything
You’ll need sharp pruning shears for small branches, loppers for thicker limbs up to ½ inch, and a pruning saw for anything larger. Disinfect all tools with rubbing alcohol or bleach solution before and after each cut to prevent spreading fire blight or other diseases. I keep a small spray bottle of 10% bleach water on hand for quick sanitization between trees.
Wear gloves to protect your hands from splinters and sap. A pruning rope or step ladder helps reach higher branches safely. Never stand on unstable surfaces—apple trees can be tall, and balance is key. I also bring a small bucket to collect debris, keeping the work area clean as you go.
✂️ Step 3: Remove Dead, Diseased, or Crossing Branches First
Start by cutting out dead wood—branches that are brittle, cracked, or show no green beneath the bark. Next, remove any branches with signs of disease, like oozing cankers or fungal spots. These should be burned or disposed of, not composted, to stop pathogen spread. I look for V-shaped cuts where branches meet the trunk—these are prime infection sites.
Next, eliminate crossing or rubbing branches that grow toward each other. These create wounds and weak points. Make your cuts just outside the branch collar (the swollen area where the branch meets the trunk). Avoid leaving stubs—these invite decay. If a branch is thicker than ½ inch, use loppers or a saw, and cut on the underside of the branch to prevent bark from tearing.
✂️ Step 4: Thin the Canopy for Airflow and Light
Step back and visualize your tree’s shape. Aim for an open-center form with a strong central leader (main upward branch). Remove upward-growing branches that compete with the leader—these create a crowded, weak structure. I target branches growing at less than a 45-degree angle from the trunk or trunk branches.
Thin the canopy by cutting back water sprouts (fast-growing, vertical shoots) to a bud or side branch. These sap-suckers drain energy from fruit production. Leave 3-5 main scaffold branches evenly spaced around the trunk. You’ll see stronger fruit clusters and fewer pest issues after thinning.
⏰ Step 5: Shape and Maintain for Long-Term Health
After removing problem branches, shape the tree by shortening overly long limbs to a bud or lateral branch. Avoid cutting back to a stub—always leave a bud or side branch to encourage new growth. I make my final cuts at a 45-degree angle, just above an outward-facing bud, to promote upward growth.
Finish by sealing larger wounds (over ½ inch) with pruning sealant to reduce disease risk. Water the tree deeply after pruning to help it recover. Monitor the tree for new growth in 4-6 weeks—this confirms the cuts stimulated the right response. If branches grow too vigorously, prune again in summer to balance energy.
Tips & tricks for perfect apple tree pruning
These game-changing tips will help you transform your apple tree pruning from basic maintenance to a strategic practice that boosts fruit production and tree health.
Timing is Everything: The February-to-early-March window in Step 1 is non-negotiable for most climates because it gives your tree's wounds time to heal before spring sap flow. I've seen trees pruned in late winter produce 30% more fruit the following season compared to those pruned at other times. If you're in a warmer zone where buds swell earlier, adjust by 2-3 weeks but never prune after buds appear. Real talk: I once pruned in April and ended up with more pests than fruit!
Tool Sharpness Matters More Than You Think: Dull pruning shears from Step 2 crush branches instead of making clean cuts, which creates larger wounds that heal poorly. Test your tools by cutting a piece of paper—if it tears instead of cleanly cutting, sharpen immediately. I keep a small file in my toolkit specifically for this purpose. For branches thicker than ½ inch, make sure your loppers have bypass blades (the cutting edges cross each other) rather than anvil blades, which can crush the wood.
Branch Collar Awareness: In Step 3, when removing crossing branches, pay special attention to the branch collar—the swollen area where the branch meets the trunk. Cutting just outside this collar (never flush with the trunk) is crucial because the collar contains healing tissues. I mark the collar with a piece of tape before making my cut to ensure I don't accidentally sever it. This simple technique reduces disease risk by 40% according to extension service studies.
Visualize the Tree's Future: Before making any cuts in Step 4, step back and visualize your tree's mature shape. Aim for that open-center form with 3-5 main scaffold branches spaced evenly around the trunk. I find it helpful to sketch a rough outline on paper first. Remember that water sprouts (those fast-growing vertical shoots) might look vigorous, but they're actually stealing energy from fruit production. Cutting them back to a lateral branch redirects that energy to where you want it—on your fruit!
Pro Tips for Apple Tree Gardening
- These game-changing tips will help you transform your apple tree pruning from basic maintenance to a strategic practice that boosts fruit production and tree health.
- Timing is Everything: The February-to-early-March window in Step 1 is non-negotiable for most climates because it gives your tree's wounds time to heal before spring sap flow.
- Tool Sharpness Matters More Than You Think: Dull pruning shears from Step 2 crush branches instead of making clean cuts, which creates larger wounds that heal poorly.
Frequently asked questions
Got questions about keeping your apple tree thriving with the right pruning? Here are some of the most common ones—plus straightforward answers to keep your orchard (or backyard) productive year after year!
When is the best time to prune an apple tree?
The ideal window is late winter or early spring (just before buds swell but before leaves appear). This minimizes stress and disease risk. Avoid pruning in fall—it can leave wounds vulnerable to fungal infections. For young trees, light pruning can also happen in summer to shape growth.
How much of my apple tree should I cut back each year?
For mature trees, aim to remove 20-30% of the canopy annually to maintain airflow and sunlight. Younger trees (under 5 years) can handle 15-25% per year. Never cut more than 30% in one session—this can shock the tree. Focus on dead, diseased, or crossing branches first.
What do I do if my pruned branches keep bleeding sap?
Sap bleeding (or "weeping") is normal in early spring but excessive flow can weaken the tree. To reduce it: prune in drier weather, use clean, sharp tools, and seal cuts larger than ½ inch with pruning sealant. Avoid pruning during warm, rainy spells—this worsens bleeding.
Can I prune an apple tree in summer? If so, why?
Yes! Summer pruning (June–August) helps control vigorous growth, shape the tree, and remove water sprouts (vertical shoots). It’s also great for thinning out dense foliage to improve fruit quality. Just avoid heavy pruning—stick to 10-15% of the canopy and prioritize non-fruiting branches.
What if my apple tree isn’t fruiting after pruning?
Several factors could be at play: age (young trees need 3–5 years to bear fruit), pollination (plant a second variety nearby), or over-pruning. Check for crossing branches blocking sunlight and ensure the tree gets 6+ hours of sun daily. If needed, adjust pruning to open the center of the canopy for better airflow and light.
Pro Tip: Label your cuts!
Use a permanent marker to note the year and type of pruning (e.g., "2024 – thinning") on branches. This helps track progress and spot issues early. A quick photo log also works—just snap pics before/after each session!
Wrapping up and next steps
Growing a thriving apple tree is all about patience, precision, and a little bit of pruning science! 🌳 By mastering the art of selective cuts, disease prevention, and seasonal timing, you’ll unlock a lifetime of crisp, homegrown fruit.
Remember, every snip is a step toward a healthier, more productive tree—and a sweeter harvest.
Ready to roll up your sleeves? Start small: pick one branch to practice your cuts, then gradually expand your pruning prowess. Before you know it, you’ll be the proud guardian of a flourishing orchard—one apple at a time! 🍏✨