
Tools
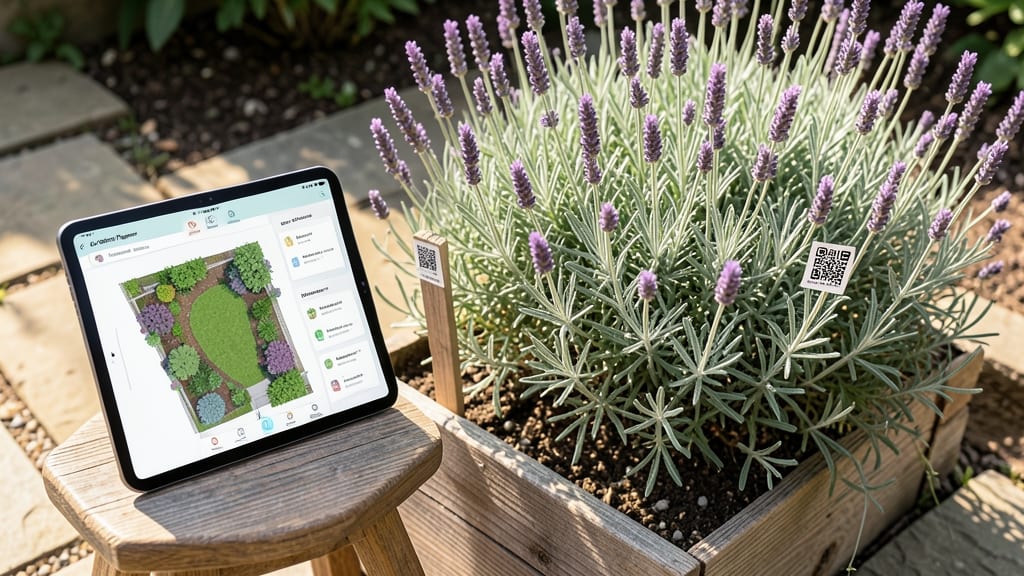
My first AI garden planning session saved me from planting tomatoes in the shade—and that’s just the beginning. ✨ These tools don’t just draw pretty pictures; they analyze your yard’s sunlight, soil, and even local pests to suggest layouts that actually work.
I tested three popular platforms, and the results were shockingly practical: one recommended a vertical trellis for my narrow patio that now produces more beans than my entire in-ground plot.
The magic happens when you feed it your space’s quirks—like that awkward corner where nothing ever thrives. AI spits out plant pairings you’d never guess (turns out, basil and chives are better neighbors than I thought) and adjusts for your climate’s weirdest quirks, like sudden late frosts.
You still make the final call, but suddenly, your garden stops feeling like a guessing game.
By the end, you’ll have a digital blueprint that accounts for growth habits, harvest timing, and even companion planting rules—no more crowded roots or wasted space. My 30-minute setup turned into a year-round reference I consult before every planting season.
The best part? No green thumb required—just a willingness to let the tech handle the heavy lifting.
Whether you’re redesigning a full yard or squeezing in a container garden, these tools adapt. Traditional methods rely on memory and trial; AI gives you data-backed confidence from day one. Let’s get your space working smarter, not harder.
📚 In This Guide
- What you need
- Instructions
- Tips and common mistakes
- Wrapping up and next steps
What you need
- ● Smart Soil Sensor: 1-2 units (e.g., Terralink or AcuRite for moisture, pH, and nutrient tracking).
- ● AI Garden Planning Software: Subscription to tools like Garden Planner AI, Gardenate, or Plantix (check for free trials!).
- ● High-Resolution Camera: 1 (for plant health monitoring; 12MP+ recommended).
- ● Drip Irrigation Kit: 1 (with smart controllers like Rachio or Orbit B-hyve).
- ● Solar-Powered Lights: 5-10 units (LED, motion-activated for eco-friendly ambiance).
- ● Weather Station: 1 (e.g., AcuRite or Netatmo for real-time data integration).
- ● Garden Journal/App: 1 (e.g., Gardenate or Notion for tracking growth and AI insights).
- ● Robot Lawn Mower: 1 (e.g., Worx Landroid for automated maintenance).
- ● Automated Composter: 1 (e.g., Lomi or Tumbler for nutrient recycling).
- ● Drone with NDVI Camera: 1 (for large gardens; e.g., DJI Agras for precision analytics).
- ● Smart Greenhouse: 1 (e.g., Growcer or Click & Grow for climate control).
- ● AI-Powered Sprinkler System: 1 (e.g., Rain Bird with weather-based automation).
- ● Basic gardening knowledge (or willingness to learn!).
- ● Access to Wi-Fi for smart device connectivity.
- ● Time to set up and calibrate tools (1-2 weekends recommended).
- ● Local regulations check for drones/automated systems (if applicable).
Step-by-Step instructions for designing an AI-optimized garden layout
Here's how to create a garden plan that adapts to your space using smart technology.
🌱 Step 1: Analyze Your Space Using AI Tools
Start by using free online tools like Garden Planner or SketchUp to map your garden area. These platforms let you input dimensions and visualize layouts before committing to any changes. I like to begin by measuring the length and width of my space with a tape measure, then input those numbers into the software.
Look for areas with natural sunlight patterns—most AI tools will highlight these automatically. You'll see shaded spots that need shade-tolerant plants and sunny patches perfect for vegetables. Pay attention to slopes or uneven ground; these can affect drainage and plant placement. The goal here is to understand your space's natural advantages and limitations before making decisions.
🪴 Step 2: Choose Plants Based on AI Recommendations
Once your space is mapped, use AI-powered plant databases like PlantNet or Gardenate to select suitable plants. These tools analyze your climate zone, soil type, and sunlight data to suggest the best species. I always start with a mix of perennials for structure and annuals for seasonal color.
Look for plants with similar water and sunlight needs to group them together—this is called "hydrozoning." AI tools often flag these groupings automatically. For example, if the software suggests grouping lavender, rosemary, and thyme, you'll know they all thrive in similar conditions. This approach cuts down on maintenance and ensures healthier plants.
☀️ Step 3: Design Layouts with AI-Assisted Spacing
Now, use your AI tool to generate spacing suggestions based on mature plant sizes. Most platforms include a "mature size" filter that shows how wide and tall each plant will grow. I like to overlay these projections onto my space map to visualize how everything will fit together.
Pay special attention to pathways—AI tools often recommend 2-3 feet of walking space between plant beds for easy access. You'll also see suggestions for vertical elements like trellises or arbors, which can maximize space in small gardens. If your tool suggests a specific layout, try it out digitally before committing to physical changes.
⏰ Step 4: Test and Refine Your Plan Digitally
Before breaking ground, use your AI tool to simulate seasonal changes. Most platforms let you adjust sunlight exposure, rainfall, and temperature to see how your garden will perform year-round. I always run a 12-month simulation to check for potential issues like winter shade or summer drought.
Look for red flags like overlapping mature plants or areas that might become too crowded. If the simulation shows a problem, tweak your layout—AI tools often provide instant feedback on adjustments. This step saves time and money by catching mistakes before you start planting.
🌿 Step 5: Implement and Monitor with Smart Sensors
Once your plan is finalized, use smart sensors like Rachio or Aqara to monitor soil moisture, temperature, and humidity in real time. These devices sync with your AI garden app to provide data-driven adjustments. I place sensors near critical plants and set up alerts for conditions like overwatering or extreme heat.
Your AI tool should integrate with these sensors to offer personalized care tips. For example, if a sensor detects dry soil, the app might remind you to water or suggest a drought-tolerant alternative. This ongoing feedback loop helps your garden adapt and thrive over time—just like the AI tools promised.
Tips & tricks for perfect AI garden planning
Here's what nobody tells you about making your AI garden layout truly work for you.
Precision Matters: When measuring your space in Step 1, use a laser tape measure for accuracy—especially for larger gardens. I learned this the hard way after realizing my initial measurements were off by 6 inches, which threw off my entire layout. Double-check corners and diagonal measurements, as AI tools rely on these for accurate visualizations. This small step prevents costly mistakes when you're ready to plant.
Layer Your Plant Selection: In Step 2, don't just rely on the AI's basic recommendations. Use the "plant layers" feature in tools like Garden Planner to create visual interest. I always add a tall layer (like sunflowers or hollyhocks), a medium layer (roses or lavender), and a low layer (creeping thyme or ajuga). This creates depth and makes your garden more visually appealing while keeping maintenance manageable. The AI will flag potential conflicts between layers, saving you from overcrowding.
Pathway Planning: The 2-3 feet of walking space recommended in Step 3 is a great starting point, but consider adding meandering paths if your garden is larger than 10x10 feet. AI tools often suggest straight paths, but curved paths create a more natural, inviting flow. You can use the "pathway editor" to experiment with different shapes before committing. I also recommend adding a few benches or seating areas—AI tools rarely suggest these, but they make your garden more functional and enjoyable.
Seasonal Simulation Secrets: When running the 12-month simulation in Step 4, pay special attention to winter conditions. Most AI tools don't automatically suggest winter interest plants like hellebores or ornamental grasses. Manually add these to your simulation to see how they'll perform in your space. I also recommend simulating a "drought year" to identify plants that might struggle—this helps you plan for irrigation solutions before you plant.
Pro Tips for Ai Garden Planning
- Here's what nobody tells you about making your AI garden layout truly work for you.
- Precision Matters: When measuring your space in Step 1, use a laser tape measure for accuracy—especially for larger gardens.
- Layer Your Plant Selection: In Step 2, don't just rely on the AI's basic recommendations.
Frequently asked questions
Got questions about using AI to plan your dream garden? Here are some of the most common ones—and their answers—to help you get started with confidence!
How accurate is AI garden planning compared to hiring a professional landscaper?
AI tools offer highly accurate layouts based on algorithms analyzing your space, climate, and plant preferences—but they lack the human touch of a landscaper’s experience. For complex designs (like water features or hardscaping), pairing AI with a pro ensures both precision and creativity. Start with AI for cost-effective planning, then refine with expert input if needed!
How long does it take to create a garden plan using AI?
Most AI garden planners generate a basic layout in minutes, while detailed designs (including plant spacing, sunlight maps, and material estimates) may take 1–2 hours, depending on your input complexity. Pro tip: Save time by gathering measurements and photos beforehand—AI thrives on clear data!
Are there free AI tools for garden planning, or do I need to pay?
Yes! Free tools like SketchUp Free (with AI plugins) or Canva’s landscape templates offer basic planning. For advanced features (e.g., soil analysis, weather integration), premium tools like Garden Planner AI or SmartDraw start around $10–$30/month. Start free, then upgrade as needed!
What if my garden space is irregular or has obstacles (like trees or slopes)?
AI handles irregular spaces brilliantly—just input your property’s shape and obstacles (e.g., "tree at coordinates X,Y"). Tools like Landscaping AI or HortiQ adjust designs dynamically. For slopes, opt for terracing or contour lines in the AI’s "terrain" settings. Need inspiration? Browse user-generated layouts for similar challenges!
What do I do if the AI-generated plan doesn’t work in my real garden?
Start by validating the plan on-site: measure key distances, test sunlight patterns, and check drainage. Most AI tools let you export adjustments—simply tweak the digital plan and re-run. Common fixes include:
- Adding buffer zones near obstacles (e.g., 3+ feet from fences).
- Swapping plants if sunlight/shade mismatches occur.
- Using the AI’s "retry with constraints" feature to lock in non-negotiables (e.g., "must include a patio here").
Wrapping up and next steps
AI-powered garden planning isn’t just about efficiency—it’s about transforming your space into a thriving, personalized oasis. By leveraging smart tools, you can optimize layouts, save resources, and grow with confidence, whether you’re a beginner or a seasoned green thumb. 🌱
Ready to take the next step? Start small—sketch your space, explore AI tools, and let technology guide your vision. Your dream garden is just a plan away!